Skincare
Upcycle a Cardboard Box into a Home Storage Savior
Jun
Somewhere in your home right now, a cardboard box is waiting for its big break. Maybe it arrived with a blender, sneakers, dog treats, or a suspiciously small item packed in a box large enough to house a raccoon. Before you flatten it for recycling, consider this: that humble box can become a stylish, practical, budget-friendly home storage solution.
Upcycling a cardboard box into a storage organizer is one of the easiest ways to reduce clutter without buying yet another plastic bin. It is affordable, customizable, eco-conscious, and surprisingly satisfying. With a little trimming, wrapping, reinforcing, and labeling, a plain shipping box can become a drawer divider, pantry organizer, toy bin, closet basket, craft caddy, entryway catchall, or under-sink helper. Basically, it can go from “delivery evidence” to “domestic hero” in an afternoon.
This guide explains how to turn a cardboard box into a home storage savior using simple materials, smart organizing principles, and real-life tips that actually work in busy homes. No advanced carpentry. No luxury closet budget. No need to whisper “custom storage system” while your wallet hides under the couch.
Why Upcycle a Cardboard Box for Storage?
Cardboard boxes are everywhere, especially in the age of online shopping. Instead of treating them as instant trash, upcycling gives them a second life before recycling. That matters because the most sustainable item is often the one you already own. Reusing a box delays waste, saves money, and helps you test storage systems before investing in permanent containers.
Cardboard is also easy to cut, fold, glue, cover, and label. Unlike rigid bins, boxes can be resized to fit awkward drawers, narrow shelves, closet cubbies, or those mysterious cabinets where lids, chargers, and birthday candles go to start secret societies. You can make one box tall, another shallow, one divided into sections, and another wrapped in fabric so it looks intentionally decorative rather than “I forgot recycling day.”
Choose the Right Box Before You Start
Not every cardboard box deserves a glamorous storage makeover. Start with a clean, dry, sturdy box. Corrugated cardboard works best because the fluted layer inside gives it strength. Shoeboxes, small shipping boxes, appliance boxes, and wine-case boxes can all work depending on the project.
Best Boxes for DIY Storage
Use small boxes for drawer organizers, office supplies, cords, makeup, socks, tea bags, spice packets, or craft tools. Medium boxes are ideal for toys, seasonal accessories, pantry overflow, cleaning cloths, pet supplies, and closet shelves. Large boxes can work for lightweight bulky items such as stuffed animals, extra blankets used often, gift wrap rolls, or sports gear.
Boxes to Avoid
Skip boxes that are damp, greasy, crushed, musty, torn, or previously used for food that leaked. Also avoid storing delicate keepsakes, electronics, important documents, photographs, valuables, chemicals, food, or anything irreplaceable in cardboard for the long term. Cardboard can absorb moisture, attract pests, and weaken over time, especially in basements, garages, attics, sheds, and humid spaces.
Supplies You Need
You can keep this project delightfully low-budget. The basic supplies include a cardboard box, scissors or a craft knife, a ruler, pencil, packing tape, glue, and decorative covering. For the covering, try leftover fabric, peel-and-stick wallpaper, wrapping paper, kraft paper, contact paper, scrapbook paper, old maps, or even a paper grocery bag. For extra polish, add rope handles, label holders, stick-on labels, washi tape, drawer pulls, or ribbon trim.
If the box will hold heavier items, reinforce it with extra cardboard panels, double layers on the bottom, and strong tape along the seams. Think of reinforcement as the box’s gym membership. It may not become a bodybuilder, but it will stop collapsing dramatically when you put three notebooks inside.
Step-by-Step: Turn a Cardboard Box into a Storage Savior
Step 1: Decide What the Box Will Store
Before decorating, decide exactly what the box will hold. Organization works best when every container has a clear job. A box labeled “miscellaneous” is usually just a clutter hotel with no checkout policy. Instead, choose a specific purpose: charging cords, winter hats, dog toys, bathroom backups, craft paint, kids’ blocks, guest towels, mail to sort, or pantry snacks.
Once you know the purpose, measure the space where the box will live. Will it sit on a shelf, inside a drawer, under a bed, in a closet, or near the entryway? Measure height, width, and depth. Leave a little wiggle room so the box slides in and out easily.
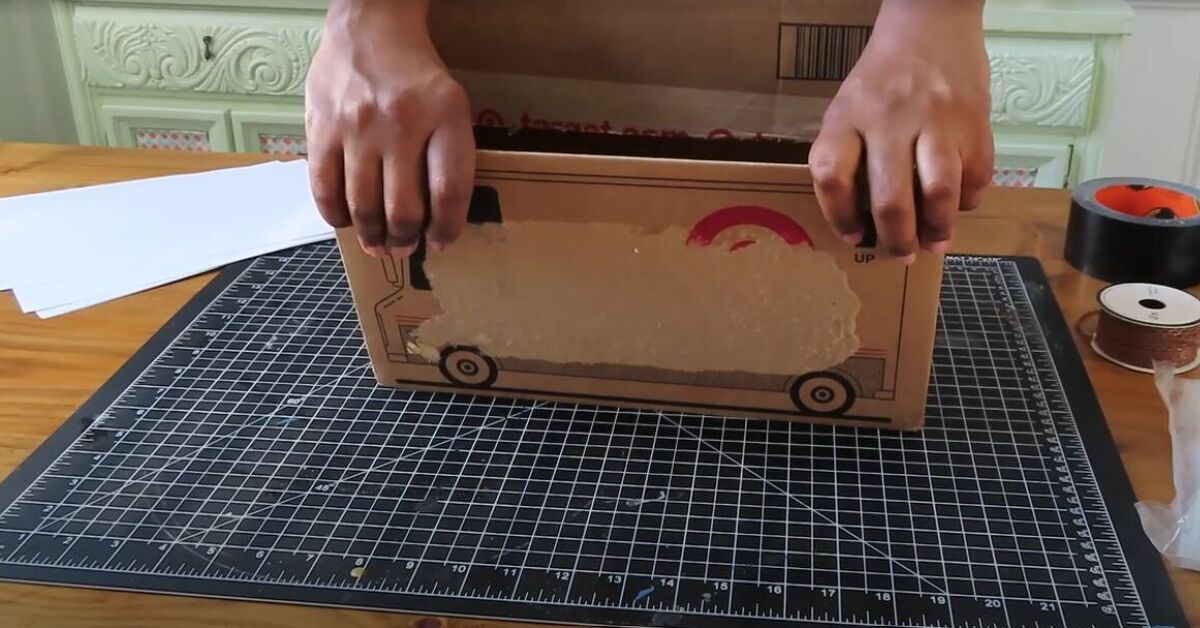
Step 2: Trim the Box to Size
If the box is too tall, mark a straight line around all four sides and cut it down. A shallow box works beautifully for drawers, while a deeper box is better for closets and shelves. Use a ruler for clean lines and a sharp craft knife for smoother edges. If you are cutting with children nearby, pause the project until tiny supervisors are safely distracted by snacks or cartoons.
Step 3: Reinforce the Base and Corners
Flip the box over and tape the bottom seams with packing tape. Add a second cardboard rectangle inside the bottom for strength. For corners, fold strips of cardboard into right angles and glue or tape them inside. This makes the box sturdier and helps it hold its shape. If you plan to use the box often, reinforce the top rim by folding the cut edge inward or wrapping it with tape before covering.
Step 4: Cover the Outside
Covering is where the magic happens. Fabric gives a soft, basket-like look. Peel-and-stick wallpaper creates a clean decorative finish. Kraft paper feels minimal and modern. Wrapping paper works well for light-duty storage but should be sealed with clear adhesive film or decoupage glue if the box will be handled frequently.
Lay the material flat, place the box on top, and wrap it like a gift, smoothing as you go. Apply glue or double-sided tape in sections. Fold corners neatly and trim extra bulk. For fabric, pull gently so it lies flat, but do not stretch it so much that the pattern looks like it is running away from responsibility.
Step 5: Line the Inside
Do not ignore the inside. A lined interior makes the storage box feel finished and protects items from rough cardboard edges. Use paper, fabric, felt, or contact paper. For a drawer divider, a plain interior is fine. For visible storage, a matching or contrasting lining makes the box look intentional.
Step 6: Add Dividers
Dividers turn a basic box into a custom organizer. Cut strips of cardboard to the box’s interior width and length. Make small slits halfway through each strip so the pieces interlock like a grid. This works beautifully for socks, underwear, tea packets, cords, batteries, craft supplies, small toys, ornaments, and office items.
For adjustable sections, use smaller shoebox lids or folded cardboard inserts instead of glued dividers. That way, your organizer can evolve when your life changes or when your “one charging cable” mysteriously becomes 27.
Step 7: Add Handles
Handles make a box easier to pull from shelves. Cut oval hand holes on two sides and reinforce the edges with tape or fabric. For a decorative option, punch two holes and thread rope, ribbon, leather scraps, or sturdy cord through them. Knot the ends inside the box. If the box will hold anything heavy, use extra cardboard behind the holes to prevent tearing.
Step 8: Label It Clearly
A label is the difference between a storage system and a guessing game. Use stick-on labels, chalkboard labels, clip-on tags, printable labels, or a simple piece of painter’s tape. Choose clear words such as “Batteries,” “Dog Leashes,” “Gift Wrap,” “Winter Gloves,” or “Craft Glue.” If multiple people use the space, labels are not optional. They are tiny household peace treaties.
Room-by-Room Cardboard Storage Ideas
Entryway Catchall
Create one box for each family member and place them on a bench, shelf, or cubby. Use them for sunglasses, hats, gloves, keys, wallets, pet leashes, and other items that love to vanish five minutes before leaving the house. A cardboard box covered in neutral fabric can look like a store-bought basket for a fraction of the price.
Closet Shelf Bins
Cardboard boxes are excellent for lightweight closet items you reach for often: scarves, belts, slippers, baseball caps, tote bags, or seasonal accessories. Use matching paper or fabric on several boxes to create a clean, coordinated look. Add large front labels so you do not have to perform a full archaeological dig every time you need a beanie.
Drawer Dividers
Cut smaller boxes into shallow trays for drawers. They can separate socks, underwear, jewelry, office supplies, makeup, hair accessories, or kitchen tools. This is one of the best beginner projects because the box does not need to be beautiful from every angle. It just needs to stop your drawer from becoming a junk lasagna.
Pantry Helpers
Use clean cardboard boxes to group individually wrapped snacks, tea bags, seasoning packets, lunch supplies, or baking decorations. Avoid storing loose food directly in cardboard because crumbs and scents can attract pests. For pantry use, line the box and keep food in sealed packaging or containers.
Craft Room Caddies
Cardboard boxes shine in craft spaces because they can be customized for odd-shaped supplies. Make narrow boxes for paintbrushes, wide trays for paper, divided boxes for beads, and covered bins for yarn. If glue, paint, or glitter spills, you will be emotionally stronger knowing the organizer did not cost $34.99.
Kids’ Toy Storage
A medium cardboard box can become a toy bin for blocks, plush animals, dress-up accessories, cars, dolls, or puzzles. Let kids decorate the outside with stickers, markers, or paper cutouts. When children help make the storage box, they are more likely to use it. Not guaranteed, of course. Children are adorable chaos consultants.
Home Office Organizer
Use a covered box for printer paper, notebooks, envelopes, cords, receipts to scan, or project files. For papers that must be preserved, use a more protective container. But for active paperwork and daily office clutter, an upcycled box can keep your desk from looking like a paper avalanche had a meeting with a coffee mug.
Make It Look Expensive Without Spending Much
The secret to a polished cardboard storage box is consistency. Use the same covering on multiple boxes, repeat label styles, and choose colors that match your room. Neutral linen-look fabric, black-and-white peel-and-stick wallpaper, kraft paper with white labels, or woven-look contact paper can make cardboard look surprisingly high-end.
For a basket effect, wrap jute rope around the lower half of the box and fabric around the upper half. For a modern office look, cover the box in matte black paper and add a brass-style label holder. For a kid’s room, use bright paper and picture labels. For a laundry shelf, use waterproof contact paper on the outside and label boxes by category: “stain tools,” “dryer balls,” “cleaning cloths,” and “missing socks awaiting trial.”
Safety and Durability Tips
Cardboard storage is practical, but it has limits. Keep cardboard boxes in dry, climate-controlled areas whenever possible. Avoid damp basements, garages with pests, sheds, and hot attics. Do not place cardboard directly on concrete floors where moisture can wick upward. If you must use cardboard in a utility area, place it on a shelf and check it regularly.
Do not overload cardboard boxes. Heavy books, tools, canned goods, liquids, and sharp objects can weaken or puncture the base. Use cardboard for lightweight to medium-weight items and choose sturdier containers for anything valuable, fragile, wet, hot, or pest-attracting.
If a box becomes soft, smells musty, shows stains, or has signs of insects, retire it. Remove any reusable labels or hardware, then recycle the cardboard if it is clean and dry. A good organizer should reduce stress, not quietly grow a science project under the sink.
When to Recycle Instead of Upcycle
Upcycling is wonderful, but not every box needs a second career. Recycle boxes that are damaged, contaminated, or unnecessary. Flatten boxes before placing them in the recycling bin, and follow your local recycling rules. Clean, dry cardboard is generally recyclable, while greasy, wet, or food-soiled cardboard may not be accepted depending on local guidelines.
The best approach is simple: reduce what comes in, reuse what you can, and recycle what no longer serves a purpose. Upcycling a cardboard box into storage is not about hoarding every shipping box that crosses your doorstep. It is about choosing the useful ones and giving them a job.
Common Mistakes to Avoid
Decorating Before Measuring
Always measure first. A beautiful box that does not fit the shelf is just decorative disappointment.
Skipping Reinforcement
If the box will be pulled, lifted, or used daily, reinforce the bottom and handles. A box failure in the hallway is not a storage solution. It is confetti with consequences.
Using Too Many Categories
Do not create a separate box for every tiny item. Group related things together. For example, “Pet Supplies” is often better than five boxes labeled “Treats,” “Brush,” “Tiny Sweater,” “Backup Leash,” and “Mystery Squeaky Object.”
Forgetting Maintenance
Every storage system needs a reset. Once a month, glance inside the box. Remove items that do not belong, update labels, and recycle boxes that have worn out.
Conclusion: Small Box, Big Storage Energy
Upcycling a cardboard box into a home storage savior is proof that organization does not have to be expensive, complicated, or perfect. A box, a little creativity, and a clear purpose can transform cluttered shelves, drawers, closets, and entryways into spaces that work better every day.
The key is to choose clean, sturdy boxes, match the size to the job, reinforce weak spots, cover them attractively, add labels, and use them in dry indoor areas. Cardboard will not replace every storage container in your home, but it is an excellent low-cost option for lightweight, frequently used items. Plus, it gives you the joy of saying, “I made that,” every time someone compliments your chic new storage bin. You do not have to mention it once carried paper towels. That can stay between you and the box.
Real-Life Experience: What I Learned from Turning Boxes into Storage
The first time I tried to upcycle a cardboard box into storage, I was not aiming for a Pinterest-worthy masterpiece. I was simply tired of opening a closet and being attacked by scarves, tote bags, and one very dramatic umbrella. I had a sturdy shipping box, some leftover peel-and-stick wallpaper, a roll of packing tape, and the dangerous confidence of a person who had watched exactly one DIY video.
The first lesson came quickly: measure twice, cut once, and do not assume shelves are as deep as they look. My first box was half an inch too tall, which meant it scraped the shelf above it every time I pulled it out. That sound was the noise of poor planning. I trimmed it down, wrapped the raw edge with tape, and suddenly the box slid smoothly into place. Tiny victory. Very tiny. Still worth celebrating.
The second lesson was that labels are not just for people who own label makers and alphabetize soup. Labels save time. I made one box for winter accessories, one for reusable shopping bags, and one for pet supplies. Before that, dog treats, lint rollers, and gloves had been living together like confused roommates. Once each box had a name, the closet became easier to use, and everyone in the house had fewer excuses for putting things in the wrong spot.
The third lesson was about durability. A single layer of cardboard is fine for lightweight items, but the bottom needs reinforcement if the box will be moved often. I learned this after one box sagged under a pile of craft supplies and developed the posture of a tired pancake. Adding a second cardboard panel to the bottom solved the problem. For handles, I reinforced the inside with extra cardboard before threading rope through the holes. Without that extra layer, the rope would have torn through the side after a few pulls.
The fourth lesson was decorative: simple materials look best when repeated. One covered box looked cute. Three matching boxes looked intentional. The closet suddenly appeared organized in a way that suggested I had my life together, which was generous of the closet. Using the same paper and label style made the whole area feel calmer, even though the contents were ordinary things like mittens, batteries, and dog shampoo.
The fifth lesson was knowing when cardboard is not the answer. I would not use it for old family photos, passports, electronics, emergency documents, or anything stored in a damp garage. Cardboard is a hero, not a superhero. It works best in dry indoor spaces and for items that are not fragile, valuable, or moisture-sensitive.
What surprised me most was how useful the project became as a trial system. Before buying permanent bins, I tested categories with cardboard boxes for a few weeks. Some worked perfectly. Others needed resizing, relabeling, or combining. By the time I bought a few long-term containers, I knew exactly what sizes and shapes I needed. The upcycled boxes helped me avoid buying the wrong organizers, which is excellent because nothing says “ironic clutter” like a pile of unused storage bins.
In the end, the humble cardboard box became more than a temporary fix. It became a reminder that organizing does not begin at the store. It begins with noticing what you already have, giving it a purpose, and making your home easier to live in. Also, it is deeply satisfying to turn packaging into something useful before recycling day. That is not just storage. That is a redemption arc.
