
Makeup
Make-Ahead Buttermilk Biscuits Recipe
Jul
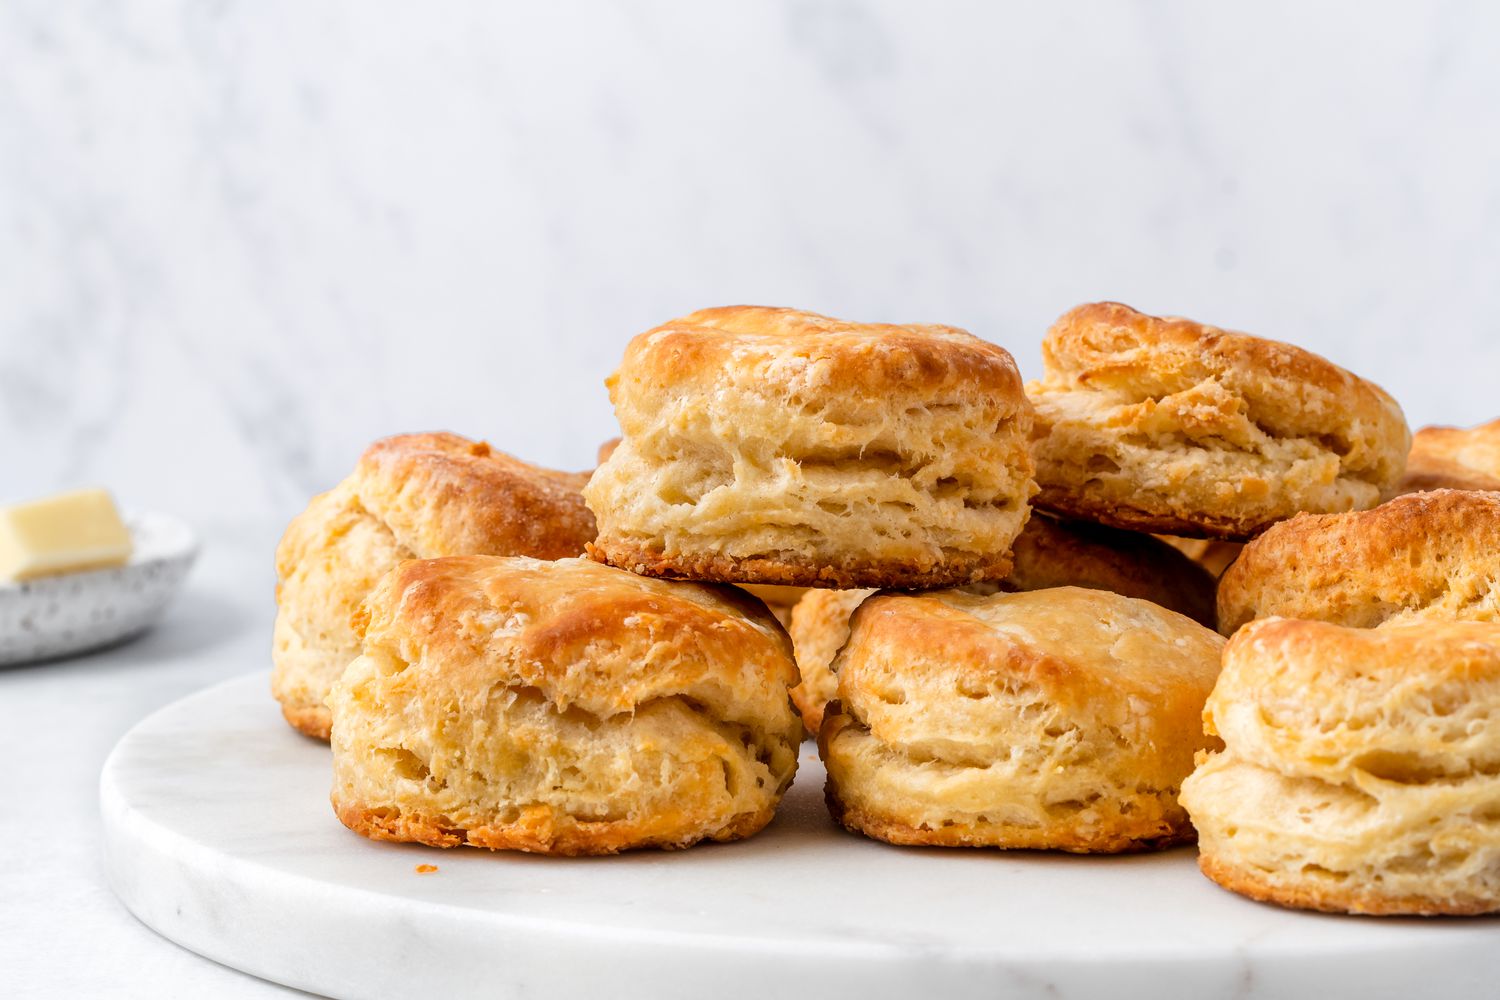
There are two kinds of people in the breakfast world: people who wake up calmly and make biscuits from scratch, and people who consider “finding matching socks” a major morning achievement. This Make-Ahead Buttermilk Biscuits Recipe is for both groups, but especially for the second one. You get all the flaky, buttery, golden-topped goodness of homemade Southern-style biscuits without turning your kitchen into a flour storm before coffee.
The beauty of make-ahead biscuits is simple: you do the mixing, folding, cutting, and freezing when life is quiet. Then, when breakfast, brunch, dinner, holidays, or a random craving attacks, you bake the biscuits straight from the freezer. No thawing. No drama. No suspicious canned pop sound from the refrigerator aisle. Just real homemade buttermilk biscuits with crisp edges, tender centers, and enough buttery layers to make your toaster jealous.
This guide covers the full recipe, the science behind flaky biscuits, smart freezing tips, storage advice, serving ideas, and troubleshooting. Whether you are making biscuits for sausage gravy, breakfast sandwiches, Thanksgiving dinner, or a Tuesday night bowl of soup, this recipe is built to be practical, reliable, and delicious.
Why Make-Ahead Buttermilk Biscuits Work So Well
Biscuits are a quick bread, which means they rely on chemical leaveners like baking powder and baking soda instead of yeast. That is good news for impatient people and hungry families. But biscuits are also sensitive little creatures. Overmix them, warm the butter too much, twist the cutter, or handle the dough like pizza dough, and you may end up with something closer to a doorstop than a fluffy biscuit.
Making biscuits ahead actually helps solve one of the biggest biscuit problems: temperature. Cold butter is the secret behind flaky layers. When cold butter hits a hot oven, it releases steam, creating pockets inside the dough. Those pockets turn into the tender, layered texture everyone wants. Freezing the cut biscuits before baking keeps the butter solid, helps the biscuits hold their shape, and makes breakfast faster than trying to convince everyone that dry cereal is “rustic.”
Ingredients for Make-Ahead Buttermilk Biscuits
This recipe keeps the ingredient list classic and pantry-friendly. You do not need fancy flour, a culinary degree, or a grandmother named Mabel, though Mabel would probably approve.
For 12 medium biscuits
- 3 cups all-purpose flour, plus more for dusting
- 1 tablespoon baking powder
- 1/2 teaspoon baking soda
- 1 1/2 teaspoons kosher salt
- 1 tablespoon granulated sugar
- 3/4 cup unsalted butter, very cold, cut into small cubes or grated
- 1 1/4 cups cold buttermilk, plus 1 tablespoon more if needed
- 2 tablespoons melted butter, for brushing after baking
Ingredient Notes
All-purpose flour: All-purpose flour gives these biscuits enough structure without making them heavy. For a softer Southern-style biscuit, you can replace 1 cup of all-purpose flour with pastry flour or a lower-protein flour.
Buttermilk: Buttermilk adds tangy flavor and helps tenderize the dough. Its acidity also reacts with baking soda to support rise. If you do not have buttermilk, stir 1 tablespoon lemon juice or white vinegar into 1 1/4 cups milk and let it sit for 5 to 10 minutes. It is not identical, but it gets the job done like a dependable backup singer.
Butter: Use unsalted butter so you control the salt level. The colder the butter, the flakier the biscuit. Frozen grated butter works beautifully because it spreads evenly through the flour without melting quickly.
Baking powder and baking soda: Fresh leaveners matter. If your baking powder has been living in the cabinet since a previous presidential administration, replace it. Old baking powder can make biscuits flat, and flat biscuits are emotionally confusing.
Tools You Will Need
- Large mixing bowl
- Box grater or pastry cutter
- Fork or flexible spatula
- Rolling pin or your hands
- 2 1/2-inch biscuit cutter or sharp knife
- Parchment-lined baking sheet
- Freezer-safe bag or airtight container
- Pastry brush
How to Make Make-Ahead Buttermilk Biscuits
Step 1: Mix the Dry Ingredients
In a large bowl, whisk together the flour, baking powder, baking soda, salt, and sugar. Whisking matters because it evenly distributes the leavening. Nobody wants one biscuit rising like a hot-air balloon while its neighbor sits there like a sad pancake.
Step 2: Cut in the Cold Butter
Add the cold butter to the flour mixture. Use a pastry cutter, your fingertips, or a box grater if the butter is frozen. Work quickly until the mixture contains pieces of butter ranging from pea-sized crumbs to thin flakes. Do not blend the butter completely into the flour. Visible butter pieces are not mistakes; they are future layers.
Step 3: Add the Buttermilk
Make a well in the center of the flour mixture and pour in the cold buttermilk. Stir gently with a fork or spatula until the dough looks shaggy and slightly dry. It should not look smooth like cake batter. Biscuit dough is supposed to look a little messy, like it just woke up from a nap.
If the dough truly will not come together, add 1 tablespoon of extra buttermilk. Be careful not to add too much liquid. Wet dough may bake up dense instead of light and flaky.
Step 4: Fold the Dough for Layers
Turn the dough onto a lightly floured surface. Pat it into a rough rectangle about 1 inch thick. Fold it in thirds, like a letter. Turn the dough, pat it out again, and repeat this folding process 3 to 5 times. This simple lamination method creates visible biscuit layers without requiring complicated pastry techniques.
The key is gentle handling. Press, fold, and pat; do not knead aggressively. Overworking develops gluten, and too much gluten makes biscuits tough. Save the serious arm workout for opening a stubborn jar of pickles.
Step 5: Cut the Biscuits
Pat the folded dough into a 3/4- to 1-inch-thick rectangle. Use a sharp biscuit cutter and press straight down. Do not twist the cutter, because twisting can seal the edges and limit the rise. If you prefer zero scraps, cut the dough into squares with a sharp knife or bench scraper. Square biscuits may not look as traditional, but they are efficient little overachievers.
Step 6: Freeze the Biscuits
Place the cut biscuits on a parchment-lined baking sheet, leaving a little space between them. Freeze until solid, about 2 to 4 hours. Once frozen, transfer them to a freezer-safe bag or airtight container. Label the bag with the date and baking instructions. Future you will be grateful, especially before breakfast.
Step 7: Bake from Frozen
When ready to bake, preheat the oven to 425°F. Place frozen biscuits on a parchment-lined baking sheet or in a cast iron skillet. For softer sides, place them close together. For crispier edges, space them apart.
Bake for 18 to 23 minutes, or until the tops are golden brown and the centers are cooked through. Brush the hot biscuits with melted butter as soon as they come out of the oven. This is not optional if you enjoy happiness.
Make-Ahead Options
Option 1: Freeze Unbaked Biscuits
This is the best method for fresh-baked flavor. Prepare, cut, freeze, and store the biscuits unbaked. Bake straight from frozen whenever needed. They can usually be stored for up to 2 months with excellent quality, though they are often safe longer if properly sealed.
Option 2: Refrigerate Cut Biscuits Overnight
If you plan to bake within 12 to 18 hours, arrange the cut biscuits on a covered baking sheet and refrigerate them. This works well for holiday mornings or brunch prep. However, freezing is usually better for longer storage because it keeps the butter firm and protects the dough structure.
Option 3: Freeze Baked Biscuits
You can also bake the biscuits first, cool them completely, and freeze them in an airtight bag. Reheat in a 325°F oven until warm. This method is convenient, but unbaked frozen biscuits taste fresher and rise better.
Recipe Tips for Tall, Flaky Biscuits
Keep Everything Cold
Cold butter is the foundation of flaky buttermilk biscuits. If your kitchen is warm, chill the mixing bowl, flour, and even the biscuit cutter for a few minutes. If the dough starts feeling greasy or sticky, pause and refrigerate it for 10 minutes.
Measure Flour Correctly
Too much flour makes dry biscuits. Spoon flour into the measuring cup and level it off with a knife instead of scooping directly from the bag. For best results, use a kitchen scale. Three cups of all-purpose flour is about 360 grams, depending on the brand and measuring method.
Do Not Overmix
Mix only until the dough comes together. A shaggy dough is better than a smooth dough. Smooth biscuit dough often means the butter has been overworked and the gluten has developed too much.
Use a Hot Oven
A hot oven gives biscuits fast lift. The burst of heat activates the leaveners and turns cold butter into steam. That steam pushes the layers apart, creating the fluffy interior biscuit lovers dream about when they are supposed to be answering emails.
Cut Straight Down
Whether using a biscuit cutter or a knife, cut cleanly. Twisting compresses the edges. Clean edges rise higher, while sealed edges can hold the biscuit down like tiny edible handcuffs.
Flavor Variations
Cheddar Herb Buttermilk Biscuits
Add 1 cup shredded sharp cheddar and 1 tablespoon chopped chives or parsley to the dry ingredients before adding buttermilk. These are excellent with chili, scrambled eggs, or roasted chicken.
Honey Butter Biscuits
After baking, brush the biscuits with a mixture of melted butter and honey. Add a pinch of flaky salt for balance. This version is dangerously good with fried chicken or a lazy weekend breakfast.
Black Pepper Biscuits
Add 1 teaspoon freshly cracked black pepper to the dry ingredients. These biscuits are especially good with sausage gravy, ham, or egg sandwiches.
Garlic Parmesan Biscuits
Add 1/2 cup grated Parmesan and 1/2 teaspoon garlic powder. Brush with melted butter and a little parsley after baking. Serve with soup, pasta, or anything that needs a buttery sidekick.
What to Serve with Buttermilk Biscuits
Homemade buttermilk biscuits are flexible enough for breakfast, lunch, dinner, and late-night “quality control.” Serve them with butter, jam, honey, apple butter, sausage gravy, fried eggs, crispy bacon, country ham, or roasted vegetables. They also make fantastic mini sandwiches for brunch trays and holiday gatherings.
For dinner, pair biscuits with chicken pot pie filling, beef stew, vegetable soup, chili, or creamy mushroom gravy. For dessert, split warm biscuits and spoon over strawberries with whipped cream for an easy biscuit-style shortcake.
How to Store and Reheat Biscuits
Freshly baked biscuits are best the day they are made, but leftovers can still be delicious. Store cooled biscuits in an airtight container at room temperature for up to 2 days. For longer storage, freeze them.
To reheat room-temperature biscuits, warm them in a 300°F oven for 8 to 10 minutes. To reheat frozen baked biscuits, wrap them loosely in foil and bake at 325°F until heated through. Avoid microwaving if possible because it can make biscuits rubbery. The microwave is great for leftovers, but biscuits deserve better treatment than a steamy spin cycle.
Common Biscuit Problems and Fixes
Why Did My Biscuits Turn Out Tough?
Tough biscuits usually come from overmixing, over-kneading, or adding too much flour. Handle the dough gently and stop mixing as soon as it comes together.
Why Did My Biscuits Not Rise?
Flat biscuits can happen if your baking powder is old, your butter melted before baking, your oven was not hot enough, or you twisted the cutter. Use fresh leaveners, keep the dough cold, and cut straight down.
Why Are My Biscuits Dry?
Dry biscuits often mean too much flour or not enough buttermilk. Measure carefully and remember that the dough should be shaggy, not powdery. A little dryness is normal at first, but the dough should hold together after folding.
Why Are My Biscuits Pale?
Pale tops may need a buttermilk brush before baking or a few extra minutes in the oven. Baking on the upper-middle rack can also help browning.
Printable Recipe Summary
Make-Ahead Buttermilk Biscuits
Yield: 12 biscuits
Prep Time: 20 minutes
Freeze Time: 2 to 4 hours
Bake Time: 18 to 23 minutes
Total Time: About 3 hours including freezing
Ingredients
- 3 cups all-purpose flour
- 1 tablespoon baking powder
- 1/2 teaspoon baking soda
- 1 1/2 teaspoons kosher salt
- 1 tablespoon sugar
- 3/4 cup cold unsalted butter, cubed or grated
- 1 1/4 cups cold buttermilk
- 2 tablespoons melted butter for brushing
Instructions
- Whisk flour, baking powder, baking soda, salt, and sugar in a large bowl.
- Cut in cold butter until the mixture contains pea-sized pieces and thin flakes.
- Add cold buttermilk and stir gently until a shaggy dough forms.
- Turn dough onto a floured surface and fold 3 to 5 times to create layers.
- Pat dough to 3/4- to 1-inch thickness and cut into rounds or squares.
- Freeze biscuits on a parchment-lined baking sheet until solid.
- Transfer frozen biscuits to a freezer bag and store for future baking.
- Bake from frozen at 425°F for 18 to 23 minutes.
- Brush hot biscuits with melted butter and serve warm.
Extra Experience: What I Learned from Making Buttermilk Biscuits Ahead
The first thing you learn from making buttermilk biscuits ahead is that biscuits are not difficult, but they are honest. They tell on you. If the butter gets too warm, they tell on you. If you dump in extra flour like you are salting a driveway in winter, they tell on you. If you twist the cutter, they rise unevenly and stare back from the baking sheet like they know exactly what happened.
One of the best experiences with this make-ahead method is how calm it makes hosting feel. Biscuits are often served at moments when the kitchen is already busy: holiday breakfast, Sunday brunch, family dinners, or when soup is bubbling on the stove and everyone suddenly becomes “starving.” Having a bag of frozen homemade biscuits ready to bake changes the mood. Instead of measuring flour while guests hover nearby, you simply preheat the oven, place the frozen biscuits on a pan, and act like you have your life together. It is a powerful illusion, and I fully support it.
Another lesson is that freezing unbaked biscuits is better than freezing baked biscuits when flavor and texture matter most. Baked biscuits are convenient, but unbaked frozen biscuits give you that fresh-from-the-oven experience. The tops brown nicely, the edges crisp, and the centers stay soft. The smell alone can make a kitchen feel like a Southern breakfast café, even if your dining table currently has homework, mail, and one mysterious battery on it.
I also learned that square biscuits deserve more respect. Round biscuits are classic and charming, but square biscuits are practical. They eliminate scraps, which means less re-rolling. Re-rolled scraps tend to become tougher because the dough has been handled more. With square biscuits, every piece gets the same gentle treatment. They may look a little less traditional, but they bake beautifully and fit breakfast sandwiches like they were born for the job.
The biggest practical tip is to label the freezer bag with baking instructions. This sounds unnecessary until someone else in the house tries to help and asks whether the biscuits need to thaw first. They do not. Write “Bake frozen at 425°F for 18 to 23 minutes” directly on the bag. This tiny step prevents confusion and protects your biscuits from well-meaning kitchen experiments.
Finally, make-ahead biscuits teach patience in the best way. You prepare something simple today that makes a future meal feel special. That is the quiet magic of freezer cooking. It is not flashy. It does not require a complicated spreadsheet or ten matching containers. It is just butter, flour, buttermilk, and a little planning. But when hot biscuits come out of the oven on a busy morning, that planning feels like a gift from your past self. And honestly, past self deserves a biscuit with extra butter.
Conclusion
This Make-Ahead Buttermilk Biscuits Recipe gives you the best parts of homemade baking without forcing you to start from zero every time a biscuit craving appears. By keeping the butter cold, folding the dough gently, freezing the cut biscuits, and baking straight from frozen, you can enjoy flaky, tender, golden biscuits whenever you want. Serve them with jam, gravy, eggs, soup, or a shameless swipe of honey butter. Homemade comfort food should be this easy more often.
Note: This article is written as original web-ready content and synthesized from reliable U.S. baking practices, professional recipe methods, and practical make-ahead kitchen techniques.

