
Body Care
Pearled Barley Pilaf Side Dish Recipe
Jul
Pearled barley pilaf is the kind of side dish that quietly walks into dinner wearing sensible shoes, then somehow steals the whole table. It is chewy, nutty, savory, cozy, and far more interesting than another scoop of plain rice. If your usual side dish rotation has been stuck between potatoes, pasta, and “whatever frozen vegetable is closest to the freezer door,” this pearled barley pilaf side dish recipe is here to rescue your plate.
This recipe turns simple pantry ingredients into a warm, satisfying grain dish with tender pearled barley, sautéed onion, garlic, vegetables, herbs, and broth. The result is a side dish that works with roasted chicken, grilled fish, baked tofu, pork chops, mushrooms, holiday turkey, or a pile of garlicky greens. It tastes earthy and rich without being heavy, which makes it perfect for weeknight dinners and special meals alike.
Unlike rice pilaf, barley pilaf has a pleasantly chewy texture that holds up beautifully. It does not collapse into mush if you look at it the wrong way. It can be made ahead, reheated, customized, and served warm, room temperature, or even turned into a next-day grain bowl. In other words, pearled barley is not just a soup ingredientit deserves a starring role on your dinner table.
What Is Pearled Barley Pilaf?
Pearled barley pilaf is a savory grain side dish made by sautéing aromatics, lightly toasting barley, and simmering everything in broth until the grains are tender. The word “pilaf” usually refers to a method where grains are cooked with flavor-building ingredients instead of being boiled plain. That is the magic here: onion, garlic, olive oil or butter, broth, herbs, and vegetables all get absorbed into the barley as it cooks.
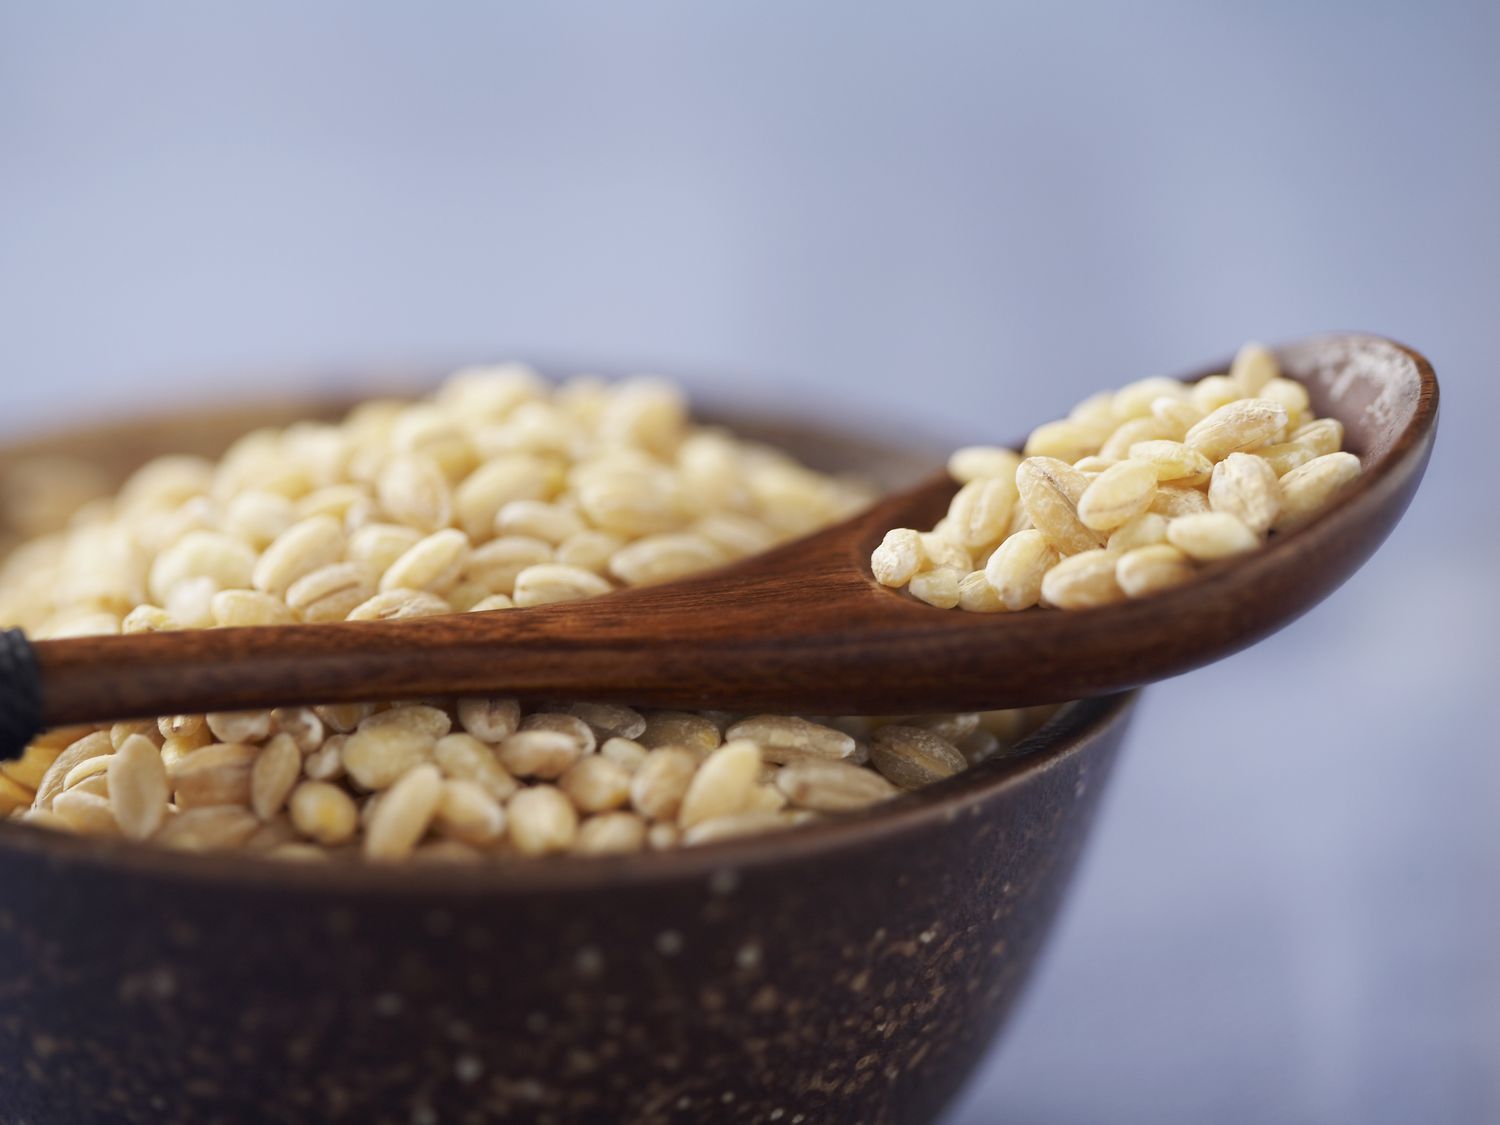
Pearled barley is barley that has had its tough outer hull and some bran removed. It cooks faster than hulled barley and has a softer texture, while still offering that signature chewy bite. It is especially good in pilaf because the grains stay distinct and plump rather than becoming sticky.
If rice is the polite guest at dinner, barley is the guest who tells a great story, compliments the cook, and brings leftovers containers just in case.
Why You’ll Love This Pearled Barley Pilaf Side Dish Recipe
It Has Big Flavor from Simple Ingredients
This recipe uses onion, garlic, broth, herbs, and a little lemon to make barley taste deeply savory and fresh. Nothing fancy is required, but the final dish feels restaurant-worthy.
It Is Budget-Friendly and Filling
Pearled barley is affordable, widely available, and expands as it cooks. One cup of dry barley becomes enough to feed several people as a side dish. It is a smart choice when you want a hearty grain without spending much.
It Pairs with Almost Everything
This barley pilaf works with roasted meats, seafood, vegetarian mains, stews, grilled vegetables, and holiday dishes. Its mild nutty flavor is flexible enough for weeknights and elegant enough for guests.
It Is Great for Meal Prep
Barley reheats well because of its firm texture. Make a batch on Sunday and you can use it throughout the week in bowls, salads, wraps, soups, or quick skillet meals.
Ingredients for Pearled Barley Pilaf
This recipe makes about 6 side-dish servings.
- 1 cup pearled barley, rinsed and drained
- 2 tablespoons olive oil or unsalted butter
- 1 small yellow onion, finely diced
- 1 medium carrot, finely diced
- 1 celery stalk, finely diced
- 2 garlic cloves, minced
- 8 ounces cremini mushrooms, chopped, optional but highly recommended
- 2 1/2 cups low-sodium vegetable or chicken broth
- 1/2 teaspoon kosher salt, plus more to taste
- 1/4 teaspoon black pepper
- 1/2 teaspoon dried thyme or 1 teaspoon fresh thyme leaves
- 1 bay leaf
- 2 tablespoons chopped fresh parsley
- 1 teaspoon lemon zest
- 1 tablespoon fresh lemon juice
- Optional garnish: toasted almonds, walnuts, grated Parmesan, dill, chives, or extra parsley
How to Make Pearled Barley Pilaf
Step 1: Rinse the Barley
Place the pearled barley in a fine-mesh strainer and rinse it under cool running water. This removes surface starch and any dusty bits from processing. Drain well before adding it to the pan. Barley does not need to be soaked for this recipe, which is excellent news for anyone who remembers dinner at 5:47 p.m.
Step 2: Sauté the Aromatics
Warm the olive oil or butter in a medium saucepan or deep skillet over medium heat. Add the onion, carrot, and celery. Cook for 5 to 7 minutes, stirring occasionally, until the vegetables soften and the onion turns translucent. This classic aromatic base gives the pilaf a savory backbone.
Step 3: Add Garlic and Mushrooms
Stir in the garlic and cook for about 30 seconds, just until fragrant. If using mushrooms, add them now with a pinch of salt. Cook for 6 to 8 minutes, until they release their moisture and begin to brown. Mushrooms add a meaty, earthy flavor that makes the barley taste even richer.
Step 4: Toast the Barley
Add the rinsed pearled barley to the pan. Stir constantly for 2 to 3 minutes so the grains get lightly coated with oil and begin to smell nutty. This small step makes a noticeable difference. Toasting helps deepen the flavor and keeps the pilaf from tasting flat.
Step 5: Simmer with Broth
Pour in the broth, then add salt, pepper, thyme, and the bay leaf. Stir well and bring the mixture to a boil. Reduce the heat to low, cover the pan, and simmer for 35 to 45 minutes, or until the barley is tender but still pleasantly chewy. If the pan looks dry before the barley is done, add a splash of water or broth.
Step 6: Rest, Fluff, and Finish
Remove the pan from the heat and let it sit, covered, for 5 to 10 minutes. Discard the bay leaf. Fluff the barley with a fork, then stir in parsley, lemon zest, and lemon juice. Taste and adjust with more salt, pepper, or herbs. The lemon brightens the whole dish and keeps the pilaf from feeling too heavy.
Recipe Card: Pearled Barley Pilaf Side Dish
Pearled Barley Pilaf
Prep time: 15 minutes
Cook time: 40 minutes
Total time: About 55 minutes
Servings: 6 side-dish servings
Ingredients
- 1 cup pearled barley, rinsed
- 2 tablespoons olive oil or butter
- 1 small onion, diced
- 1 carrot, diced
- 1 celery stalk, diced
- 2 garlic cloves, minced
- 8 ounces mushrooms, chopped
- 2 1/2 cups low-sodium broth
- 1/2 teaspoon kosher salt
- 1/4 teaspoon black pepper
- 1/2 teaspoon dried thyme
- 1 bay leaf
- 2 tablespoons chopped parsley
- 1 teaspoon lemon zest
- 1 tablespoon lemon juice
Instructions
- Rinse and drain the pearled barley.
- Heat olive oil or butter in a saucepan over medium heat.
- Add onion, carrot, and celery. Cook until softened.
- Add garlic and mushrooms. Cook until the mushrooms brown lightly.
- Stir in barley and toast for 2 to 3 minutes.
- Add broth, salt, pepper, thyme, and bay leaf.
- Bring to a boil, reduce heat, cover, and simmer for 35 to 45 minutes.
- Rest covered for 5 to 10 minutes.
- Remove bay leaf, fluff with a fork, and stir in parsley, lemon zest, and lemon juice.
Tips for the Best Barley Pilaf
Use Broth Instead of Water
Water works in an emergency, but broth gives the barley much more flavor. Vegetable broth keeps the recipe vegetarian, while chicken broth gives it a classic savory taste. Low-sodium broth is best because you can control the salt level yourself.
Do Not Skip the Toasting Step
Toasting pearled barley for a few minutes before simmering brings out its nutty flavor. It is the grain version of warming up before a workoutsmall effort, better performance.
Keep the Heat Low
Once the broth comes to a boil, lower the heat so the pilaf gently simmers. A hard boil can make the grains cook unevenly and may cause the liquid to evaporate too quickly.
Let It Rest Before Serving
The resting time allows the barley to absorb any remaining steam and liquid. This makes the texture more even and helps the pilaf fluff instead of clump.
Flavor Variations
Mediterranean Barley Pilaf
Add chopped sun-dried tomatoes, oregano, parsley, lemon zest, and crumbled feta. Serve it with grilled chicken, salmon, falafel, or roasted eggplant.
Mushroom Herb Barley Pilaf
Use a mix of cremini, shiitake, and oyster mushrooms. Finish with dill, parsley, and a small splash of balsamic vinegar for a deeper, woodsy flavor.
Parmesan Garlic Barley Pilaf
After cooking, stir in grated Parmesan and a little extra black pepper. This version is excellent with roasted chicken, steak, or broiled vegetables.
Holiday Barley Pilaf
Add dried cranberries, toasted pecans, orange zest, and fresh thyme. It makes a beautiful Thanksgiving or Christmas side dish when you want something more interesting than another casserole wearing a blanket of marshmallows.
Vegan Barley Pilaf
Use olive oil and vegetable broth. Add mushrooms, spinach, roasted chickpeas, or toasted nuts for extra texture and plant-based protein.
What to Serve with Pearled Barley Pilaf
This pearled barley pilaf side dish recipe is flexible enough to match many meals. For a classic dinner, serve it with roasted chicken, turkey, pork tenderloin, or baked salmon. For a vegetarian plate, pair it with roasted cauliflower, stuffed peppers, grilled portobello mushrooms, lentil patties, or a crisp green salad.
It also works well under saucy dishes. Spoon beef stew, mushroom gravy, braised greens, chicken thighs, or tomato-braised beans over the pilaf. The barley soaks up sauce beautifully while keeping its chewy texture.
For lunch, turn leftovers into a grain bowl with baby spinach, roasted vegetables, chickpeas, cucumbers, feta, and a lemony vinaigrette. The barley gives the bowl enough substance to keep you full without requiring a dramatic 3 p.m. snack raid.
Storage and Make-Ahead Instructions
Barley pilaf stores very well, making it a reliable meal-prep side dish. Let the cooked pilaf cool, then transfer it to an airtight container. Refrigerate for up to 4 days. Reheat it in the microwave or in a skillet with a splash of broth or water to loosen the grains.
You can also freeze barley pilaf. Portion it into freezer-safe containers, label it, and freeze for up to 2 months. Thaw overnight in the refrigerator before reheating. The texture remains pleasantly chewy, although fresh herbs are best added after reheating for the brightest flavor.
If making the pilaf for a holiday or dinner party, cook it earlier in the day and reheat gently before serving. Add the lemon juice and fresh parsley at the end so the dish tastes fresh, not sleepy.
Nutrition Notes
Pearled barley is a satisfying grain that provides carbohydrates, fiber, and small amounts of plant-based protein. It is especially known for its soluble fiber, including beta-glucan, which is also found in oats. While pearled barley is more processed than hulled barley, it still offers a hearty texture and useful nutrients.
Because barley contains gluten, this recipe is not suitable for people with celiac disease or anyone who needs to avoid gluten. For a gluten-free alternative, try a similar pilaf method with brown rice, quinoa, millet, or buckwheat groats, adjusting the liquid and cooking time as needed.
To keep this recipe lighter, use olive oil instead of butter and choose low-sodium broth. To make it richer, add toasted nuts, Parmesan, or a small pat of butter before serving. The recipe is flexible, which is exactly what a good side dish should be: dependable, useful, and not emotionally fragile.
Common Mistakes to Avoid
Using Too Much Liquid
Pearled barley needs enough liquid to become tender, but too much can make the pilaf soupy. Start with 2 1/2 cups broth for 1 cup barley. Add more only if the barley is not tender and the pan is dry.
Forgetting to Season in Layers
Salt the vegetables lightly, season the broth, and taste again at the end. Barley absorbs flavor as it cooks, so seasoning only at the very end can leave the inside of the grains bland.
Overcooking the Barley
Barley should be tender but still chewy. If it becomes mushy, it has cooked too long or absorbed too much liquid. Start checking around the 35-minute mark.
Skipping Fresh Finishers
Fresh parsley, lemon zest, lemon juice, dill, chives, or green onions wake up the dish. Without a fresh finish, barley pilaf can taste a little too earthy. Think of lemon as the tiny spotlight operator making everyone on stage look better.
Personal Cooking Experience with Pearled Barley Pilaf
The first time you make pearled barley pilaf, you may wonder why barley has been hiding in the soup aisle for so long. Many people meet barley in beef barley soup, where it plays the role of “pleasant chewy thing in the background.” But once you cook it pilaf-style, it becomes clear that barley can carry a side dish all by itself.
One of the best experiences with this recipe is the smell that develops during cooking. The onion softens, the garlic blooms, the mushrooms brown, and the barley gets lightly toasted. At that point, the kitchen starts smelling like you planned dinner with great care, even if the original plan was “please let there be something in the pantry.” When the broth hits the pan, it pulls all those browned bits into the cooking liquid, which means the barley absorbs flavor from the inside out.
Texture is another reason this dish is so satisfying. Rice can be lovely, but it sometimes becomes soft or sticky after sitting. Pearled barley has more personality. It stays chewy, plump, and distinct. That makes it great for family dinners where the side dish may sit on the table while everyone debates who took the last dinner roll. It also means leftovers do not feel sad the next day. In fact, leftover barley pilaf may be even better after the flavors have had time to settle.
A practical lesson from cooking barley pilaf is that patience matters, but perfection does not. The barley may take 35 minutes one day and 45 minutes another day depending on the brand, pan, and heat level. That is normal. The best test is not the clock; it is the bite. Taste a spoonful. If it is tender with a gentle chew, it is done. If it still feels too firm, add a splash of broth, cover the pan, and give it a little more time.
This recipe is also a great reminder that side dishes do not have to be boring. A good side dish should support the main course, but it should also bring something to the meal. Pearled barley pilaf adds warmth, texture, and a subtle nutty flavor that makes a plate feel complete. Serve it beside roasted chicken and it feels classic. Add feta and herbs and it leans Mediterranean. Stir in cranberries and pecans and suddenly it looks ready for a holiday table.
The most useful experience-related tip is to make extra. A double batch does not require much more effort, and future you will be grateful. Leftover barley pilaf can become a quick lunch with a fried egg, a grain salad with cucumbers and vinaigrette, or a hearty base for roasted vegetables. It is one of those recipes that quietly makes the rest of the week easier, which is basically the culinary equivalent of finding money in a jacket pocket.
Another small but important experience: do not be shy with the finishing touches. Lemon juice, herbs, and a drizzle of olive oil make the difference between “good grain side dish” and “wait, who made this?” The barley itself is earthy and mellow, so it welcomes brightness. A little acid at the end sharpens the flavors and keeps the dish lively.
If you are serving this to people who claim they do not like barley, do not introduce it like a health lecture. Just call it a mushroom herb pilaf and place it on the table. Let the chewy texture, savory broth, and fresh herbs do the convincing. Food is often more persuasive than speeches, especially when garlic is involved.
Final Thoughts
This pearled barley pilaf side dish recipe proves that humble ingredients can make a memorable meal. With toasted barley, sautéed vegetables, savory broth, herbs, and lemon, you get a side dish that is hearty but not heavy, simple but not plain, and flexible enough for almost any dinner. It is budget-friendly, meal-prep friendly, and dinner-party friendlythe rare triple threat that does not require special equipment or culinary gymnastics.
Make it once as written, then start customizing. Add mushrooms for depth, Parmesan for richness, cranberries for a holiday feel, or fresh dill for a brighter finish. However you serve it, pearled barley pilaf brings comfort, texture, and flavor to the table. Rice had a good run, but barley is ready for its close-up.
Note: This recipe is designed for regular pearled barley, not quick-cooking barley. If you use quick-cooking barley, reduce the simmering time and check the package directions for the best texture.

