Beauty Unlocked
How to Repair a Door Frame: 5 Ways to Fix and Replace Jambs
Jun
A damaged door frame has a special talent for making an entire room feel slightly chaotic. The door sticks, the latch misses the strike plate, the trim looks chewed by a tiny beaver, and every close sounds like the house is clearing its throat. The good news? Many door frame problems are very fixable with basic tools, patience, and a willingness to measure twice before swinging a hammer like a movie carpenter.
In this guide, you’ll learn how to repair a door frame, fix a split or rotted door jamb, patch cosmetic damage, reinforce weak areas, and replace jambs when repair is no longer the smartest choice. We’ll cover five practical methods, from quick hinge and strike-plate fixes to full jamb replacement. Whether you’re dealing with an interior bedroom door or a hard-working exterior entry door, the goal is the same: make the door close cleanly, latch securely, and stop looking like it lost a fight with a linebacker.
Before You Start: Understand the Parts of a Door Frame
A door frame is the structure surrounding the door opening. The vertical pieces are called jambs. The hinge-side jamb holds the hinges, the latch-side jamb holds the strike plate, and the top horizontal piece is the head jamb. The casing is the decorative trim around the outside of the frame, while the door stop is the thin strip that the door rests against when closed.
Knowing these parts matters because “door frame repair” can mean several different things. A loose hinge screw is not the same as a rotted exterior jamb. A chipped casing does not require the same repair as a cracked latch-side jamb. The trick is to diagnose the problem first, then choose the least invasive repair that actually solves it.
Tools and Materials You May Need
You will not need every item for every repair, but these are the usual suspects:
- Utility knife
- Putty knife or painter’s 5-in-1 tool
- Hammer and nail set
- Pry bar
- Drill and driver bits
- Wood screws, including 2-1/2-inch or 3-inch screws
- Wood glue or construction adhesive
- Wood filler or two-part epoxy filler
- Wood hardener for soft or rotted areas
- Sandpaper in medium and fine grits
- Clamps
- Level and square
- Shims
- Replacement jamb board or jamb kit
- Primer, paint, caulk, and brush
- Safety glasses and work gloves
How to Diagnose Door Frame Damage
Start with a slow inspection. Open and close the door several times. Does it rub at the top? Does the latch hit too high or too low? Do the hinges move? Is the jamb cracked near the strike plate? Is the wood soft, crumbly, or discolored near the bottom? These clues tell you what kind of repair is needed.
If the door is sagging, the hinge screws may be loose or too short. If the latch misses the strike plate, the frame may be slightly out of alignment. If the jamb is split, usually near the lockset, the wood needs bonding, reinforcement, or replacement. If the bottom of an exterior jamb is soft, moisture has likely caused rot, and cosmetic filler alone will not save the day. Paint is wonderful, but it is not magic soup.
1. Fix a Loose or Misaligned Door Frame with Screws and Adjustments
This is the best starting point when the door frame looks mostly intact but the door sticks, sags, or refuses to latch. Many “broken frame” problems are actually hinge or strike-plate problems wearing a fake mustache.
When to Use This Repair
Choose this method if the jamb is solid, the casing is not pulling away, and the door only needs minor alignment help. Common signs include a door that rubs the jamb, a latch that barely misses the strike plate, or hinges with loose screws.
Steps to Fix It
- Tighten the hinge screws. Open the door and tighten every screw in the hinges. If a screw spins without grabbing, the hole is stripped.
- Replace short screws with longer screws. On the hinge-side jamb, swap one or two screws for longer screws that reach the wall framing behind the jamb. This can pull a sagging door back into alignment.
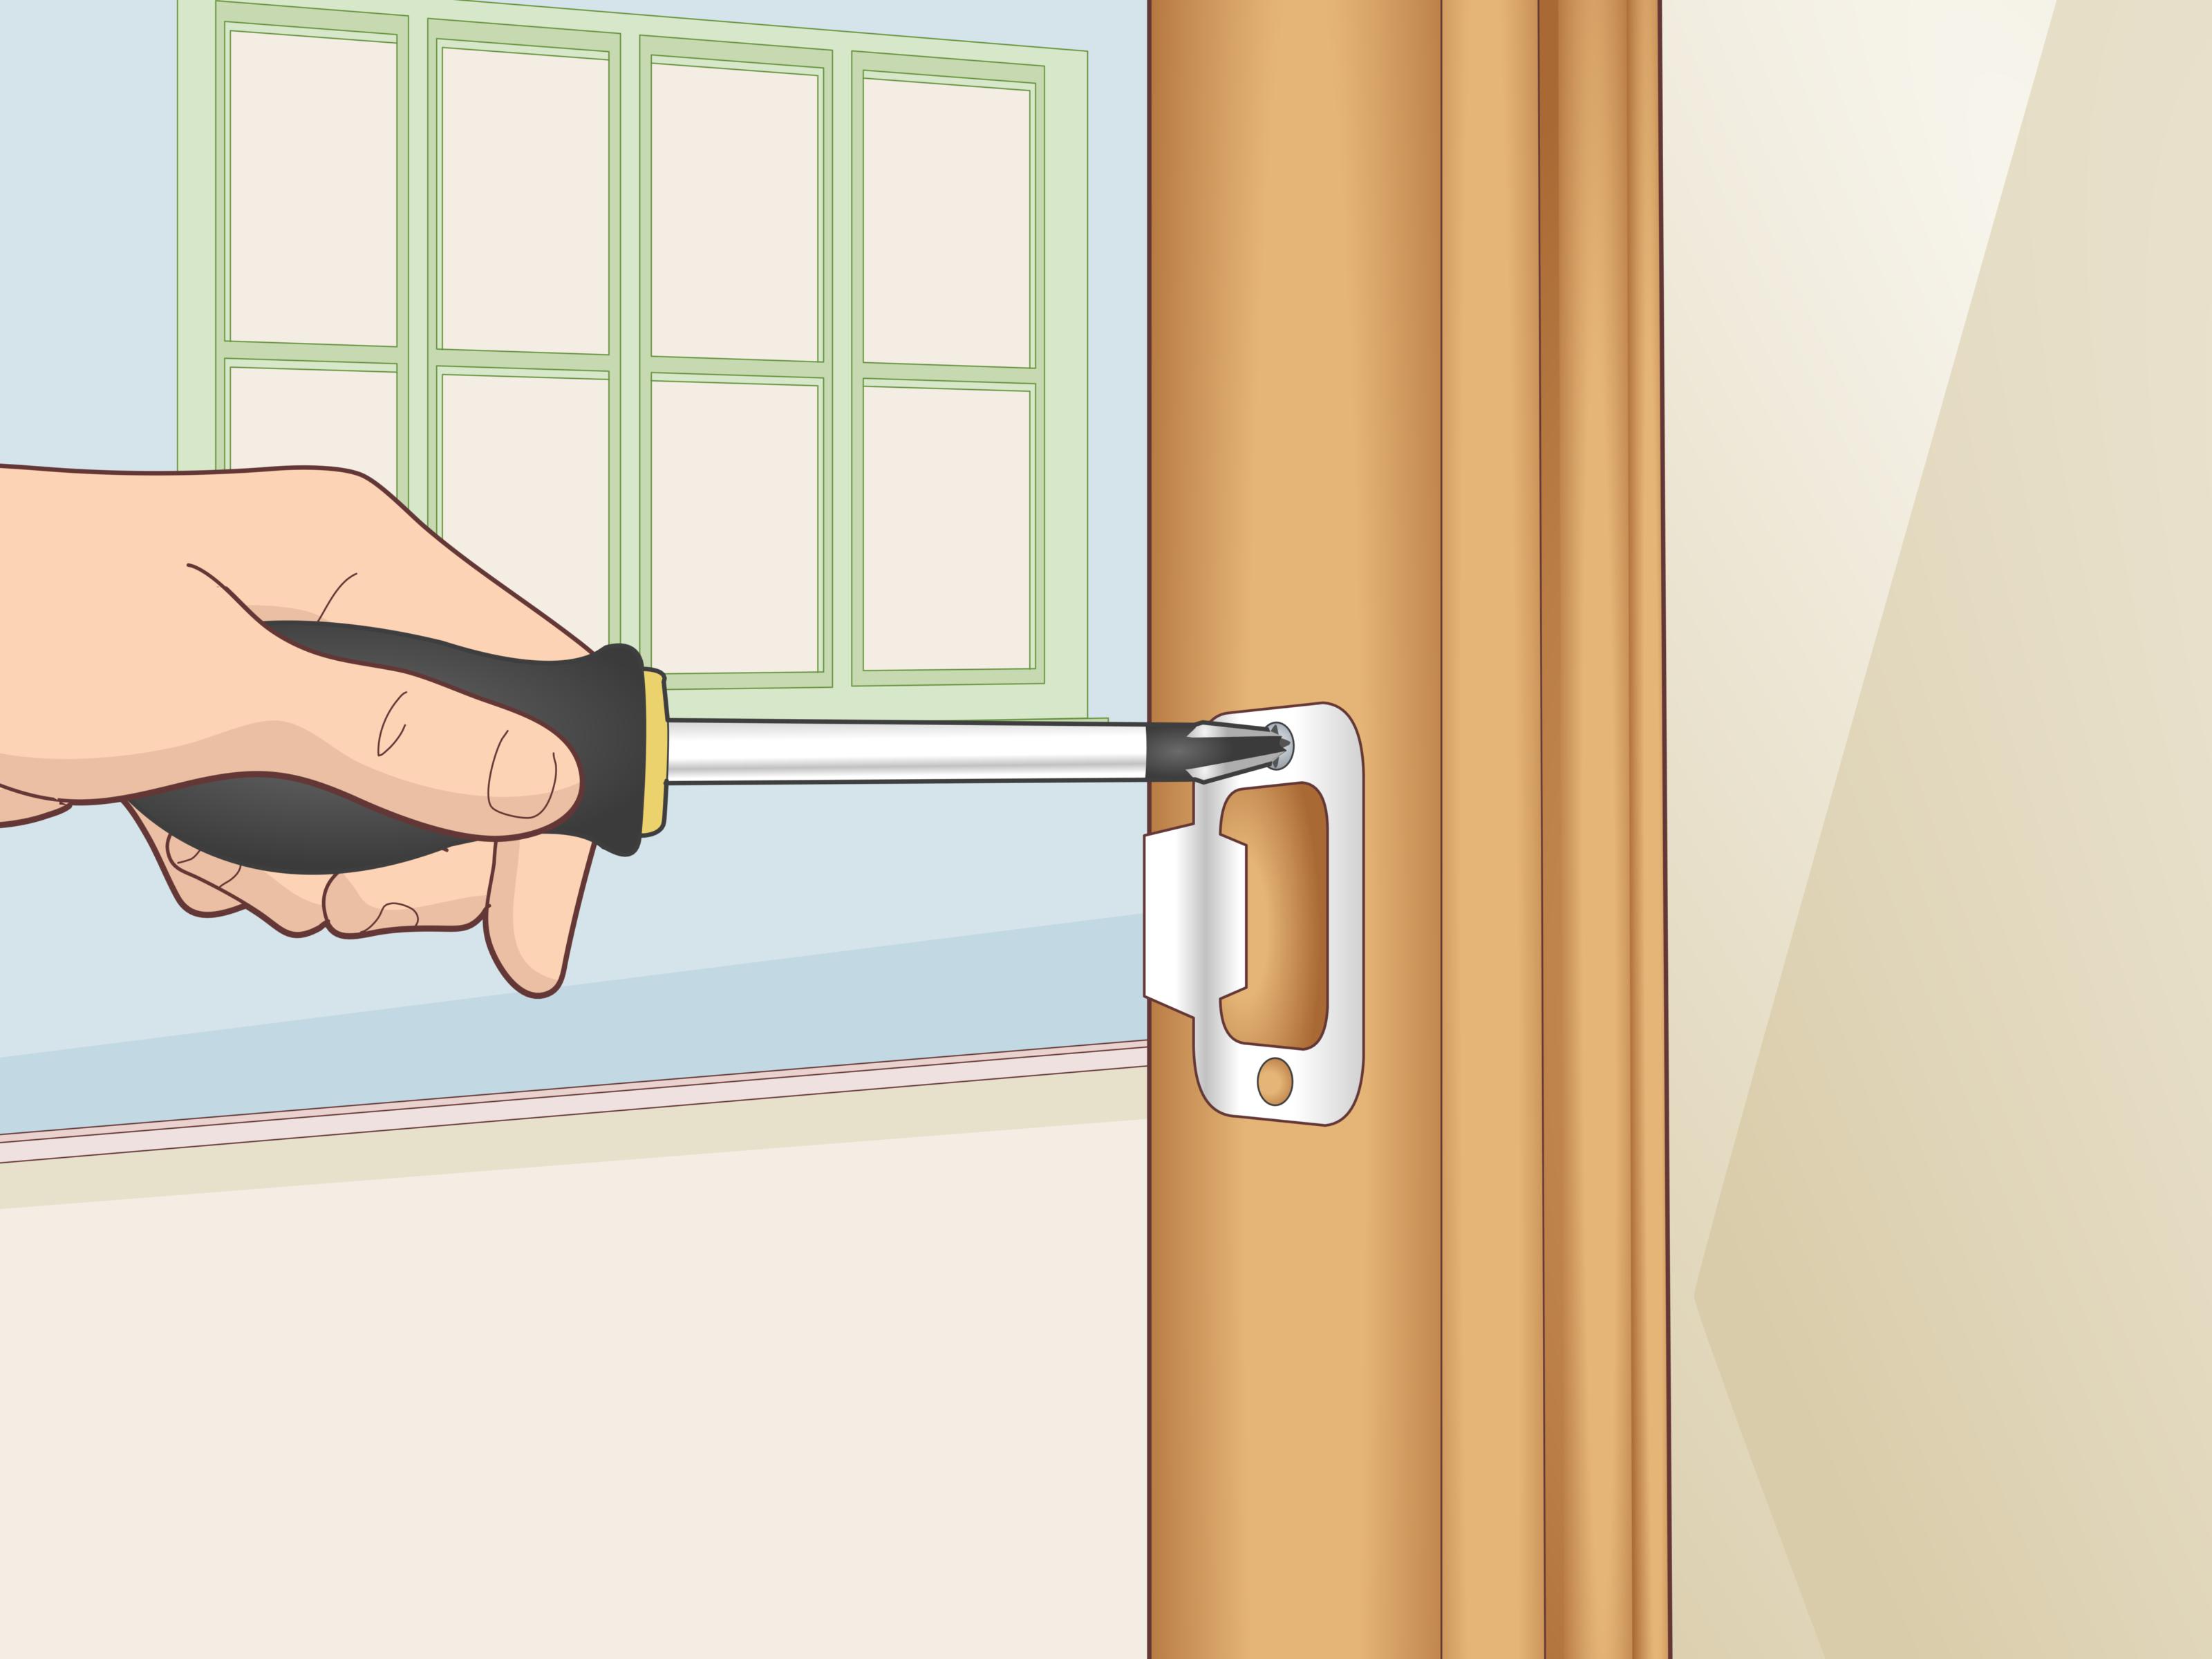
- Check the strike plate. If the latch is slightly off, loosen the strike plate and reposition it. For tiny adjustments, you can enlarge the strike opening carefully with a file.
- Fill stripped screw holes. For interior doors, pack stripped holes with wood glue and wood toothpicks or dowels, let dry, trim flush, and reinstall the screws.
- Test the door. Close the door slowly. The latch should enter the strike plate without lifting, pushing, or whispering encouraging words to the knob.
This repair is quick, inexpensive, and often enough for a bedroom, bathroom, closet, or pantry door. For exterior doors, especially entry doors with deadbolts, use sturdy screws and make sure the strike plate is anchored well into solid framing for better security.
2. Patch Small Dents, Gouges, and Nail Holes in the Door Frame
If your door frame has dents, pet scratches, old nail holes, or chipped corners, patching is usually the simplest repair. This is cosmetic door frame repair, not structural surgery. Think of it as giving the jamb a spa day, except with sandpaper.
When to Use This Repair
Use wood filler for shallow dents, small holes, worn casing, and minor surface damage. If the wood is solid and the door operates correctly, you probably do not need to replace the jamb.
Steps to Patch Cosmetic Damage
- Clean the area. Remove loose paint, dust, and splinters with a utility knife or putty knife.
- Sand rough edges. Feather the edges around the damaged spot so the filler blends smoothly.
- Apply wood filler. Press filler into the dent or hole with a putty knife. Slightly overfill it because filler can shrink as it dries.
- Let it dry completely. Follow the product instructions. Rushing this step leads to gummy sanding, which is exactly as annoying as it sounds.
- Sand smooth. Use medium-grit sandpaper first, then fine-grit sandpaper for a clean finish.
- Prime and paint. Primer helps the patched area take paint evenly, especially on previously painted trim.
For exterior frames, choose a filler rated for exterior use. Standard interior filler may crack, shrink, or fail when exposed to moisture and temperature swings. After painting, caulk gaps where casing meets the wall or where trim meets the jamb to help keep water out.
3. Repair a Split Door Jamb with Glue, Clamps, and Reinforcement
A split door jamb often happens near the latch or deadbolt area. Sometimes it comes from a forced entry. Sometimes it comes from a child, a dog, or a locked bathroom situation that became more dramatic than necessary. Either way, a split jamb needs more than paint and optimism.
When to Use This Repair
This method works when the jamb is cracked but still mostly present, the wood pieces fit back together, and the door frame has not shifted badly out of square. For severe breakage, missing wood, or security concerns on an exterior door, consider a jamb reinforcement kit or partial replacement.
Steps to Repair a Split Jamb
- Remove hardware in the way. Take off the strike plate, weatherstripping, or trim pieces blocking access to the split.
- Open the crack gently. Do not pry it apart like you are opening a stubborn clam. Just create enough space to work glue into the split.
- Apply wood glue. Use a small brush or thin scrap of cardboard to push glue deep into the crack.
- Clamp the jamb. Bring the split pieces back together and clamp them until the glue cures.
- Add screws if needed. Predrill pilot holes and drive screws through the jamb into the framing, keeping the screw heads slightly countersunk.
- Fill, sand, and paint. Patch remaining cracks or screw holes, sand smooth, then prime and paint.
- Reinstall the strike plate. Use longer screws for better holding power, especially on doors that need extra strength.
When to Add a Jamb Repair Kit
For a damaged latch-side jamb, a metal door jamb repair kit can reinforce the weak area. These kits often include steel plates or sleeves that cover the split section and provide a stronger landing zone for the latch or deadbolt. They are especially useful when the wood is still serviceable but no longer strong enough by itself.
For an exterior entry door, security should guide your decision. A patched jamb may look fine, but a reinforced jamb is usually stronger. If the frame was damaged by forced entry, do not treat the repair as purely cosmetic. Strength matters.
4. Repair Rotted Door Frame Wood with Hardener and Epoxy
Rot is common at the bottom of exterior door jambs because rain, splashback, poor caulking, and old paint can invite moisture into the wood. Once the wood becomes soft, dark, crumbly, or sponge-like, ordinary wood filler will not fix the underlying problem. You must remove the bad wood and stabilize what remains.
When to Use This Repair
Use epoxy repair for small to moderate rot where the surrounding wood is still solid. If the rot extends deep into the jamb, reaches the framing behind it, or affects the threshold and subfloor, replacement is the better and safer option.
Steps to Repair Rotted Jamb Wood
- Find the full extent of the rot. Press the wood gently with a screwdriver or awl. Soft areas must be removed.
- Scrape out damaged wood. Use a putty knife, chisel, or oscillating tool to remove loose, punky material.
- Dry the area. Epoxy and hardener work best on dry wood. If the area is damp, wait until it dries and solve the moisture source.
- Apply wood hardener. Brush or soak hardener into the remaining fibers to stabilize them.
- Mix two-part epoxy filler. Follow the manufacturer’s ratio. Guessing is not recommended unless you also enjoy sanding mistakes.
- Shape the repair. Press epoxy into the void and sculpt it slightly proud of the surface.
- Sand and finish. After curing, sand the repair flush, prime it thoroughly, paint it, and caulk exposed seams.
Stop the Moisture or the Rot Comes Back
Repairing rot without fixing the water problem is like mopping the floor while the sink is still overflowing. Check the threshold, weatherstripping, exterior caulk, gutters, porch slope, and splashback near the entry. Repaint exposed wood and keep bottom edges sealed. If water keeps reaching bare wood, the repair will eventually fail.
5. Replace a Damaged Door Jamb or Install a New Frame
Sometimes the best way to repair a door frame is to stop repairing it and replace the damaged part. This is true when the jamb is badly split, warped, rotted through, or so out of square that the door cannot operate properly. Partial jamb replacement can save a door you like, while a full prehung door installation replaces the door and frame together.
When to Replace Instead of Repair
Replace the jamb if the wood is missing, the frame has shifted severely, screws no longer hold, rot goes through the board, or previous repairs have created a lumpy museum of old filler. For exterior doors, replacement may also be wise if security, weather sealing, or energy efficiency is compromised.
How to Replace One Door Jamb
- Remove the casing carefully. Score caulk lines with a utility knife, then pry the trim away gently so you can reuse it if possible.
- Remove the door. Pull the hinge pins or unscrew the hinges, then set the door aside safely.
- Cut or pry out the damaged jamb. Remove nails or screws holding the jamb to the framing.
- Measure the replacement. Match the width, thickness, and length of the old jamb. Door frames are not a place for “close enough, probably.”
- Install the new jamb. Position it with shims, check for plumb, and fasten it to the framing.
- Rehang the door. Attach hinges, test the swing, and adjust shims until the reveal is even.
- Reinstall casing and hardware. Nail the trim back, set nails, caulk gaps, then prime and paint.
When to Use a Prehung Door
A prehung door comes already mounted in its own frame. This can be the cleanest solution when both the door and frame are worn, when the opening needs a fresh start, or when a slab door would require too much fitting. The key steps are setting the hinge-side jamb plumb, shimming properly, checking the reveal, securing the jambs, and testing the door before final fastening.
Prehung doors are common for major interior updates and exterior replacements. Exterior installations require extra care with flashing, sealing, threshold support, insulation, and weatherstripping. If the rough opening is damaged, out of square, or affected by hidden rot, repair the structure before installing the new unit.
Door Frame Repair Costs: DIY vs. Hiring a Pro
Small DIY repairs can cost very little. Tightening hinge screws, adjusting a strike plate, or patching nail holes may only require screws, filler, sandpaper, and paint. Split jamb repairs and reinforcement kits cost more but are still manageable for many homeowners with basic tools.
Professional door frame repair or replacement costs vary depending on your location, door type, materials, and damage. Interior frame repairs are usually less expensive than exterior door frame work because exterior doors involve security, weatherproofing, thresholds, and sometimes hidden water damage. If the door protects your main entry, paying for professional installation can be a smart move, especially if the frame is structural, severely rotted, or tied into siding, masonry, or custom trim.
Common Mistakes to Avoid
Painting Over Rot
Paint can protect wood, but it cannot restore rotten wood. Remove soft material, stabilize the area, and repair or replace the damaged section before painting.
Skipping Pilot Holes
Driving screws near the edge of a jamb without pilot holes can split the wood. Predrill first, especially when working near old cracks or narrow trim.
Using Interior Filler Outside
Exterior jambs need materials rated for moisture and temperature changes. Use exterior-grade filler, epoxy, primer, paint, and caulk.
Ignoring Door Reveal
The reveal is the even gap around the door. If it is uneven, the door may rub, latch poorly, or look crooked even after the repair.
Forgetting Security
A front door frame is not just decoration. If the latch-side jamb or deadbolt area is damaged, reinforce it properly or replace it.
Maintenance Tips to Keep Door Frames in Good Shape
Inspect exterior door frames twice a year, especially before rainy or cold seasons. Look for cracked caulk, peeling paint, soft wood, loose hinges, worn weatherstripping, and gaps around the threshold. Touch up paint before bare wood is exposed. Replace failed caulk. Keep sprinklers from blasting the door frame like it owes them money.
For interior doors, keep hinges tight, avoid slamming, and repair small cracks early. A tiny split near the strike plate is much easier to fix than a jamb that has broken open. If doors begin sticking throughout the house, pay attention. Seasonal humidity can cause swelling, but widespread sticking may also point to settling or foundation movement.
Real-World Experience: What Door Frame Repairs Teach You
One of the first things you learn while repairing a door frame is that doors are excellent truth-tellers. They reveal crooked walls, rushed paint jobs, old water leaks, loose hinges, settling floors, and previous repairs performed by someone who may have owned only a butter knife and confidence. A door that does not close properly is rarely being dramatic for no reason. It is reporting a problem.
A common experience with interior door frame repair is discovering that the fix is simpler than expected. A bedroom door may rub the top jamb, and the immediate fear is that the whole frame is warped. Then you tighten the top hinge screws, replace one short screw with a longer one, and suddenly the door behaves like it attended finishing school. This is why diagnosis matters. Many homeowners jump straight to replacing parts when the real problem is loose hardware.
Split jambs are a different kind of lesson. They teach patience. When a latch-side jamb cracks, the broken pieces often still fit together, but only if you avoid making the damage worse. Forcing the split open, overdriving screws, or skipping clamps can turn a repairable crack into a replacement project. The best results usually come from cleaning the area, working glue deep into the split, clamping the wood back into position, and adding reinforcement only after the basic structure is stable.
Rotted exterior jambs teach the biggest lesson: water always wins if you let it keep playing. A soft patch near the bottom of a door frame may look small, but it often points to failed caulk, splashback, poor drainage, or worn weatherstripping. The repair is not just scraping, filling, sanding, and painting. The real repair is stopping the moisture path. Otherwise, the new filler becomes a temporary disguise, and the rot returns like an unwanted sequel.
Replacing a jamb also teaches respect for small measurements. A door can be only slightly out of plumb and still refuse to latch. A shim placed too aggressively can bow the jamb. A casing board removed too quickly can split. The work rewards slow progress: test the door, adjust, test again, and fasten only when the swing and reveal look right. Door frame repair is not glamorous, but it is satisfying. Few household sounds are better than a repaired door closing with a clean, confident click.
The final experience worth mentioning is that cosmetic perfection comes from finishing, not just fixing. Even a strong repair can look amateur if you skip sanding, primer, caulk, and paint. Once the structure is sound, take the time to blend the surface. A smooth patched jamb with fresh paint can make the whole doorway look new. And yes, you may start noticing every other chipped frame in the house afterward. That is not a defect; that is the ancient DIY curse.
Conclusion
Learning how to repair a door frame gives you options. You can tighten and realign a sagging door, patch dents and gouges, glue and reinforce a split jamb, rebuild rotted wood with epoxy, or replace a damaged jamb entirely. The right method depends on the type and severity of the damage. Small cosmetic problems call for filler and paint. Loose doors often need hinge or strike-plate adjustments. Split or weakened jambs need glue, screws, and sometimes metal reinforcement. Rot requires removal, stabilization, and moisture control. Major damage calls for replacement.
The best repair is the one that restores both function and strength. A door should swing smoothly, latch securely, seal properly, and look like it belongs in the house instead of in a cautionary tale. Take your time, choose the right materials, and do not ignore water damage or security issues. Your door frame may not send you a thank-you card, but that clean little click when the latch catches? That is basically applause.
