
Skincare
Make Your Own Telescope, Right Down To The Glass
Jul
There are two kinds of people in the world: the ones who buy a telescope, and the ones who look at a telescope and think,
“Sure, but what if I made the mirror too?” If you’re reading this, congratulationsyou’re in the second category,
also known as “future owner of a garage that smells faintly of wet glass and determination.”
Building a DIY telescope is already satisfying. Building one right down to the glassmeaning you grind,
polish, test, and finish your own primary mirrorturns the hobby into a craft. It’s part science, part handwork, part
“why is there slurry on my elbow?” The reward is real: a homemade telescope that can deliver jaw-dropping views of the Moon,
Saturn’s rings, Jupiter’s cloud bands, bright nebulae, and galaxies that look like someone smudged a faint pencil mark on the universe.
This guide blends practical advice from long-running U.S. amateur telescope making communities, classic how-to traditions,
and modern optics/coating know-how. It’s written for curious beginners with enough patience to rub glass on glass for a while
(and enough humor to survive it).
The Big Idea: What You’re Actually Building
A telescope is basically a light bucket plus a way to aim it. The two most common designs for DIY builders are:
refractors (lenses) and reflectors (mirrors).
Making high-quality lenses at home is possible, but it’s a steeper and more equipment-heavy path.
Making a Newtonian reflector mirror at home is the classic route because it’s achievable, well-documented,
and incredibly effective for deep-sky observing.
When people say “Make your own telescope mirror,” they usually mean shaping a glass blank into a precise concave curve,
polishing it to optical smoothness, then “figuring” it into the right final shape (typically a parabola for a Newtonian).
After that, the mirror gets a reflective coating (usually aluminum with a protective overcoat), and the rest of the telescope
becomes a straightforward mechanical project: tube, focuser, secondary mirror, and mount.
Choose Your DIY Telescope Style
Why most first-timers pick a Newtonian/Dobsonian
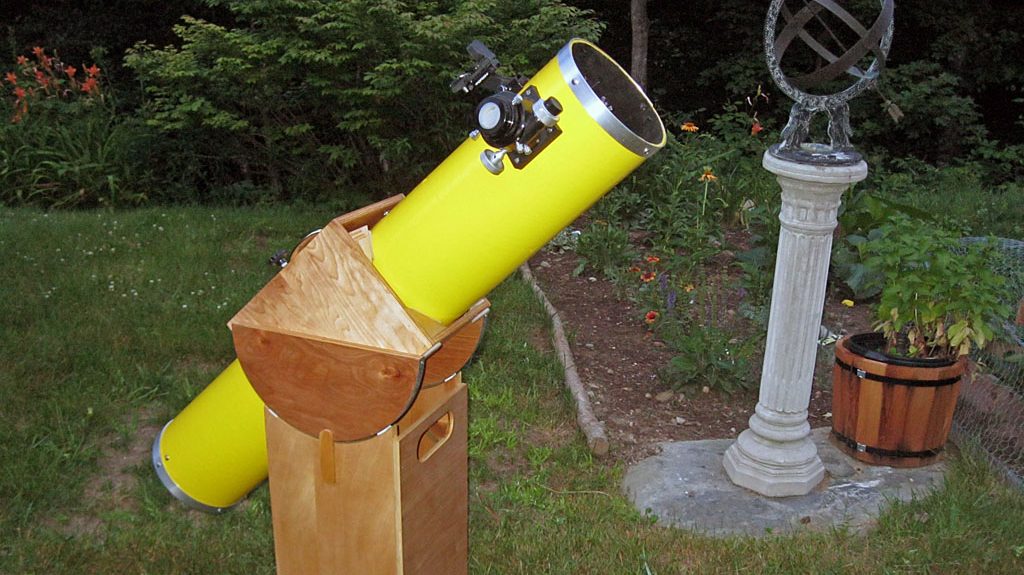
If your goal is maximum sky for minimum fuss, a Dobsonian mount paired with a Newtonian optical tube is the
people’s champion. The mount is basically a stable swivel boxcheap, strong, and forgiving. You’ll spend your energy where
it matters: making great optics.
A realistic first mirror size
The sweet spot for many beginners is a 6-inch to 8-inch primary mirror. Big enough to show a lot. Small enough
to finish without declaring a long-term relationship with your workbench.
A common first project is a 6-inch f/8 mirror: it’s relatively tolerant, easy to collimate, and the parabolizing
step is less dramatic than faster mirrors.
Picking the Glass: Mirror Blanks Without Regret
Let’s talk about the “right down to the glass” part. Your mirror starts as a glass blanka round disk of glass
that will become the primary mirror. Your job is to remove glass in a controlled way until the surface is the right shape.
The glass doesn’t “make the mirror reflective.” It holds the shape that the reflective coating will follow.
Glass types you’ll hear about
| Glass Type | Why people use it | Tradeoffs |
|---|---|---|
| Soda-lime / Plate glass | Affordable, available, works fine for many amateur mirrors | More sensitive to temperature swings; needs good thermal management |
| Borosilicate (often referenced as “Pyrex-like”) | Lower thermal expansion; holds figure better as temperatures change | Costs more; sourcing can be trickier depending on diameter/thickness |
| Fused silica / specialty low-expansion glass | Excellent thermal stability, premium performance | Often expensive and overkill for a first DIY telescope build |
For a first homemade telescope mirror, borosilicate is a very popular “nice-to-have,” especially if you observe in places
where nighttime temperature drops fast. Plate glass can still perform beautifully; it just benefits from patience while cooling
and thoughtful ventilation in the telescope design.
Thickness, focal ratio, and the “don’t make life harder” rule
Mirror thickness matters because thin glass is easier to flex (not what you want while polishing). Beginners often do best
with a reasonably sturdy blank. Also, faster mirrors (like f/4 or f/5) demand tighter figuring and collimation.
If this is your first rodeo, choose a focal ratio that won’t pick fights with youf/6 to f/8 is a friendly neighborhood.
Tools and Materials Checklist (A.K.A. Your New Shopping Personality)
You don’t need a machine shop. You do need the right consumables and a few DIY fixtures.
Here’s the typical kit for grinding a telescope mirror:
- Mirror blank and a tool (often another glass disk or a tile tool)
- Abrasive grits (coarse to fine, usually silicon carbide)
- Cerium oxide or similar polishing compound
- Pitch for making a pitch lap (your polishing “contact surface”)
- Work stand that’s stable and comfortable at the right height
- Spray bottle, measuring spoons, towels, and a dedicated cleanup routine
- Testing setup (at minimum, a simple knife-edge or Ronchi tester)
- Patience (not sold in stores; try borrowing from a friend)
Safety note: you’ll be working with glass and fine abrasives. Wear eye protection when appropriate, keep grit stages separated,
and don’t let “just a quick rinse” turn into cross-contamination that drags your fine grinding back to the Stone Age.
Mirror Making, Step by Step
1) Generating the curve (hogging out)
The first goal is to create a concave curve with roughly the right radius of curvature.
This is where coarse grit does the heavy lifting. You’ll use a simple stroke pattern with the mirror and tool,
rotating them regularly so the work stays symmetrical.
The rhythm is oddly meditative: wet, grit, stroke, rotate, repeat. The sound is… memorable. Think “beach sand in a blender,”
but with purpose. You’re removing material quickly here, so you measure progress often and avoid going too deep.
2) Rough grinding
After the curve exists, you refine it with a sequence of grits. Rough grinding removes the big pits and scratches from hogging.
Your job is to complete each grit stage thoroughlymeaning the surface shows a consistent “frost” texture with no surprise
scratches from the previous grit.
A practical rule: if you can still find coarse scratches, you’re not done, and your next grit will not magically forgive you.
Mirror making is polite like thatit always returns what you put into it.
3) Fine grinding
Fine grinding is where the mirror starts to look serious. The abrasive gets smaller, the surface becomes smoother,
and your technique matters more. Everything should be clean. Separate buckets, separate towels, and a healthy suspicion
of anything that looks like it came from the previous grit stage.
4) Polishing (the moment the magic shows up)
Polishing is when the surface transitions from frosted to shiny. You’ll pour a pitch lap (a disk of pitch
with channels) and “press” it to match the mirror’s curve. Then you polish with cerium oxide slurry.
The first time the surface starts reflecting your face, it’s equal parts thrilling and alarminglike,
“Oh wow, this might actually work,” followed immediately by, “Oh wow, now I can see every mistake.”
That’s normal. Polishing reveals what grinding hid.
5) Figuring (turning a good sphere into a great parabola)
For many Newtonian designs, a perfect sphere isn’t the final goal. You need a parabolic mirror for sharp images,
especially at common focal ratios. Figuring is controlled, strategic polishing: specific stroke patterns and lap conditions
that selectively remove tiny amounts of glass to reach the correct shape.
This is the stage where testing becomes your co-pilot. You’ll polish a bit, test a bit, and slowly “sneak up” on the figure.
It’s not about rushingit’s about converging.
Testing Without Losing Your Mind (Too Much)
Mirror testing sounds intimidating until you realize the goal is simple: measure how closely the surface matches the target shape.
Amateur telescope makers have used brilliantly simple tests for decades.
The Foucault knife-edge test
The Foucault test uses a light source and a knife edge near the mirror’s center of curvature.
As the knife edge cuts the returning beam, zones of the mirror darken differently depending on the surface figure.
It’s sensitive, affordable, and extremely educational. Also, it will make you feel like a Victorian scientist, which is a bonus.
The Ronchi test
The Ronchi test uses a grating that produces bands across the mirror’s reflection.
Straight, evenly spaced lines suggest a smooth spherical figure; curved or kinked lines reveal deviations.
It’s fast and visualgreat for quick checks during figuring.
The star test (your telescope’s final exam)
Once the mirror is coated and installed, the star test is the real-world confirmation:
slightly defocus a bright star and compare the diffraction pattern inside and outside of focus.
It’s sensitive to collimation and atmospheric seeing, so interpret it carefullybut it’s also deeply satisfying.
This is the part where the sky itself grades your homework.
From Glass to Mirror: Coatings, Reflectivity, and Reality
A polished glass surface is not reflective enough for serious observing. To become a true primary mirror, it needs a thin metallic
layer (commonly aluminum) applied in a vacuum chamber, then protected with a durable overcoat.
Most DIY builders ship the finished mirror to a coating service for aluminizing.
Protected aluminum vs enhanced coatings
“Protected aluminum” usually means aluminum plus a thin protective layer (often a metal oxide).
Enhanced coatings can boost reflectivity, but cost more and may not be necessary for a first homemade telescope.
For most visual observers, a solid protected aluminum coating is a great balance of performance and durability.
Mirror care (how not to panic-clean)
A telescope mirror will gather dust. That’s not a moral failing. Don’t obsessively clean it.
Clean only when it’s genuinely dirty, use gentle techniques, and avoid rubbing grit across the surface.
The best mirror is the one that stays in good shape long enough to show you the sky, not the one that gets “refreshed” every time it sees pollen.
Turning Your Mirror Into a Real DIY Telescope
Optical components you’ll need
- Primary mirror (your handmade masterpiece)
- Secondary mirror (typically bought, since it’s smaller and already precisely made)
- Spider to hold the secondary
- Focuser (where your eyepiece goes)
- Tube or truss structure
- Mirror cell to support the primary without warping it
The Dobsonian mount: simple, stable, brilliant
A Dobsonian mount is essentially a sturdy altitude-azimuth platform: it moves up-down and left-right smoothly, and that’s it.
No electronics required. The “secret sauce” is good balance and smooth bearing surfaces.
Done right, it feels like the telescope is floating.
Collimation (the alignment you can’t skip)
Reflectors need collimationaligning mirrors so the optical path is correct.
The good news: it’s learnable. The better news: once you get the hang of it, it takes minutes.
The best news: sharp views reward you immediately, so the universe provides instant positive reinforcement.
What It Costs (Money, Time, and the Occasional Existential Question)
A homemade telescope can be budget-friendly, especially if you enjoy scrounging materials and building your own structure.
But mirror making isn’t “cheap” in the sense of “free.” You’ll spend on abrasives, pitch, testing materials, and coating.
The bigger cost is time: mirror grinding and polishing can take many dozens of hours depending on size, experience, and how picky you are (and you should be at least medium-picky).
The payoff isn’t only optical performance. It’s the feeling that when you look at Saturn, you’re seeing it through a surface you shaped with your own hands.
That’s not just astronomy. That’s craftsmanship with a view.
Conclusion: A Telescope With Your Fingerprints On It
Making your own telescope mirror is one of those rare projects where the “hard part” is also the point.
You learn how optics behave, how surfaces become precise, and how small errors turn into visible consequences.
You also learn that patience isn’t passiveit’s active, repetitive, and occasionally involves scrubbing a work stand at midnight because you refuse to carry grit into the next stage.
If you keep your first project practicalan approachable mirror size, a forgiving focal ratio, and a steady test-and-correct rhythmyou can absolutely build a DIY telescope that performs like a serious observing instrument.
And when someone asks where you bought it, you get to say, “I didn’t. I made it. Yes, even the glass.”
Then you can casually enjoy the stunned silence, which is honestly one of the underrated perks of amateur telescope making.
Workshop Stories: of Real-World Experience
The first time I tried mirror grinding, I expected a cinematic moment: heroic music, a single perfect stroke, and suddenly a mirror worthy of a mountaintop observatory.
What I got was a wet hiss, a gritty squeak, and the immediate realization that I had underestimated how far “a long time” can stretch when you’re rubbing two circles together.
If you’re starting this journey, here’s the most useful truth I can offer: progress feels slow until it suddenly feels fastusually right after you stop rushing.
My biggest early mistake was treating “clean enough” as a real category. During fine grinding, I once found a rogue scratch that looked like a tiny lightning bolt across the surface.
It wasn’t mysterious. It was a single coarse grit particle that hitched a ride on a towel that had no business being anywhere near that stage.
The fix wasn’t complicated, but it was humbling: I had to step back to an earlier grit and earn my way forward again.
After that, I became the kind of person who has “grit-specific towels,” which sounds ridiculous until you’ve lived through scratch-induced grief.
Polishing is where emotions get interesting. The mirror turns shiny and your brain declares victorythen your test setup politely disagrees.
I remember staring at a Foucault shadow pattern thinking, “Is that a zone, or did I just blink wrong?”
The lesson was to slow down and standardize everything: same lighting, same distances, same notes, same process.
Once I treated testing like a repeatable experiment instead of a vibe check, figuring became less mystical and more methodical.
Pitch laps deserve their own little memoir. On one memorable day, the lap behaved like it had personal boundaries and I had violated them.
It would either stick like glue or slide like it was on ice, with no middle ground. The fix was almost always boring: adjust temperature, press correctly, keep channels open, and accept that pitch is basically a moody roommate.
When the lap finally “clicked,” the polishing action felt smooth and controlledlike the mirror and tool had agreed to cooperate.
The best moment came later, under the actual night sky. I pointed the finished scope at Jupiter and saw distinct bandscrisp, steady, unmistakable.
That view wasn’t just about the planet; it was proof that the hours mattered.
If you’re building your own telescope right down to the glass, expect a few setbacks. Expect to re-do a step.
Expect to learn more than you planned. And expect this: when you finally nail it, the universe looks a little more personallike it’s meeting you halfway because you showed up with your own mirror.

