
Body Care
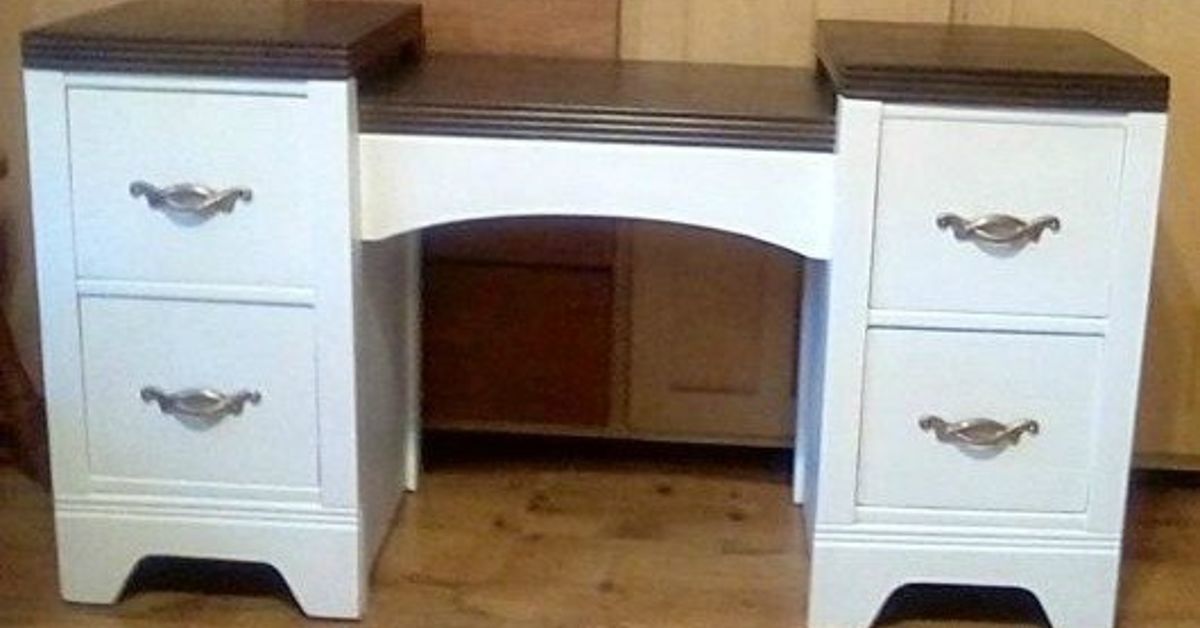
Waterfall Vanity Refinish
Jul
A waterfall vanity refinish is the kind of project that makes you feel like a furniture detective, a painter, a woodworker, and occasionally a person questioning every life choice while sanding a curved edge at 11:47 p.m. But when it is done right, the result is worth every speck of dust. A vintage waterfall vanity can go from “forgotten garage goblin” to “Art Deco main character” with careful cleaning, veneer repair, smart sanding, stain or paint, and a protective topcoat that can handle daily use.
The term “waterfall vanity” often refers to an Art Deco-style dressing vanity from the 1930s or 1940s, known for rounded edges that appear to flow downward like a waterfall. Some homeowners also use the phrase for bathroom vanities with a waterfall countertop edge. This guide focuses mainly on refinishing a vintage waterfall wood vanity, while also including bathroom-friendly finishing tips for anyone adapting the piece for a powder room or dressing area.
What Makes a Waterfall Vanity Special?
Waterfall furniture is loved for its curves, dramatic grain patterns, geometric details, and glamorous old-Hollywood personality. Many waterfall vanities were built with plywood cores and decorative wood veneers, often walnut, mahogany, maple, or burl-style patterns. Those veneers are what give the piece its showy surface, but they are also the part most likely to chip, lift, bubble, or sand through if treated like a modern solid-wood cabinet.
That is the first rule of a waterfall vanity refinish: respect the veneer. This is not a picnic table you can attack with 60-grit sandpaper and a heroic attitude. The top layer may be thin, and once it is gone, it is gone. The best refinishing approach is patient, light-handed, and planned before the first screw comes out.
Before You Start: Inspect the Vanity Like a Pro
Begin by looking at the entire vanity in good light. Check the curved front edges, drawer faces, mirror supports, feet, and top surface. You are looking for four things: loose veneer, water damage, peeling finish, and structural weakness. A few scratches are normal. Deep gouges, missing veneer, swollen wood, or soft spots need repair before any stain or paint touches the piece.
Remove the drawers and hardware. If the vanity has a mirror, detach it if possible and store it safely. Label every screw, hinge, drawer pull, and bracket in small bags. This step feels fussy until you are staring at fourteen nearly identical screws and wondering which one came from the left mirror arm. Future-you will be grateful.
Decide: Restore, Paint, or Do a Hybrid Finish?
There are three common approaches to refinishing a waterfall vanity:
- Full wood restoration: Best when the veneer is attractive and mostly intact.
- Painted refinish: Best when veneer damage is extensive or the original finish is beyond saving.
- Hybrid refinish: A popular choice that stains the drawer fronts or top while painting the body for contrast.
A hybrid waterfall vanity refinish often gives the best of both worlds. You preserve the beautiful Art Deco grain where it matters most and use paint to hide damaged side panels, patched areas, or mismatched repairs. Think of it as furniture makeup, not furniture fraud.
Tools and Supplies for a Waterfall Vanity Refinish
You do not need a professional workshop, but you do need the right basics. Gather a screwdriver, painter’s tape, drop cloths, mild cleaner or degreaser, clean rags, wood glue, clamps, wood filler, veneer patch material if needed, sanding sponges, 180-grit and 220-grit sandpaper, primer, paint or stain, topcoat, tack cloth, gloves, eye protection, and a properly rated mask or respirator.
If you plan to strip old paint or heavy varnish, choose products carefully and follow all label directions. Paint strippers can release strong fumes, and older finishes may contain substances you do not want floating around your lungs. Work outdoors or in a very well-ventilated area whenever possible. If the vanity came from an old home or has unknown old paint, test before sanding aggressively.
Step-by-Step Waterfall Vanity Refinish
1. Clean First, Sand Later
Cleaning is not glamorous, but it is the difference between a finish that bonds and a finish that flakes off like a bad sunburn. Use a mild degreasing cleaner to remove old polish, hand oils, dust, makeup residue, and mystery grime. Bathroom or dressing vanities often collect lotions, powders, hairspray, and perfume overspray. That invisible film can sabotage primer and stain.
After cleaning, wipe the piece with a damp cloth and let it dry completely. Do not rush this part. Moisture trapped under primer, stain, or topcoat can create cloudy patches or adhesion problems.
2. Repair Loose Veneer
If veneer is lifting but still present, save it. Carefully slip wood glue underneath the loose section using a thin tool, then press it flat. Use wax paper between the veneer and clamp blocks so you do not glue your clamp to the vanity, which is the sort of comedy nobody enjoys during cleanup. Clamp the repair until fully dry.
For missing veneer, cut a patch from matching veneer if the damaged area is large or visible. For smaller chips along edges, a high-quality wood filler may be enough, especially if you plan to paint that section. Shape curved waterfall edges slowly so the repair follows the original line. The curve is the signature; do not turn it into a square corner by overfilling or over-sanding.
3. Sand Lightly and Strategically
For a painted finish, sand enough to dull the surface and give primer something to grip. For a stained finish, sand more carefully, always with the grain, and avoid lingering on edges. Start around 180 grit if the surface is rough, then move to 220 grit for smoothing. On veneer, aggressive sanding is risky. The goal is not to erase history; it is to prepare the surface for its next chapter.
Vacuum dust from crevices and wipe everything with a tack cloth. Dust left behind can create gritty paint, bumpy topcoat, and a finish that feels like it spent the afternoon at the beach.
4. Choose Stain, Paint, or Both
If the wood grain is beautiful, stain can bring back depth and warmth. Gel stain is especially useful when you are working over an existing finish or when the wood tones are uneven. Always test stain in an inconspicuous area, such as the back of a drawer front or underside of the vanity. Waterfall furniture often combines different veneers, so one stain color may look different from one panel to the next.
If painting, use a bonding or stain-blocking primer first. This is especially important on glossy old finishes, patched areas, and bathroom pieces that need extra durability. For paint, satin, semi-gloss, or gloss finishes are easier to wipe clean than flat paint. In a bathroom, mildew-resistant latex paint or durable enamel-style cabinet paint is a smart choice.
5. Prime Like You Mean It
Primer is not optional if you want a smooth, durable painted waterfall vanity. Apply it with an angled brush for corners and a small foam roller for flat areas. Let it dry according to the product directions, then sand lightly with 220-grit paper or a fine sanding sponge. This quick scuff-sand knocks down brush marks and tiny bumps. Wipe clean before painting.
6. Apply Paint in Thin Coats
Two thin coats beat one thick coat every time. Thick paint tends to drip around waterfall curves, pool in decorative grooves, and stay soft longer than expected. Work in sections, brush into details, then roll flat areas for a smoother finish. Watch the curved edges closely; they love to collect drips when you are not looking.
Allow each coat to dry fully before adding the next. Dry-to-the-touch does not mean cured. A finish may feel dry within hours but still need several days to harden. Be gentle during reassembly and avoid heavy objects on the top until the finish has cured.
7. Seal for Real Life
A vanity is not wall art. It gets touched, opened, wiped, bumped, and sometimes attacked by a curling iron. Protect stained wood with polyurethane, water-based polycrylic, lacquer, or another compatible clear topcoat. For painted pieces, a durable cabinet paint may not need a separate sealer, but a clear topcoat can add protection in high-use areas.
If the waterfall vanity will live in a bathroom, moisture resistance matters. Seal the top, sides, edges, and any exposed wood near plumbing. Water sneaks into raw edges faster than a cat into an empty cardboard box.
Design Ideas for a Refinished Waterfall Vanity
A refinished waterfall vanity can go in several style directions. For a classic Art Deco look, choose deep walnut stain, black accents, brass hardware, and a glossy protective finish. For a softer vintage style, try warm white, muted sage, dusty blue, or cream with restored wood drawer fronts. For a dramatic modern look, paint the body matte black and keep the curved veneer top stained in a rich medium brown.
Hardware makes a huge difference. Original Bakelite-style pulls, brass handles, glass knobs, or geometric drawer pulls can all work beautifully. If the original hardware is intact, clean it before replacing it. Sometimes the old pulls are the jewelry that makes the whole outfit make sense.
Bathroom Conversion Tips
If you are turning a waterfall dressing vanity into a bathroom vanity, plan carefully before cutting anything. Vintage furniture was not built around modern plumbing. You may need to reinforce the interior, modify drawers, seal cut edges, and choose a sink that does not overwhelm the piece. A vessel sink can preserve more drawer space, while an undermount or drop-in sink may require more structural changes.
Always protect the top from standing water. Use a waterproof countertop material, a sealed wood top, or a professionally installed stone or quartz surface. The more moisture the piece will face, the more important proper sealing becomes.
Common Mistakes to Avoid
The biggest mistake is sanding through veneer. Once that thin decorative layer disappears, staining becomes difficult and patching becomes more obvious. The second mistake is skipping cleaning. Paint does not bond well to furniture polish, body oil, or old wax. The third mistake is rushing cure time. Reattaching hardware too soon can dent soft paint, and placing decor on a fresh topcoat can leave permanent marks.
Another common mistake is using the wrong finish for the vanity’s future location. A piece used as a bedroom vanity does not need the same moisture resistance as a bathroom vanity. Match the product to the job. Pretty is nice. Pretty and durable is better.
Cost and Time Expectations
A basic waterfall vanity refinish can often be completed with affordable supplies if the piece is structurally sound. Expect to spend more if you need veneer sheets, specialty primer, high-end cabinet paint, new hardware, or a custom mirror repair. Time depends on drying and curing, not just labor. You may only spend a few active hours cleaning, sanding, priming, painting, or staining, but the full project can stretch over several days because each layer needs time to dry properly.
For a simple paint refresh, a weekend may be enough. For veneer repair, stain matching, and topcoating, give yourself more time. This is not a race. The furniture has already waited decades; it can wait one more day for the topcoat to cure.
Maintenance After Refinishing
Once your waterfall vanity is refinished, keep it looking good with gentle care. Wipe spills quickly, use coasters or trays for cosmetics, avoid harsh cleaners, and dust with a soft cloth. In a bathroom, run the exhaust fan during showers and keep water from sitting on the surface. If the finish begins to dull after years of use, a light cleaning and fresh topcoat may revive it without a full refinish.
For drawers, consider liners to protect the interiors. For old wooden runners, a little furniture wax can help sticky drawers glide smoothly. Small details like these make the piece feel less like a rescued antique and more like a functional part of daily life.
Conclusion: A Waterfall Vanity Refinish Is Worth the Effort
A waterfall vanity refinish is more than a furniture makeover. It is a way to preserve craftsmanship, reduce waste, and create a one-of-a-kind piece that modern flat-pack furniture simply cannot imitate. The curved edges, veneer patterns, and vintage details give the vanity personality before you even choose a paint color or stain. With careful cleaning, gentle sanding, veneer repair, the right primer or stain, and a durable topcoat, even a tired waterfall vanity can become a stunning focal point.
The secret is patience. Do not bully the veneer. Do not skip prep. Do not trust “dry to the touch” when your hardware is ready to scratch the finish. Treat the piece like it has survived generations because, well, it probably has. Refinish it thoughtfully, and it may keep stealing compliments for decades more.
Real-World Experiences With a Waterfall Vanity Refinish
The first thing most people learn during a waterfall vanity refinish is that the project looks easy right up until the cleaning starts. In photos, the piece may appear charmingly aged. In person, it may have sticky drawer tracks, chipped veneer, cloudy varnish, and a smell best described as “grandma’s attic met an old perfume bottle and they started a band.” That is normal. Vintage furniture carries a history, and sometimes that history needs degreaser.
One common experience is discovering that the drawer fronts are far prettier than expected. Many waterfall vanities hide beautiful bookmatched veneer under yellowed finish or old paint. After careful cleaning and light sanding, the grain suddenly appears, and the entire plan changes. People who planned to paint everything often end up staining the drawers and painting only the frame. This hybrid approach is popular because it honors the original wood while still allowing damaged areas to look fresh and intentional.
Another lesson is that curved waterfall edges require patience. Flat drawer fronts are simple compared with rounded corners and rolled tops. Paint can drip there. Stain can gather there. Sandpaper can cut through veneer there. The best approach is to slow down and use flexible sanding sponges, light pressure, and frequent checks. If you are tired, stop. Tired sanding is dangerous sanding. That is when beautiful veneer becomes a bald spot.
Hardware restoration can also become surprisingly satisfying. Old pulls may look dull, but a careful cleaning can reveal brass tones, Bakelite warmth, or decorative details that match the vanity better than anything new from a store. However, if the original hardware is missing, replacement pulls should match the scale of the furniture. Oversized modern handles can overpower delicate Art Deco lines, while tiny knobs can look lost on wide drawers.
People refinishing a waterfall vanity for bathroom use often learn that moisture planning is everything. A vintage dressing vanity can survive beautifully in a bedroom with basic protection, but a bathroom adds steam, splashes, toothpaste, cosmetics, and plumbing cuts. Sealing exposed wood, protecting the top, and using durable finishes are not optional. The prettiest refinish in the world will not stay pretty if water sneaks under the veneer.
The most rewarding moment usually comes after reassembly. The drawers slide back in, the mirror returns, the hardware catches the light, and the piece suddenly looks intentional again. Even imperfections become part of the charm. A tiny repaired chip or slightly uneven patch does not ruin the vanity; it proves the piece was saved rather than replaced. That is the real magic of refinishing. You are not just changing the color. You are giving an old piece permission to be useful, beautiful, and admired again.
SEO Tags

