Skincare
Make a Coffee Table Out of an Old Window to Store Your Treasures
Jun
Some old windows are too charming to toss and too awkward to hang on a wall without making your living room look like a haunted farmhouse gift shop. That is exactly why turning one into a coffee table is such a brilliant DIY project. A salvaged window already has character, structure, glass, history, and just enough mystery to make guests say, “Wait, is that a window?” Yes. Yes, it is. And now it holds seashells, postcards, family photos, vintage keys, matchbooks, concert tickets, or whatever tiny treasures have been living in your junk drawer rent-free.
A DIY old window coffee table combines three things homeowners love: storage, display, and the satisfying feeling of rescuing something from the “maybe I’ll use this someday” pile. Instead of buying a generic table, you can create a custom shadow-box coffee table with a hinged window top and a shallow storage compartment underneath. It is part furniture, part memory box, part conversation starter, and part proof that you should not be left unsupervised near architectural salvage.
This guide walks you through how to make a coffee table out of an old window, what materials to use, how to keep it sturdy and safe, and how to style it so it looks intentional rather than “garage sale avalanche.” Whether your taste leans farmhouse, coastal, vintage, cottagecore, rustic industrial, or cozy eclectic, this project gives your living room a practical centerpiece with personality.
Why an Old Window Makes a Perfect Coffee Table Top
An old window is naturally suited for a display coffee table because it already works like a lid. The panes create visual compartments, the frame adds architectural detail, and the glass lets you see the objects stored below. Instead of hiding your keepsakes in boxes, you get to enjoy them every day without dusting each tiny souvenir individually, which is a blessing for anyone who owns more than three decorative objects.
The best candidates are wood-framed windows with solid rails and stiles, intact panes, and enough depth to accept hinges. Multi-pane windows are especially attractive because they visually divide the display area. A single-pane window can also work beautifully, especially if you prefer a cleaner modern look or want to display larger items such as books, maps, pressed flowers, or folded textiles.
Before You Build: Safety Comes First
Old windows are gorgeous, but they deserve a careful inspection. If the window came from a home built before 1978, assume the paint may contain lead unless it has been professionally tested. Do not sand, scrape, or cut old painted surfaces casually. Lead dust is dangerous, especially for children and pregnant people. Use a lead test kit, keep suspicious paint sealed, and consider hiring a lead-safe professional if the finish is flaking badly.
Glass is the second big safety concern. Many old windows contain regular annealed glass, which can break into sharp shards. For a coffee table, especially in a home with kids, pets, or enthusiastic snack reachers, consider replacing the panes with tempered or laminated safety glass. At minimum, inspect every pane for cracks, secure loose glazing, and avoid using fragile glass in a high-traffic room. A coffee table should hold magazines and mugs, not create a dramatic emergency room subplot.
Materials and Tools You Will Need
Basic Materials
- One old wood window, cleaned and inspected
- Wood boards for the table box frame, such as 1×4 or 1×6 lumber
- Plywood or hardwood panel for the bottom
- Four table legs, hairpin legs, salvaged legs, or a repurposed base
- Two or three hinges for the window lid
- Small chain, lid support, or soft-close support arm
- Wood glue
- Wood screws and pilot-hole drill bit
- Corner brackets or pocket-hole screws for added strength
- Sandpaper in medium and fine grits
- Paint, stain, clear polyurethane, or furniture wax
- Optional: weatherstripping, felt pads, drawer liner, or fabric backing
Useful Tools
- Tape measure
- Drill or driver
- Miter saw, circular saw, or handsaw
- Clamps
- Orbital sander or sanding block
- Square
- Screwdriver
- Paintbrush or lint-free cloth
Step 1: Choose the Right Old Window
Start with the window because it determines the size of the entire coffee table. A common living room coffee table is roughly 36 to 48 inches long, 18 to 30 inches wide, and 16 to 18 inches tall. Your window does not have to match those dimensions perfectly, but it should feel proportional to your sofa and room. A tiny window may become a side table instead. A massive window may become a coffee table for giants, or at least for people with very ambitious charcuterie boards.
Check the window frame for rot, soft spots, loose joints, and missing glazing. Press gently on the corners. If the frame twists like a stale pretzel, reinforce it before building. If the window has beautiful chippy paint, you can preserve the look by sealing it under a clear coat, provided it is stable and safe. If the paint is peeling heavily, address safety before aesthetics.
Step 2: Clean and Stabilize the Window
Remove dirt with a damp cloth and mild soap. Avoid aggressive scraping if the paint is old. Tighten loose screws, re-glue weak joints, and repair small gaps with wood filler. If the glass rattles, add clear silicone, fresh glazing points, or glazing compound where appropriate. The goal is to make the window feel like a furniture component, not a rescued prop from a windstorm.
If you want a cleaner finish, lightly sand bare wood areas and apply primer before painting. For a rustic look, keep the age marks but seal them. A matte or satin clear coat usually looks more natural than a glossy finish, unless you want the table to shout “freshly lacquered bowling alley.”
Step 3: Build the Shadow-Box Frame
The box frame is the storage compartment beneath the window. Measure the outside dimensions of the window and build a rectangular frame to match. Many DIYers use 1×4 boards for a shallow display space or 1×6 boards for deeper storage. Shallow is best for photos, postcards, shells, matchbooks, medals, ticket stubs, and small collections. Deeper compartments can hold books, remotes, coasters, small baskets, or seasonal decorations.
Cut two long boards and two short boards. Dry-fit the pieces around the window before fastening anything. Use wood glue and screws, corner brackets, or pocket holes to secure the frame. Drill pilot holes to prevent splitting. Check for square by measuring diagonally from corner to corner; the measurements should match. If they do not, gently adjust the frame before the glue sets. This is the part where patience saves you from building a parallelogram with legs.
Step 4: Add the Bottom Panel
Cut plywood to fit the bottom of the box. You can attach it underneath the frame for maximum storage depth or inset it slightly for a more finished look. Glue and screw the panel in place, making sure the frame remains square. If you plan to display delicate objects, line the bottom with fabric, cork, peel-and-stick wallpaper, old maps, scrapbook paper, or painted beadboard.
A dark interior makes pale objects stand out. A whitewashed or natural wood interior feels airy and coastal. A velvet or felt lining gives the table a museum-case effect, which is perfect if your “treasures” include antique jewelry, coins, military patches, or family heirlooms.
Step 5: Attach the Legs or Base
You have several options for supporting the table. Hairpin legs give the piece a modern vintage look and are easy to install. Turned wood legs create farmhouse charm. Salvaged legs from an old table add instant history. You can also mount the shadow box onto an existing coffee table base if you have one with good bones.
Whatever legs you choose, make sure they are strong enough for daily use. Attach them with proper mounting plates, screws, and reinforcement blocks if needed. A coffee table gets leaned on, bumped, moved, and occasionally used as a stage by a cat who believes the household is a theater. Build accordingly.
Step 6: Hinge the Window Lid
Place the window on top of the box and align it carefully. Mark the hinge locations along the back edge. Pre-drill the holes, then attach the hinges to the window and frame. A piano hinge offers continuous support, while two or three sturdy butt hinges are easier to install and often look more traditional.
Add a lid support, small chain, or soft-close support arm so the window does not flop backward or slam shut. This detail is easy to skip and easy to regret. A window lid with glass has weight, and your fingers deserve better than a surprise guillotine moment while reaching for the remote.
Step 7: Finish the Wood
For stained wood, sand in the direction of the grain and move from medium to fine grit. Apply stain evenly with a cloth or brush, wipe away excess, and let it dry according to the product instructions. Finish with polyurethane or another protective topcoat, especially on the frame edges that will be touched often.
For painted wood, use primer if the surface is raw or patchy. Chalk-style paint works well for rustic furniture, while enamel or cabinet paint offers a smoother, tougher finish. Light distressing around corners can help the new frame blend with the vintage window. Seal painted surfaces with clear wax or a water-based topcoat if the table will see heavy use.
Step 8: Style the Display Compartment
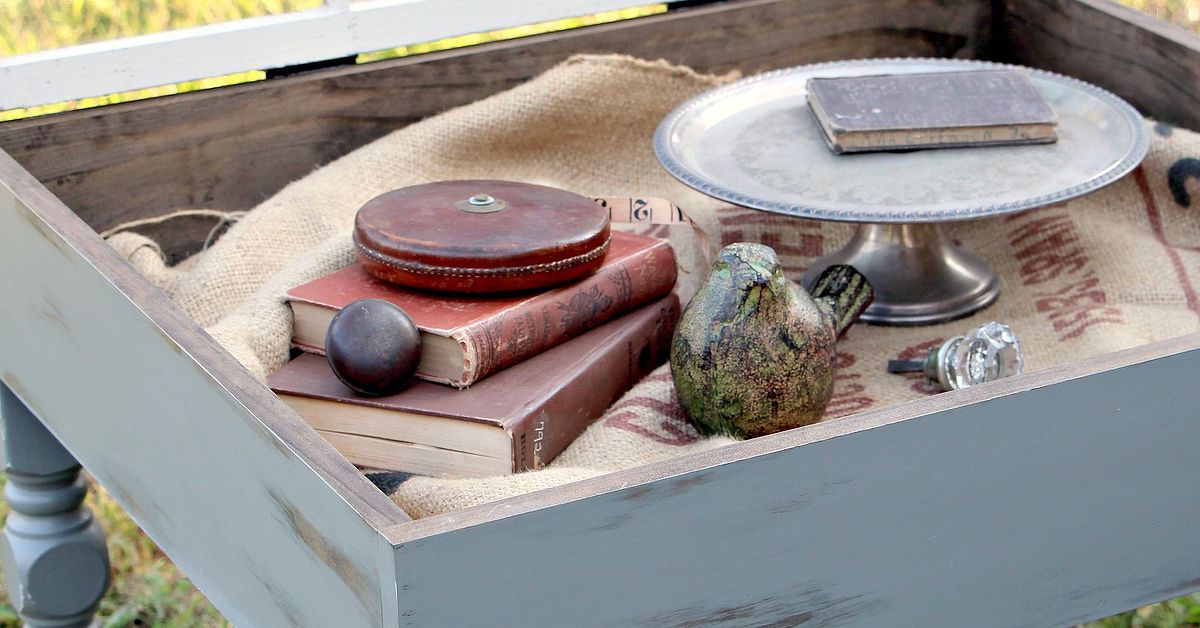
This is the fun part: filling the table with treasures. Choose a theme so the display feels curated rather than chaotic. Coastal collections might include shells, driftwood, sea glass, and vacation photos. A travel table could feature maps, museum tickets, foreign coins, postcards, and tiny souvenirs. A family memory table might hold black-and-white photos, handwritten recipes, baby shoes, or inherited trinkets.
Use height carefully. Objects should not press against the glass when the lid closes. Place flat items on the bottom first, then add small dimensional pieces. Leave some empty space so each item can breathe visually. A crowded display can look less like a treasure box and more like a raccoon’s retirement account.
Design Ideas for Different Home Styles
Farmhouse Style
Use white or cream paint, lightly distressed edges, turned legs, and a burlap or beadboard bottom. Fill the compartment with vintage postcards, old keys, dried lavender, and sepia family photos.
Coastal Style
Choose a weathered blue, gray, or whitewashed finish. Add shells, sand dollars, sea glass, rope knots, and beach photos. Keep the palette soft so the table feels breezy instead of souvenir-shop frantic.
Industrial Style
Pair the window with black metal hairpin legs, dark stain, and simple hardware. Display old tools, gears, measuring tapes, black-and-white city photos, or architectural fragments.
Modern Eclectic Style
Paint the frame matte black or deep green, replace the old panes with clean safety glass, and use a minimalist display: one open book, a pressed botanical, a ceramic dish, and a few meaningful objects.
Common Mistakes to Avoid
The first mistake is building the frame before measuring the window carefully. Old windows are often not perfectly square, so measure the actual piece, not what you assume it “should” be. The second mistake is making the storage box too deep. Deep storage sounds practical, but it can make the table bulky and turn delicate keepsakes into a dark archaeological dig.
The third mistake is skipping safety glass considerations. If the window will be used in a busy home, replacing old glass is often worth the cost. The fourth mistake is using weak hinges. Choose hardware that can support the window’s weight and open smoothly. Finally, do not forget felt pads under the legs. They protect your floor and make the table easier to move when you inevitably rearrange the room at 10:47 p.m. because “something feels off.”
Maintenance Tips for Your Window Coffee Table
Clean the glass with a soft cloth and glass cleaner, spraying the cloth instead of the table to avoid liquid seeping into the frame. Dust the wood regularly and wipe spills immediately. If the lid gets heavy use, check hinge screws every few months. If the table stores delicate paper items, keep it away from direct sunlight to reduce fading.
Rotate the display seasonally if you enjoy decorating. In spring, try pressed flowers and garden notes. In summer, use travel souvenirs. In fall, display vintage book pages, acorns, and warm-toned photos. During the holidays, add ornaments, ribbon, old cards, or tiny wrapped boxes. The table becomes a flexible display case, which is just a fancy way of saying your living room now has a mood ring.
Budget-Friendly Ways to Make the Project Easier
Look for old windows at architectural salvage stores, flea markets, yard sales, online marketplaces, and home reuse centers. If you already have an outdated coffee table, reuse its legs or base. Scrap plywood can become the bottom panel. Leftover paint from another room can create a coordinated look. Even small details such as thrifted drawer pulls, old cabinet hinges, or leftover wallpaper can make the piece feel custom.
If you do not own power tools, many home improvement stores can cut lumber to size. You can also design the table around standard board lengths to reduce cutting. The project does not have to be complicated to look impressive. In fact, the charm often comes from the simple combination of old glass, honest wood, and meaningful objects.
Experience Notes: What This Project Teaches You in Real Life
Making a coffee table out of an old window is one of those DIY projects that looks simple on paper and then quietly teaches you several life lessons, usually while you are kneeling on the floor looking for a screw that vanished into another dimension. The first lesson is that old materials have opinions. A brand-new board from the lumber aisle is predictable. An old window, on the other hand, may be slightly bowed, uneven, patched, painted six times, and still somehow beautiful. Instead of forcing it to behave like factory-made furniture, the best approach is to work with its character.
One practical experience is learning to measure more than once. With salvaged windows, the left side may be a quarter inch different from the right side. The corners may not be perfectly square. If you build the box frame from one quick measurement, you may discover that the lid overhangs oddly or refuses to close. The fix is simple: measure width at the top, middle, and bottom; measure length on both sides; then build for the actual window, not the imaginary perfect rectangle in your head.
Another real-world lesson is that hardware matters more than people think. Cheap hinges can make a lovely table feel wobbly. A lid support can transform the experience from awkward to elegant. Soft felt pads can make the finished table feel polished. These small pieces are not glamorous, but they are the difference between “I made this!” and “Please do not touch that; it has structural emotions.”
The display compartment also teaches restraint. At first, you may want to put every ticket stub, shell, coin, photo, badge, button, and mysterious drawer object inside. But the table looks better when it tells one clear story. A few well-chosen pieces create charm. Too many pieces create visual soup. Try arranging items on the floor first, then edit by removing anything that does not support the theme.
Finally, this project is rewarding because it turns ordinary memories into everyday decor. A vacation shell stops being a dusty object in a box and becomes part of the room. A family photo becomes something guests notice. A salvaged window becomes useful again. The finished coffee table is not just a place to set a mug. It is a small museum of your life, built with your hands, slightly imperfect in the best possible way, and far more interesting than anything that arrived flat-packed with an Allen wrench.
Conclusion
Learning how to make a coffee table out of an old window is a satisfying way to combine DIY furniture building, creative storage, and meaningful home decor. The project is approachable for beginners, flexible for experienced woodworkers, and endlessly customizable. With a sturdy frame, safe glass, reliable hinges, and a thoughtful display, an old window can become a beautiful shadow-box coffee table that stores your treasures while adding vintage character to your living room.
Best of all, this project proves that useful furniture does not have to be boring. Sometimes the most memorable piece in the room starts as something dusty, forgotten, and one yard sale away from the landfill. Add lumber, legs, hardware, and a little imagination, and suddenly that old window has a new job: holding coffee, memories, and the occasional snack plate like it was born for it.
