
Hair Care
How to Curl Bangs with a Curling Iron or Round Brush
Jul
Bangs are tiny, dramatic overachievers. They occupy only a few inches of forehead real estate, yet somehow they can decide whether your whole hairstyle says “effortless chic” or “I fought a ceiling fan and lost.” The good news? Learning how to curl bangs with a curling iron or round brush is much easier once you understand three things: direction, heat control, and how long to let the shape cool before touching it.
Whether you have curtain bangs, side-swept bangs, wispy fringe, bottleneck bangs, long face-framing pieces, or classic blunt bangs, the goal is not to create a stiff sausage curl across your forehead. We are aiming for soft bend, movement, lift, and that little “I woke up stylish” swoop that definitely did not happen by accident.
This guide breaks down the best tools, prep steps, curling iron techniques, round brush methods, fixes for common bang disasters, and real-life styling experiences so you can finally make peace with your fringe. Your bangs may still have opinions, but after this, they will have fewer opportunities to be rude.
Before You Curl: Start with the Right Bang Prep
The best bang styling begins before the curling iron or round brush even enters the scene. Bangs sit against the forehead, which means they collect oil, skincare, sunscreen, sweat, and whatever mystery humidity is floating through the air. If your fringe looks limp five minutes after styling, the problem may not be your technique. It may simply need a cleaner, lighter base.
Style Bangs First
Always style your bangs before the rest of your hair. They dry quickly because they are shorter and thinner than the rest of your hair, and once they dry in the wrong direction, convincing them to behave is like negotiating with a cat. If you are using a round brush, begin when bangs are damp, not soaking wet. If you are using a curling iron, your bangs must be completely dry before heat touches them.
Use Heat Protectant, but Do Not Drench
A heat protectant is essential when styling bangs with a curling iron, blow dryer, hot brush, or round brush and dryer combo. The trick is using a light mist, not a monsoon. Hold the product several inches away and spray lightly, then comb through for even distribution. Too much product can make bangs greasy, heavy, or separated into sad little fringe noodles.
Choose Lightweight Products
For fine bangs, use a root-lifting spray, dry shampoo, or lightweight mousse. For thick or coarse bangs, try a smoothing cream in a very small amount. For curly bangs, use a lightweight curl cream or leave-in conditioner before shaping. Avoid heavy oils near the roots unless your goal is “forehead curtain after a rainstorm.”
Best Tools for Curling Bangs
The right tool depends on your bang length, hair texture, and desired finish. A curling iron gives a more defined bend or swoop. A round brush gives bounce, polish, and airy volume. Many people get the best results by using both: round brush first for lift, curling iron second for targeted shape.
Curling Iron Size Guide
For short bangs, use a small barrel around 3/4 inch to 1 inch, but be careful not to overcurl. For curtain bangs or longer face-framing bangs, a 1-inch to 1.25-inch curling iron usually creates a soft, flattering bend. A larger barrel gives a looser swoop, while a smaller barrel gives more curl and control.
Round Brush Size Guide
For short or blunt bangs, use a small round brush so you can grip the hair without losing control. For curtain bangs, a medium round brush works beautifully because it creates lift at the root and curve through the ends. A larger brush creates more volume and less curl, which is great for long bangs but may be too bulky for short fringe.
Helpful Extras
A blow dryer with a concentrator nozzle helps direct airflow and reduce frizz. Velcro rollers can set the shape while your hair cools. A fine-tooth comb helps control cowlicks. Clips keep the rest of your hair out of the way. Flexible hairspray locks everything in without giving your bangs the crunchy personality of uncooked spaghetti.
How to Curl Bangs with a Curling Iron
A curling iron is perfect for creating polished curtain bangs, side-swept fringe, retro flips, or a soft bend on stubborn pieces. The secret is to use gentle tension, low-to-medium heat, and a very short hold time. Bangs are close to your face, so this is not the moment to multitask, text, or prove your bravery.
Step 1: Dry and Detangle Your Bangs
Make sure your bangs are 100 percent dry. Curling damp hair with a hot iron can cause damage and frizz. Brush through your fringe so there are no knots, tangles, or product clumps. If your bangs are freshly washed and too soft, add a tiny amount of dry shampoo or texture spray for grip.
Step 2: Section the Bangs
Separate your bangs from the rest of your hair. For curtain bangs, split them down the center or wherever you normally part them. For blunt bangs, divide them into two or three small horizontal sections if they are thick. Smaller sections give you more control and prevent that dreaded single-piece helmet curl.
Step 3: Set the Right Temperature
Use the lowest heat setting that still shapes your hair. Fine, fragile, color-treated, or bleached bangs usually need less heat. Thick or coarse hair may require more, but you should still avoid holding the iron on the hair for too long. Bangs are short, exposed, and easy to overcook. Think “toast lightly,” not “campfire marshmallow.”
Step 4: Curl Away from the Face for Curtain Bangs
For curtain bangs, clamp or wrap one side around the barrel and rotate the iron away from your face. Hold for only a few seconds, then release gently. Repeat on the other side, again curling away from the face. This creates that open, face-framing shape that makes curtain bangs look soft instead of squished.
Step 5: Curl Under for Blunt Bangs
For blunt bangs, place the iron horizontally near the middle or ends of the fringe and roll slightly under. Do not curl all the way to the root unless you want a very rounded vintage look. For a modern finish, curl only the ends enough to bend them inward. The result should look smooth and intentional, not like a bumper on a tiny hair car.
Step 6: Let the Curl Cool
This step is where many bang dreams go to perish. After releasing the curl, do not immediately brush it, tug it, or panic. Let the hair cool in its new shape for a minute. Hair sets as it cools, so touching it too soon can flatten the curl before it has committed to the assignment.
Step 7: Break Up and Shape
Once cool, use your fingers or a wide-tooth comb to soften the curl. For curtain bangs, pinch the ends and sweep them outward. For side-swept bangs, brush them gently across the forehead and secure the direction with flexible hairspray. For blunt bangs, lightly comb downward and tap the ends into place.
How to Curl Bangs with a Round Brush
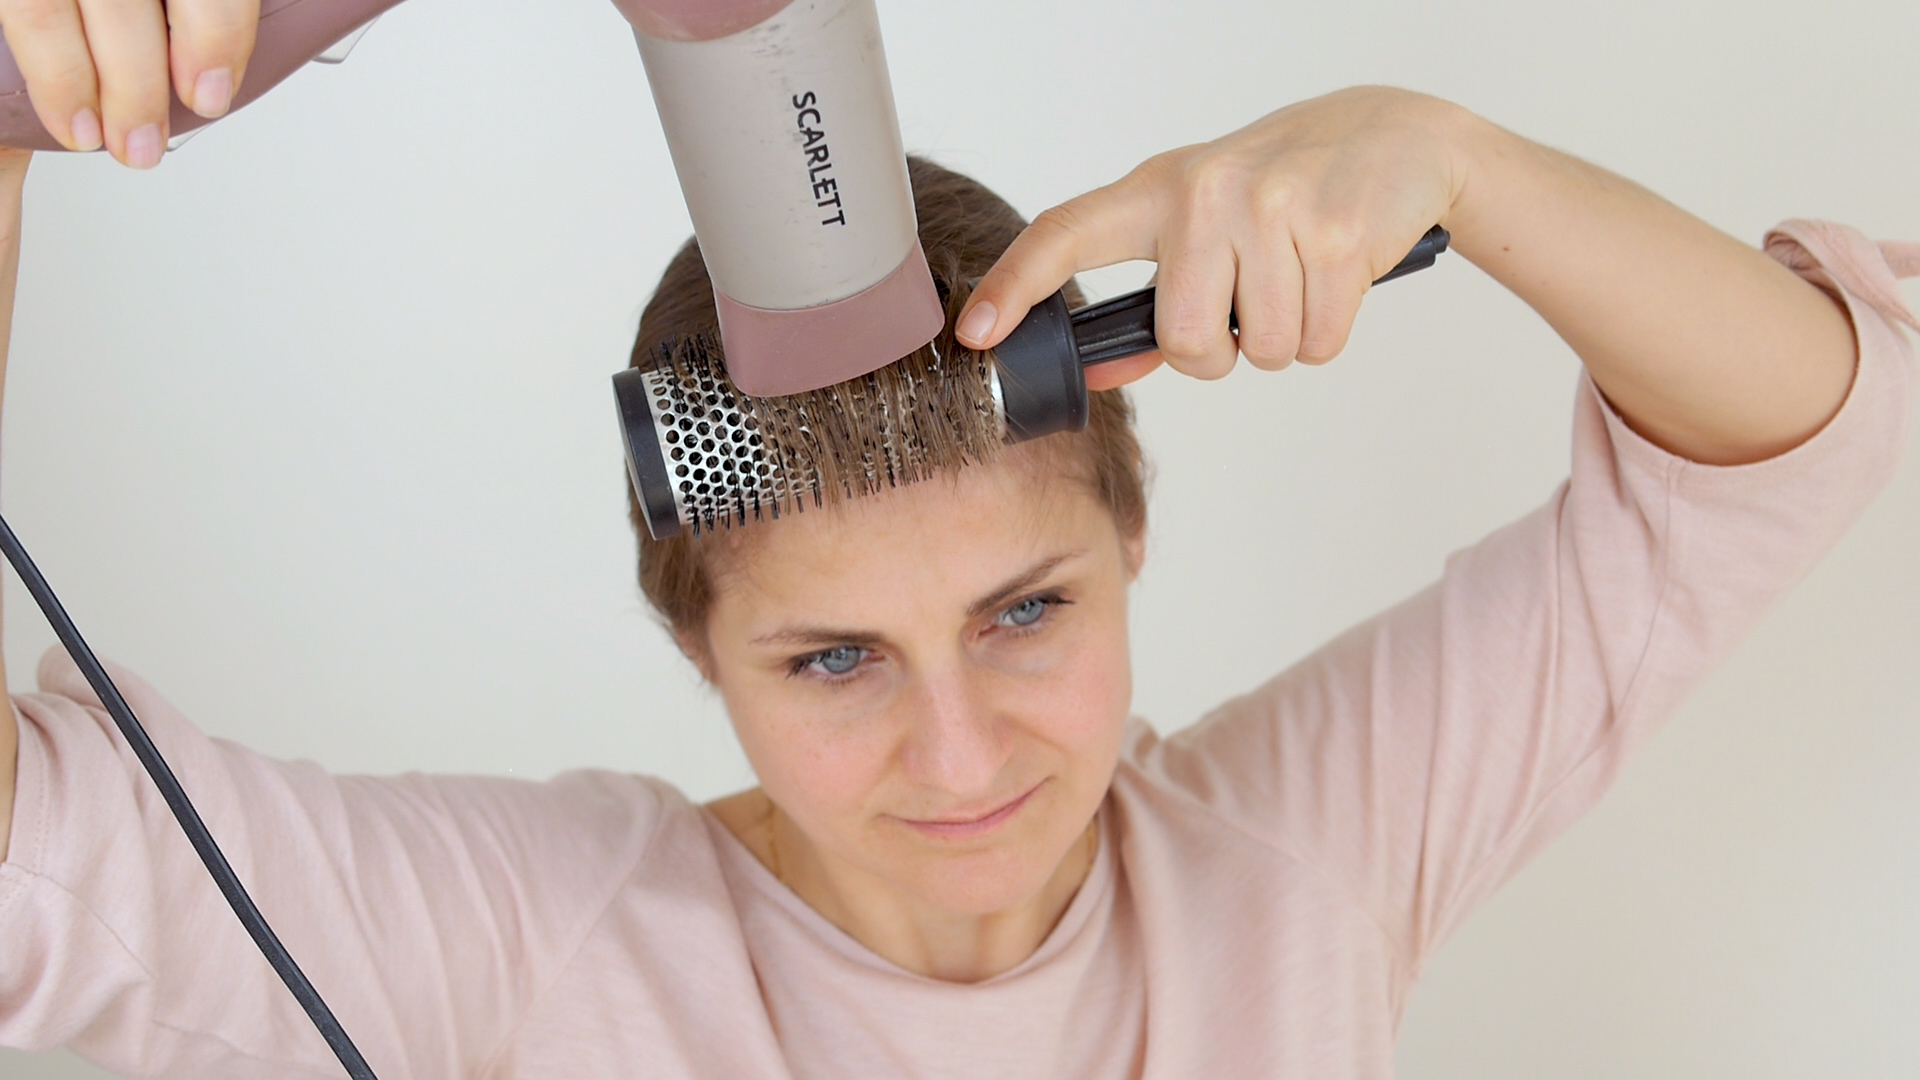
A round brush is the best choice when you want volume, bounce, smoothness, and a natural-looking curve. It is also less dramatic than a curling iron, which makes it ideal for everyday styling. The round brush method works especially well on damp bangs, second-day fringe that has been lightly misted with water, or bangs that need root direction corrected.
Step 1: Start with Damp Bangs
Your bangs should be damp but not dripping. If they are too wet, they will take longer to style and may frizz. If they are too dry, they may not reset properly. A spray bottle is your best friend here. Lightly mist the bangs until they are flexible again.
Step 2: Blow-Dry Side to Side
Before creating curl, rough-dry your bangs side to side using your fingers, a comb, or the round brush. Move them left, then right, then forward. This helps neutralize cowlicks and stubborn part lines. It also keeps the roots from drying flat against your forehead.
Step 3: Add Lift at the Roots
Place the round brush under the bangs at the root, lift upward, and aim the dryer’s nozzle down the hair shaft. This smooths the cuticle and builds volume. Keep the dryer moving so you do not overheat one spot. Your scalp is not a panini press and should not be treated like one.
Step 4: Roll the Ends
For blunt bangs, roll the brush slightly under at the ends while drying. For curtain bangs, pull the brush forward first, then roll each side away from the face. For side bangs, pull the brush down and toward the side where you want the fringe to fall. The direction you dry is the direction your bangs will remember.
Step 5: Use the Cool Shot
Once the bangs are dry and wrapped around the brush, hit them with the cool-shot button for a few seconds. Cooling helps lock in the bend and reduces the chance of immediate collapse. If your dryer does not have a cool shot, simply hold the brush in place for a few moments after turning off the heat.
Step 6: Finish with Fingers
Remove the brush carefully and shape the bangs with your fingers. Do not yank the brush out or you may create frizz. Curtain bangs often look best when you pinch the center lightly, sweep the sides outward, and let the ends blend into the rest of your hairstyle.
Curling Techniques by Bang Type
Curtain Bangs
Curtain bangs need lift at the center and movement away from the face. Use a medium round brush to blow-dry them forward first, then split them and roll each side away from your face. If using a curling iron, curl each side outward with a 1-inch or 1.25-inch barrel. Let cool, then brush lightly for a soft, swooping finish.
Side-Swept Bangs
Side-swept bangs look best when they are smooth at the root and curved through the ends. Blow-dry them in the opposite direction first to create volume, then guide them back to the preferred side. With a curling iron, use one gentle bend rather than a full curl. Finish with a little flexible hairspray under the bang, not on top, to avoid stiffness.
Blunt Bangs
Blunt bangs need polish without too much puff. Use a small round brush and roll only the ends under. With a curling iron, tap the ends into a slight curve instead of wrapping the whole bang section around the barrel. Too much curl can make blunt bangs shrink upward, and suddenly your chic fringe is auditioning for a school photo from 1996.
Wispy Bangs
Wispy bangs need a light touch. Use low heat, small sections, and minimal product. A round brush can create soft separation, while a curling iron can define a few pieces. Avoid heavy hairspray or creams because wispy bangs can clump quickly.
Curly Bangs
Curly bangs do not always need a curling iron. Often, the best method is to apply curl cream, finger-coil a few pieces, and diffuse gently. If you want to reshape one stubborn curl, use a small curling iron that matches your natural curl pattern. Wrap the curl in the same direction it naturally wants to go, then let it cool completely.
Common Bang Curling Mistakes
Mistake 1: Using Too Much Heat
Bangs are short and fragile compared with the rest of your hair. Too much heat can make them dry, frizzy, or oddly stiff. Use a lower temperature, keep contact brief, and always apply heat protectant.
Mistake 2: Curling Too Close to the Root
Unless you are intentionally creating a retro rounded bang, curling from the root can create too much height. Start around the middle or ends for a softer, more modern shape.
Mistake 3: Touching the Curl Too Soon
If your bangs fall flat immediately, you may be brushing them before they cool. Let the shape set first. Then soften it gently.
Mistake 4: Using Heavy Products
Bangs live on the oiliest part of the face. Heavy creams, gels, waxes, or shine oils can make them separate and droop. Use lightweight styling products and save rich formulas for the mid-lengths and ends of the rest of your hair.
Mistake 5: Fighting Your Natural Part
If your bangs split in the same place every day, you may have a cowlick or strong growth pattern. Blow-dry the roots side to side while damp before shaping. Once the root direction is set, curling becomes much easier.
How to Make Curled Bangs Last Longer
To keep curled bangs in place, start with clean or refreshed roots. Use dry shampoo before your bangs look oily, not after they have already collapsed. Set the shape with cool air, let it cool fully, and finish with flexible hairspray. Avoid touching your bangs throughout the day because fingers transfer oil.
If you sleep on styled bangs, clip them loosely to the side or use a soft roller at the front. A silk or satin pillowcase can reduce friction and help prevent morning frizz. In humid weather, use an anti-frizz spray or lightweight texture spray, but keep the application minimal.
Quick Fixes for Bang Emergencies
If Your Bangs Are Too Puffy
Mist them lightly with water, then blow-dry downward using a small round brush or paddle brush. Avoid rolling too tightly under. Finish by pressing the bangs gently with your fingers while they cool.
If Your Bangs Are Too Flat
Lift the roots with a round brush and blow-dry upward for a few seconds. Add dry shampoo at the root for grip, then use the cool shot. A Velcro roller placed at the bang area for five minutes can also revive volume.
If Curtain Bangs Will Not Swoop
Blow-dry the entire bang section forward first. Then part it and roll each side away from the face. If needed, use a curling iron on the ends only, curling outward. Let cool before separating.
If Bangs Look Greasy
Apply dry shampoo underneath the bangs at the root, wait a minute, then brush through. You can also wash only your bangs in the sink, which feels ridiculous the first time and genius every time after that.
Real-Life Experience: What Actually Works When Curling Bangs
After experimenting with bangs in real life, one truth becomes clear: bangs do not care how busy you are. They demand attention early, preferably before coffee, and they know when you are rushing. The biggest lesson is that styling bangs first makes everything easier. When I used to dry the rest of my hair and save the bangs for last, they would already be half-dry in whatever shape they chose. Usually, that shape was “confused comma.” Once I started misting and styling the bangs immediately, the final result looked smoother, softer, and much more intentional.
The round brush method is the most forgiving for daily styling. It gives that airy, natural bend that looks polished without looking too “done.” For curtain bangs, drying them forward before splitting them is a game changer. It feels wrong at first because you are pulling the hair straight toward your nose, but that forward motion creates root lift. Then, when each side is rolled away from the face, the bangs open beautifully instead of falling flat against the forehead.
The curling iron method is better when the bangs need more structure. For example, if the weather is humid, if the bangs are freshly washed and slippery, or if one side is flipping in a completely different direction, a curling iron can restore order quickly. The key is restraint. Holding the iron for too long creates a curl that looks too tight, too round, or too theatrical for everyday wear. A few seconds is usually enough. The goal is a bend, not a cinnamon roll.
Another practical lesson: dry shampoo is not just for dirty hair. A tiny bit of dry shampoo on clean bangs gives them grip and keeps them from sticking to skincare or sunscreen. This is especially helpful if you have fine hair or oily skin. However, too much dry shampoo can make bangs dull and powdery, so apply it underneath, wait, and brush it through.
For short blunt bangs, the best result often comes from barely curling the ends. It is tempting to use the round brush like a full roller, but that can make bangs bounce up too high. A slight undercurve looks cleaner and more modern. For longer curtain bangs, a medium round brush or 1.25-inch curling iron gives a prettier swoop because the bend is loose and face-framing.
The final lesson is emotional: do not judge bangs while they are still hot. Freshly curled bangs can look too big, too curled, or just plain suspicious. Let them cool, brush them gently, and give them a minute to relax. Bangs are like pancakes: the first attempt may be weird, but once you understand the heat, timing, and flip, everything starts making sense.
Conclusion
Learning how to curl bangs with a curling iron or round brush is really about learning how your fringe responds to direction, heat, and cooling time. A curling iron creates a stronger bend for curtain bangs, side bangs, and stubborn pieces, while a round brush gives volume, smoothness, and soft everyday movement. Prep lightly, protect your hair from heat, style bangs while they are damp if blow-drying, and make sure they are fully dry before using a curling iron.
For the most flattering finish, keep the curl soft and flexible. Curl curtain bangs away from the face, bend blunt bangs only at the ends, and use your fingers to shape the final look. When bangs misbehave, reset the roots with water and airflow instead of piling on more product. With a little practice, your bangs can go from forehead chaos to face-framing magicand they might even let you leave the house on time.

