Hair Care
How to Clean an Ice Maker: Countertop and Refrigerator
Jun
Ice is one of those kitchen luxuries we forget is actually food. It goes straight into water, iced coffee, lemonade, smoothies, cocktails, lunch boxes, and the occasional “I just bumped my elbow on the cabinet” emergency bag. But unlike a cutting board or coffee mug, an ice maker can quietly collect mineral deposits, food odors, mold, slime, and mystery freezer funk while nobody is looking. Charming? Not exactly. Fixable? Absolutely.
Learning how to clean an ice maker is simple once you understand the difference between cleaning, descaling, and sanitizing. Cleaning removes visible dirt and residue. Descaling dissolves mineral buildup from hard water. Sanitizing reduces germs on food-contact surfaces. A countertop ice maker usually needs more frequent attention because it holds standing water and often lives in warm kitchens. A refrigerator ice maker typically needs less frequent cleaning, but its bin, chute, dispenser area, and water filter still deserve regular care.
This guide explains how to clean both countertop and refrigerator ice makers safely, what supplies to use, how often to do it, and how to prevent cloudy, smelly, or clumpy ice from making your drink taste like “freezer basement.”
Why Cleaning Your Ice Maker Matters
Ice makers combine water, cold temperatures, plastic surfaces, moving parts, and tiny spaces. That sounds clean, but it is also the perfect place for mineral scale and biofilm to form if the machine is ignored. Hard water leaves calcium and limescale deposits. Freezer odors can settle into ice. Dust and kitchen grease can cling to countertop units. If the water reservoir is left wet between uses, the machine can start smelling stale.
Dirty ice does not always look dramatic. Sometimes the first sign is cloudy cubes. Sometimes the machine makes less ice than usual. Sometimes the ice tastes like last week’s onion leftovers even though the onion leftovers deny everything. Other warning signs include visible flakes, slime, mold spots, slow water flow, clumped ice, unusual noise, or ice that melts into cloudy water with floating particles.
Regular ice maker maintenance improves taste, protects the machine, and helps the ice maker run more efficiently. It also keeps you from serving guests a glass of “refreshing mineral buildup with a hint of freezer.”
Cleaning vs. Descaling vs. Sanitizing
Cleaning
Cleaning removes dirt, spills, residue, and loose debris. For ice bins, scoops, drip trays, and removable baskets, warm water and mild dish soap are usually enough. Use a soft sponge, microfiber cloth, or soft-bristle brush. Avoid abrasive pads because they can scratch plastic surfaces and create tiny hiding places for grime.
Descaling
Descaling targets mineral buildup caused by hard water. White vinegar or a manufacturer-approved ice machine cleaner is commonly used for this step. Vinegar helps dissolve limescale, but it is not a powerful sanitizer. A commercial ice machine cleaner may work faster, but it must be approved for your machine and used exactly as directed.
Sanitizing
Sanitizing is used when you need to reduce germs on food-contact surfaces. Some refrigerator ice maker instructions allow a diluted bleach solution, while many countertop ice makers warn against bleach or require specific cleaners only. Always check the manual first. Never mix bleach with vinegar, ammonia, or any other cleaner. That is not a cleaning hack; that is a chemistry problem wearing rubber gloves.
How Often Should You Clean an Ice Maker?
For most countertop ice makers, clean the basket, scoop, and reservoir every two to three weeks during regular use. If you use the machine daily, live in a hard-water area, or run it heavily during summer, weekly cleaning may be smarter. Descale every one to three months, depending on water quality and manufacturer guidance.
For refrigerator ice makers, clean the ice bin every one to three months and deep clean the ice maker area about every six months. Replace the refrigerator water filter according to the brand’s recommendation, often around every six months, or sooner if water flow slows, the ice tastes odd, or the filter indicator turns on.
Clean immediately if you notice cloudy ice, flakes, bad smells, black or pink residue, clumped cubes, slow ice production, or visible scale. The calendar is helpful, but your nose and eyes also get a vote.
Supplies You Need
- Mild dish soap
- Warm water
- White distilled vinegar or approved ice machine cleaner
- Soft microfiber cloths
- Soft sponge
- Soft-bristle brush or clean toothbrush
- Clean towel
- Small bowl or measuring cup
- Replacement refrigerator water filter, if needed
- Food-safe sanitizer, only if your manual recommends it
Avoid harsh scouring pads, scented cleaners, glass cleaner, oven cleaner, bathroom sprays, and random miracle products from the back of the cabinet. Ice touches the surfaces you clean, so the safest cleaner is the one your owner’s manual approves.
How to Clean a Countertop Ice Maker
Countertop ice makers are convenient, fast, and slightly magical. They are also the machines most likely to be forgotten after the party ends. Because many models recycle meltwater into the reservoir, regular cleaning is essential.
Step 1: Turn Off and Unplug the Machine
Safety first. Turn off the countertop ice maker and unplug it. Remove any remaining ice from the basket and throw it away. Do not save ice from a dirty machine for later. That is like mopping the floor and then licking the mop.
Step 2: Drain the Water Reservoir
Move the unit near a sink if needed. Remove the drain plug and let all water empty out. Replace the plug once the reservoir is drained. If your model has a water line, side tank, or special drain hose, follow the manufacturer’s instructions.
Step 3: Wash Removable Parts
Remove the ice basket, scoop, drip tray, and any washable accessories. Clean them with warm water and mild dish soap. Rinse thoroughly and dry with a clean towel. Do not assume parts are dishwasher-safe unless the manual says so. Heat can warp plastic, and warped plastic is rarely in the mood to cooperate.
Step 4: Wipe the Interior
Use a soft cloth dampened with warm soapy water to wipe the inside walls, lid, reservoir, and reachable corners. A clean toothbrush can help around seams, sensors, and water openings. Do not scrape evaporator fingers or metal freezing rods unless your manual specifically allows it. These parts can be delicate.
Step 5: Descale With Vinegar or Approved Cleaner
If you see white crust, chalky film, cloudy deposits, or slow ice production, descale the machine. Many countertop models can be cleaned with a vinegar-water solution, while others recommend a branded cleaner. A common gentle approach is equal parts white vinegar and water, but some manufacturers specify different ratios or cleaning cycles.
Pour the descaling solution into the reservoir up to the fill line. Run the cleaning cycle if your machine has one. If it does not, run one ice-making cycle, then discard every cube. Let the solution sit for 10 to 30 minutes if the buildup is stubborn, unless the manual says otherwise.
Step 6: Rinse Until the Smell Is Gone
Drain the solution. Refill the reservoir with clean water and run at least two rinse cycles. Discard all ice from those cycles. If you still smell vinegar or cleaner, rinse again. The goal is fresh ice, not salad dressing nuggets.
Step 7: Dry Before Storage
After cleaning, drain the reservoir completely and wipe the interior dry. If you are storing the ice maker, leave the lid open for a while so moisture can evaporate. A dry machine is much less likely to develop stale odors.
How to Clean a Refrigerator Ice Maker
Refrigerator ice makers are different from countertop models because many parts are built into the freezer. You may not be able to remove every component, and you should not force anything. The main goals are to clean the bin, dispenser chute, visible ice maker area, and water system maintenance points.
Step 1: Turn Off the Ice Maker
Use the ice maker switch, control panel, wire arm, or app setting to turn the ice maker off. If you will be wiping inside the freezer near electrical parts, unplug the refrigerator or follow the safety instructions in your manual. Keep freezer doors closed as much as possible so food stays cold.
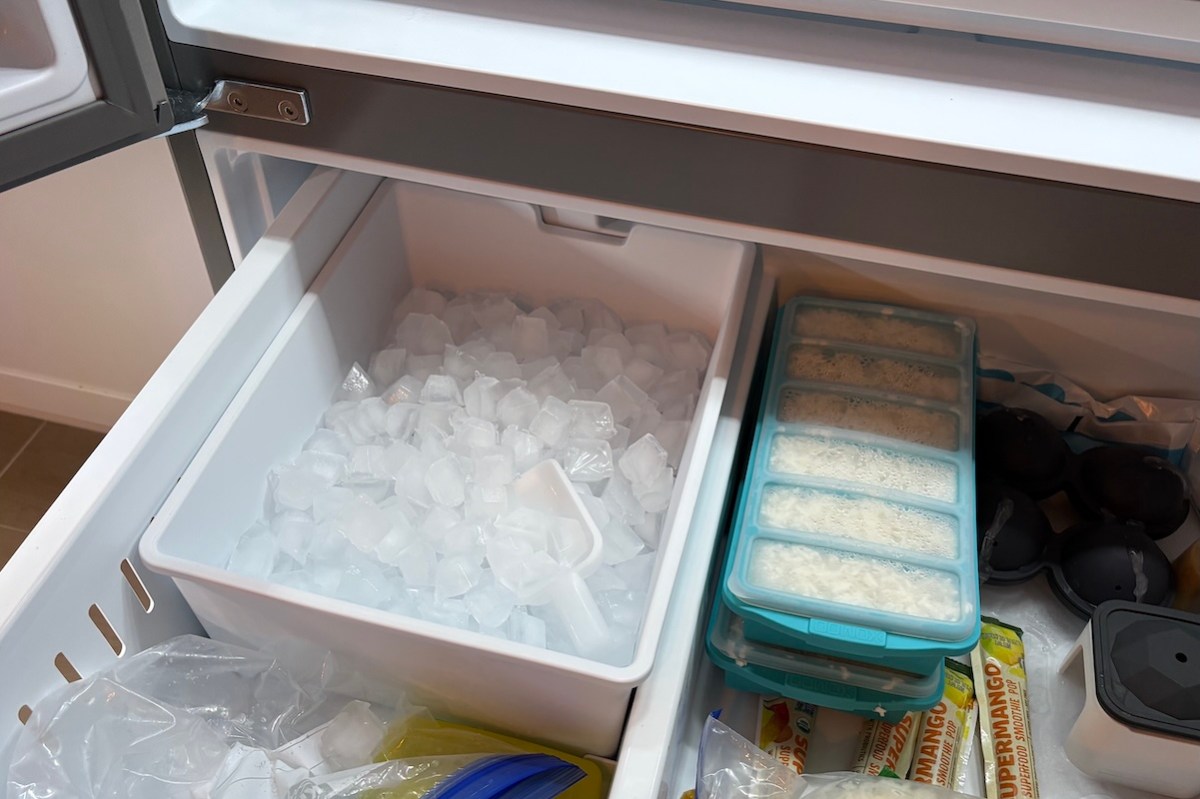
Step 2: Remove and Empty the Ice Bin
Pull out the ice bin according to your model’s instructions. Some bins slide straight out; others lift slightly first. If the bin is stuck because cubes have frozen into one block, do not attack it with a knife. Let it sit for a few minutes, gently break up loose ice, or follow the brand’s thawing guidance.
Step 3: Wash the Ice Bin
Wash the bin with warm water and mild dish soap. Use a soft sponge to remove residue. Rinse very well because soap residue can flavor ice. Dry the bin completely before replacing it. Moisture left in the bin can freeze into clumps and make the dispenser grumpy.
Step 4: Wipe the Ice Maker Area
Use a damp microfiber cloth to wipe reachable surfaces around the ice maker, including the shelf, rails, and surrounding freezer area. For sticky spots, use mild soap and water, then wipe again with plain water. Avoid spraying cleaner directly into the ice maker mechanism.
Step 5: Clean the Dispenser Chute and Paddle
If your refrigerator has an in-door ice dispenser, clean the chute, dispenser paddle, and drip tray. Use a soft cloth with mild soap and water, then rinse with a clean damp cloth. Vinegar and water can help remove light mineral deposits around the dispenser area. Dry thoroughly so ice does not freeze inside the chute.
Step 6: Sanitize Only When the Manual Allows It
Some refrigerator brands allow a diluted bleach solution for disinfecting the ice bin or interior surfaces, followed by a plain-water wipe and complete drying. Other models may recommend avoiding bleach. If sanitizing is needed because of visible mold, contamination, or a long period of non-use, follow the manufacturer’s ratio exactly and rinse thoroughly. Never run bleach through a water line or ice maker unless the manufacturer specifically instructs you to do so.
Step 7: Replace the Water Filter
A clogged or expired water filter can reduce water flow, affect ice quality, and contribute to strange tastes. Replace the filter on schedule, usually about every six months for many refrigerators. After installing a new filter, flush the water dispenser as directed and discard the first batches of ice.
Step 8: Restart and Discard the First Ice
Put the clean, dry bin back in place. Turn the ice maker on. Throw away the first batch or two of ice after cleaning, especially if you used vinegar, sanitizer, or installed a new filter. Fresh ice should be clear of odors, residue, and cleaner taste.
How to Remove Odors From Ice
If your ice tastes like frozen leftovers, the ice maker may not be the only suspect. Ice absorbs odors from the freezer. Open containers, spilled food, old freezer bags, and strong-smelling items can all affect flavor. Clean the freezer interior, toss mystery leftovers, and store food in sealed containers.
Place a fresh box of baking soda in the freezer and refrigerator compartments to help control odors. Do not sprinkle loose baking soda near the ice maker or ice tray. Fine powder can circulate and settle where it does not belong.
If the water from your sink tastes the same as the ice, the issue may be your home water supply rather than the refrigerator. If the water tastes fine but the ice tastes bad, focus on the filter, bin, dispenser chute, freezer odors, and cleaning schedule.
Common Mistakes to Avoid
Using Too Much Cleaner
More cleaner does not mean cleaner ice. It means more rinsing and possibly a bad taste. Use the recommended amount and rinse until the machine smells neutral.
Skipping the Rinse Cycles
After vinegar, descaler, or sanitizer, rinse cycles are not optional. Discard the first ice. Yes, it feels wasteful. No, you should not put it in your drink.
Forcing Frozen Parts
If a bucket, tray, or chute is frozen in place, forcing it can crack plastic or damage the mechanism. Let it thaw safely or follow the manual.
Ignoring Hard Water
Hard water causes scale faster. If your kettle, faucet, or showerhead gets white buildup, your ice maker probably does too. Filtered or distilled water can reduce deposits in countertop units.
Using Scented Products
Lemon-scented cleaner sounds cheerful until your ice tastes like a cleaning aisle. Stick with mild dish soap, white vinegar, or approved cleaners.
Quick Maintenance Checklist
- Empty old ice weekly if you do not use much ice.
- Wash the ice scoop regularly and store it outside the ice bin.
- Keep the freezer clean and food tightly sealed.
- Clean countertop reservoirs every few weeks.
- Descale when ice production slows or white deposits appear.
- Replace refrigerator water filters on schedule.
- Dry removable parts before reinstalling them.
- Discard the first ice after cleaning or filter replacement.
Real-World Experience: What Actually Works When Cleaning Ice Makers
After cleaning different types of ice makers, the biggest lesson is that most problems start small. A countertop ice maker may look fine from the outside, but the water reservoir can hide a slick film near the corners. The scoop may be clean, but the basket may have mineral spots. A refrigerator bin may seem harmless until you empty it and find frozen crumbs, cloudy shards, and a smell that can only be described as “old freezer wearing a wet sweater.”
The easiest routine is to clean before the machine looks dirty. With countertop units, draining the reservoir after heavy use makes a huge difference. If the machine is used for a weekend party, it is better to empty it, wipe it, and leave the lid open overnight than to let leftover water sit until the next family gathering. Standing water is where odors begin. A two-minute wipe-down can prevent a thirty-minute deep clean later.
Vinegar is useful, but patience matters. For light scale, one cleaning cycle may be enough. For stubborn mineral buildup, letting vinegar sit for a short period helps loosen deposits. However, vinegar needs serious rinsing. If you rush the rinse step, the next batch of ice can taste sharp and sour. The best test is simple: smell the reservoir after rinsing. If it still smells like vinegar, keep rinsing.
Refrigerator ice makers are more about odor control and filter discipline. Many people blame the ice maker when the real culprit is uncovered food in the freezer. Ice is basically a tiny frozen sponge for smells. If the freezer has open bags of fish, onion, garlic bread, or freezer-burned leftovers, the ice will eventually join the flavor committee. Cleaning the bin helps, but sealing food and replacing old freezer items often fixes the taste faster.
Another practical tip: dry everything. A clean ice bin that goes back into the freezer wet can create clumps almost immediately. Those clumps can jam the dispenser, block the chute, and make the machine sound like it is chewing gravel. Drying the bin with a clean towel takes one extra minute and prevents a lot of annoyance.
The most overlooked part is the ice scoop. People wash the machine, rinse the bin, replace the filter, and then toss the same sticky scoop back into the ice. Store the scoop in a clean holder outside the bin whenever possible. Hands should not dig through ice, even if everyone in the house insists their hands are “basically clean.” Ice deserves better manners.
Finally, keep a small maintenance note near the refrigerator or inside a kitchen app. Write down the last cleaning date and filter replacement date. Ice maker maintenance is not difficult; it is just easy to forget. Once it becomes part of the kitchen routine, the reward is simple: better-tasting ice, fewer weird smells, and a machine that does its job without drama.
Conclusion
Cleaning an ice maker is not glamorous, but it is one of the easiest ways to improve everyday drinks and protect your appliance. Countertop ice makers need frequent draining, wiping, descaling, and careful rinsing because they hold water and operate in warm kitchen spaces. Refrigerator ice makers need clean bins, dry dispenser chutes, fresh filters, sealed freezer food, and occasional deep cleaning. Use mild soap for removable parts, vinegar or approved cleaner for scale, and sanitizer only when the manual allows it. Most importantly, rinse thoroughly and discard the first ice after cleaning.
Fresh ice should taste like nothing. That is the whole point. When your ice maker is clean, your water tastes better, your iced coffee behaves itself, and your freezer stops contributing mystery flavors to every glass.
Note: Always check your specific owner’s manual before using vinegar, bleach, descaling solution, or sanitizer. Different ice maker models have different materials, cleaning cycles, and safety requirements.
