
Makeup
Easy Succulent Container Gardening Ideas for Beginners
Jul
Succulents are the gateway plant of the gardening world. They’re cute, sculptural, and surprisingly forgivingprovided you follow the
one rule they take very personally: don’t keep their feet wet. Think of succulents like cats in plant form. They enjoy bright
spots, hate soggy conditions, and thrive when you’re affectionate… from a respectful distance.
If you’ve ever wanted a little “mini garden” you can build in an afternoon (and keep alive past Tuesday), succulent container gardening is
your moment. Below you’ll find beginner-friendly container ideas, simple plant combos, and practical tips to help you avoid the most common
succulent tragedy: loving them too much with a watering can.
Why succulents are perfect for beginner container gardeners
Succulents store water in their leaves, stems, or roots. That’s why they handle missed waterings better than most plants, and why they work
so well in containers. Plus, you can mix different colors, shapes, and texturesrosettes, spikes, beads, paddles, and trailing varietiesin
one pot for a living centerpiece that looks “designer” without needing a degree in botany.
Before you plant: 5 rules that keep succulents alive
1) Choose a container that drains (or “fake” drainage the smart way)
Drainage holes are not optional for most succulents. If water can’t escape, it sits in the pot, the roots suffocate, and rot moves in like an
unwanted roommate who never pays rent.
- Best beginner pots: unglazed terracotta/clay with a drainage hole (breathable and dries faster).
- Also fine: ceramic, concrete, and plasticas long as there’s a drainage hole and you don’t overwater.
-
No-hole container workaround: use it as a decorative cachepot. Keep the succulent in a plastic nursery pot with holes,
set it inside the cute container, and remove it to water and drain completely.
2) Use fast-draining soil (regular potting mix is usually too moisture-happy)
Standard potting soil holds water like a sponge. Succulents prefer a mix that drains quickly and lets air reach roots. The easiest route is a
labeled cactus/succulent mix, then “boost” it for extra drainage.
- Simple beginner mix: 2 parts cactus/succulent soil + 1 part perlite or pumice.
- For very humid climates or indoor low-light spots: go even grittier (equal parts soil and grit).
- Skip “rocks at the bottom” as your only drainage plan: the soil still needs to drain well throughout the pot.
3) Match the plant to your light (not your optimism)
Most succulents want bright light. Indoors, a sunny window is great, but “bright” doesn’t always mean “direct scorching afternoon sun.”
Outdoors, new plants need a gentle transition so they don’t sunburn.
- High light lovers: many echeverias, sedums, agaves, aloes (outdoors or brightest window/grow light).
- Medium light champs: jade plant (Crassula), some aloes, many kalanchoes (note: some are toxic to pets).
- Lower light picks (still bright, just less intense): haworthia and gasteriagreat for desks and shelves near a window.
4) Water like a pro: “soak and dry,” not “sip and worry”
Succulents generally prefer deep, thorough watering followed by a full dry-out period. Water the soil, let excess drain out, and don’t let the
pot sit in a saucer of water. If you’re unsure, wait a day. It’s easier to rescue a thirsty succulent than a rotting one.
- Check before watering: the soil should feel dry several inches down (not just dry on top).
- Season matters: many succulents slow down in winter and need less water.
- Technique tip: water at the base of the plant; avoid filling rosettes with water.
5) Group plants with similar needs
A haworthia that tolerates less light and an echeveria that wants full sun can coexist for a while, but long-term they’ll disagree like roommates
with opposite sleep schedules. For easy success, build containers where everyone likes the same light and watering rhythm.
Easy succulent container gardening ideas for beginners
These ideas are designed to be low-stress, high-reward, and forgiving if you’re still learning your “watering personality.”
1) The “three-pot windowsill” starter set
Start with three small terracotta pots (3–4 inches). This teaches you how different succulents dry out at different speeds without risking a whole
arrangement.
- Pot 1 (rosette): echeveria (brightest spot)
- Pot 2 (architectural): small aloe or gasteria
- Pot 3 (textured): haworthia (handles slightly less intense light)
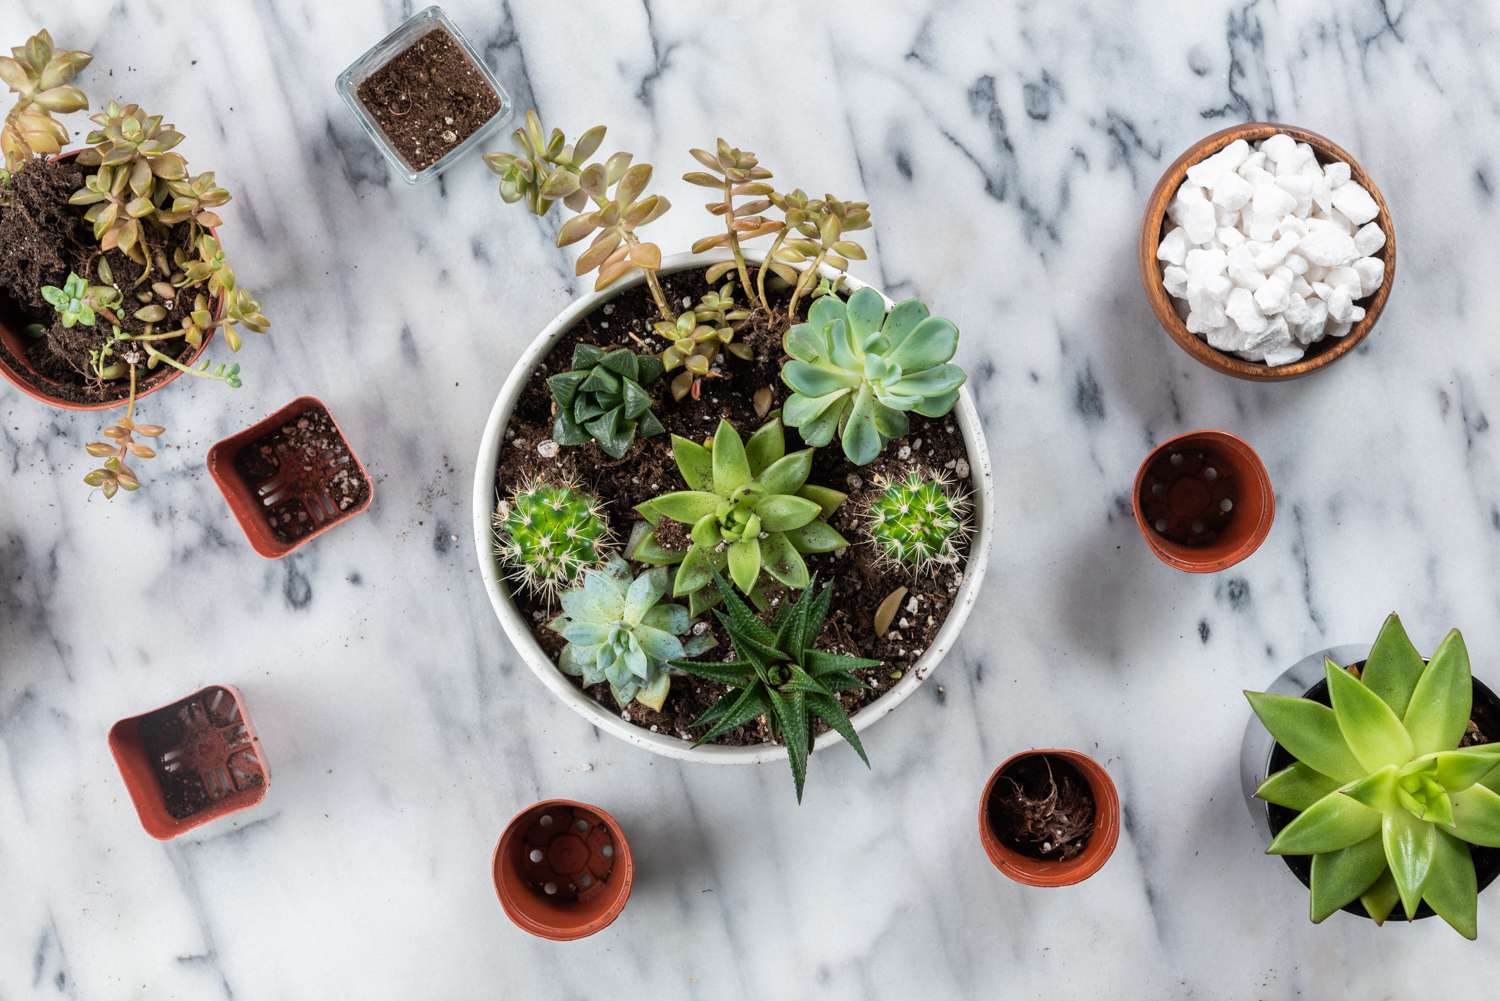
2) A shallow bowl “dish garden” that looks designer
Use a wide, shallow container with drainage (a bonsai pot works beautifully). Arrange plants using the classic container design approach:
thriller, filler, spiller.
- Thriller (tall focal point): small snake plant variety, aloe, or a spiky haworthia
- Fillers (main body): echeveria rosettes, compact sedums
- Spillers (trail over edge): string of bananas (Senecio), burro’s tail (Sedum morganianum), trailing sedums
Add a top dressing (small gravel or pumice) for a finished look and to keep leaves off damp soil.
3) The “cute container with no holes” hack (a.k.a. the cachepot trick)
Want to use a vintage teacup, mug, or thrifted bowl? Don’t drill it (unless you enjoy living dangerously with ceramics). Instead:
- Keep the plant in a nursery pot with drainage holes.
- Place that pot inside the cute container.
- When watering, lift the plant out, water thoroughly in the sink, let it drain, then put it back.
This gives you the look without the root rot.
4) A hanging basket that doesn’t turn into a dripping mess
Hanging succulents are gorgeous, but they dry differently than tabletop pots. Use a basket or hanging pot with drainage and choose plants that
trail naturally.
- Great spillers: string of pearls/bananas, trailing sedums, donkey tail
- Design tip: plant the trailing varieties near the rim so they can cascade.
- Watering tip: take the pot down to water, let it drain fully, then hang it back up.
5) The “hardy succulent trough” for outdoor beginners
If you want an outdoor container that can handle cooler weather, build a trough with hardy succulents like hens and chicks (Sempervivum)
and many sedums. These are great for beginners because they tolerate more temperature swings than many tender succulents.
- Container: a concrete or hypertufa trough with drainage
- Look: miniature rock garden with grit top dressing and a few larger stones
- Placement: outdoors in bright light; protect from waterlogged winter conditions
6) Upcycled colander planter (pretty AND practical)
A metal colander is basically a drainage superhero. Line it with mesh (to keep soil from washing out), add gritty mix, and plant a mix of compact
succulents. It’s a fun patio piece and a sneaky way to avoid overwatering because the container drains fast.
7) A “centerpiece container” that survives the dinner party
Fresh flowers are lovely. A succulent centerpiece is lovely and doesn’t wilt halfway through dessert.
- Shape: low, wide bowl so guests can see over it
- Plants: 3–5 rosette succulents + 1 trailing accent
- Bonus: after the party, it becomes your table decor for months
8) The “one statement plant” container (for the truly cautious)
Beginners often do best starting with one plant per pot. Pick a bold, sculptural succulent in a simple container and treat it like living décor.
- Options: aloe, agave (outdoors in warm climates), jade, large haworthia, snake plant
- Why it works: watering and light needs stay simpleno mixed signals.
9) Mini “party favor” succulents you can actually keep alive
Tiny pots (2 inches) look adorable… and dry out quickly. If you go mini, use a gritty mix, bright light, and check moisture more often.
They make great gifts, desk buddies, and “practice plants” for learning.
10) A vertical frame or wall planter (yes, beginners can do it)
Succulent wall planters look fancy, but the concept is simple: shallow soil + tight planting + bright light + careful watering.
Choose hardy, smaller succulents (sedums, sempervivums) and let the arrangement root in flat for a couple of weeks before hanging.
Step-by-step: How to plant a succulent container garden
- Cover drainage holes with mesh or a small screen so soil doesn’t fall out.
- Fill with gritty mix to within an inch or two of the rim.
- Plan your layout before planting: tallest in back/center, trailers at the edge.
- Loosen roots gently if they’re tightly circling the pot.
- Plant at the right height: keep the crown above soil level so leaves don’t sit in damp mix.
- Top dress with gravel/pumice to keep things tidy and reduce leaf contact with wet soil.
- Wait before watering (especially if you disturbed roots). Giving it a few days can help prevent rot while tiny root breaks heal.
Beginner troubleshooting (because succulents do communicate, just silently)
“It’s getting tall and stretched out.”
That’s etiolation, usually from not enough light. Move the plant to brighter light gradually, rotate the pot weekly, and consider a grow light.
You can also behead and re-root some succulents once you’re comfortable.
“The leaves are mushy or translucent.”
Classic overwatering or poor drainage. Let the soil dry completely, check for rot, and repot into a grittier mix if needed. If the stem is soft,
take healthy cuttings above the damage and start over (succulents are wonderfully forgiving like that).
“The leaves are wrinkled and thin.”
Usually underwateringor roots that can’t absorb water because they’re damaged. Water thoroughly and let it drain. If the soil has become
hydrophobic (water runs straight down the sides), soak the pot briefly from the bottom to rehydrate the mix.
“I see white fluff or tiny bugs.”
That may be mealybugs. Isolate the plant, dab pests with rubbing alcohol on a cotton swab, and monitor weekly. Good airflow and not overwatering
help prevent repeat offenders.
Simple care routine (easy enough to stick with)
| Task | How often | Quick tip |
|---|---|---|
| Check soil dryness | Weekly | Feel several inches down; don’t water just because the top looks dry. |
| Rotate pots | Every 1–2 weeks | Helps prevent leaning and stretched growth. |
| Water deeply | When soil is fully dry | Water until it drains; empty saucers after a few minutes. |
| Fertilize lightly | Spring/summer (optional) | Use a diluted fertilizer; skip in winter for many indoor plants. |
| Repot | Every 1–2 years | Refresh soil and move to a slightly bigger pot if rootbound. |
Real-life experiences beginners tend to have (and how to enjoy them)
Let’s talk about what this hobby actually feels like when you’re newbecause “easy” doesn’t mean “zero learning curve.” Succulent container
gardening is a lot like learning to cook pasta: you can absolutely do it on day one, but your first attempt might involve a little guesswork,
a timer you don’t fully trust, and a dramatic moment where you wonder if you’ve ruined everything. (You haven’t.)
Week 1: The confidence boost
The first experience most beginners have is pure delight. You plant your succulents, top-dress with pretty gravel, and suddenly you have a tiny
landscape on your windowsill. You’ll catch yourself staring at it like it’s a small masterpiece. And it kind of isbecause you made it.
You’ll also notice something fun: succulents look “styled” immediately. There’s no awkward phase where they flop over or pout dramatically like
some houseplants do. They’re show-offs from day one.
Week 2: The urge to water (aka the main villain)
Here comes the most universal beginner experience: the overwhelming desire to water your brand-new plants just because you love them. You’ll
walk by and think, “They’re outside in nature, they get rain, right?” True. But your container isn’t “nature”it’s more like a tiny bathtub
unless drainage and soil are right. Most beginners learn this lesson gently: they water once too soon, then spend a few days anxiously checking
leaves like a plant detective. If you feel that itch, redirect it. Rotate the pot. Wipe dust off leaves. Take a photo and admire your work.
Save watering for when the soil is truly dry.
Week 3: The light mystery
Another common experience is realizing that “near a window” can mean very different things. You might notice one plant leaning toward the glass
or stretching a bit. That’s your succulent politely asking for brighter light. The good news? This is a fixable problem. Beginners often feel
a little proud when they solve itlike you’ve unlocked a secret level. You move the pot, add a grow light, or swap plant placements, and the
container starts looking tighter and healthier. That sense of “I figured it out!” is a huge part of why people fall in love with succulents.
Week 4: Your first propagation win
At some point, a leaf will fall off. Beginners sometimes panic. Experienced succulent people see it as an opportunity. You set the leaf on dry
soil, forget about it (the healthiest approach), and a few weeks later you might spot tiny roots or a baby rosette. It feels like plant magic.
That first propagation success is one of the most joyful experiences in this hobby because it’s proof you’re not just keeping something alive
you’re helping it multiply. Suddenly, you’re the person who says things like “I have extra sedum cuttings if you want some,” and you’ll mean it.
The long-term experience: low drama, high reward
Once you’ve been through the beginner phase, succulent containers become reliably satisfying. You learn your home’s light patterns, your
watering rhythm, and your favorite plant types. Your containers gradually fill in, colors deepen with good sun, and your arrangement starts to
look like a tiny, thriving world. The most surprising experience for many beginners is how calming this is. It’s a small project with visible
progresssomething you can care for without it taking over your schedule. And if a container doesn’t work? You can replant, rearrange, and try
again. Succulents are basically built for second chances.
Conclusion
Succulent container gardening is one of the easiest ways to get a “wow” result without a high-maintenance routine. Start with drainage, use a
gritty mix, match plants to your light, and water only when the soil is truly dry. From windowsill trios to dish gardens and hardy outdoor
troughs, you can build a container that fits your space, your style, and your beginner confidence level. And if you slip up? Don’t worry.
Succulents are resilientespecially when you give them what they really want: bright light, fast drainage, and a little benign neglect.

