
Makeup
Easy DIY Moss Wreath
Aug
A moss wreath has a rare decorating superpower: It looks elegant, natural, and pleasantly expensive even when it was assembled at the kitchen table with a bargain wreath form and a mildly overworked glue gun. Better still, this easy DIY moss wreath can be adapted for spring, summer, fall, Christmas, weddings, or everyday home decor without requiring advanced crafting skills.
The basic project involves covering a wreath form with preserved moss, securing loose areas, and adding a few carefully chosen decorations. The trick is not complicated technique. It is knowing which moss to buy, how to create even coverage, and when to stop adding things before your peaceful woodland wreath becomes a botanical yard sale.
Why Make a DIY Moss Wreath?
A handmade moss wreath brings organic color and texture to a front door, mantel, entryway, dining room, or covered porch. Unlike a strongly seasonal wreath covered in plastic pumpkins or jingling ornaments, a simple green moss wreath can remain on display throughout most of the year.
Preserved sheet moss and reindeer moss are especially useful for crafts because they provide the appearance of natural greenery without the watering schedule required by a living wreath. Moss is also easy to combine with grapevine, twigs, dried flowers, ribbon, berries, faux mushrooms, miniature eggs, pinecones, and other decorative materials.
Home and craft publications frequently recommend foam, straw, grapevine, wire, or ready-made moss forms for wreath projects. Foam forms create a smooth, full circle, while grapevine forms produce a looser woodland appearance. Moss can be attached with hot glue, floral pins, wire, or a combination of methods, depending on the wreath base and the weight of the decorations.
Materials and Tools
Essential supplies
- One 12- to 16-inch foam, straw, grapevine, or wire wreath form
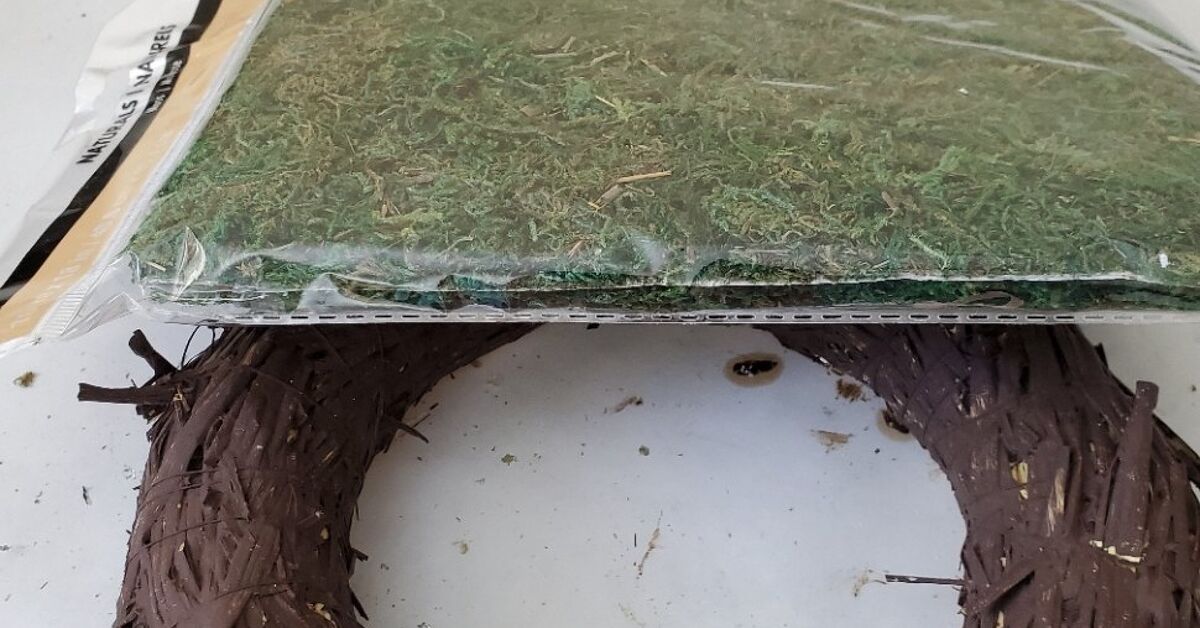
- Preserved sheet moss, reindeer moss, or mixed craft moss
- Low-temperature or standard hot glue gun
- Plenty of glue sticks
- Floral pins, greening pins, or thin floral wire
- Scissors
- Wire cutters, if using floral wire
- Ribbon, twine, or a wreath hanger
- Cardboard, kraft paper, or an old tablecloth to protect the work surface
Optional decorations
- Small branches or twigs
- Dried or artificial flowers
- Faux berries
- Pinecones or acorns
- Miniature mushrooms
- Decorative eggs or butterflies
- Wooden monogram letters
- Velvet, linen, burlap, or satin ribbon
A 16-inch foam form creates a substantial front-door wreath, while a 12-inch form works well for an interior door, cabinet, mirror, or small wall. One published moss wreath project uses a 16-inch foam form, approximately one pound of reindeer moss, floral wire, twigs, and hot glue, offering a useful starting point for estimating supplies.
Buy slightly more moss than you think you need. Moss compresses inside the package, and thin spots become surprisingly obvious after the wreath is hung vertically. Having an extra bag also prevents the classic crafting emergency known as “driving back to the store with glue strings attached to your sleeve.�
Choosing the Best Moss for a Wreath
Preserved sheet moss
Preserved sheet moss comes in flat sections that can be wrapped around a foam or straw form. It is one of the easiest materials for beginners because it covers large areas quickly. Its uneven surface creates a natural forest-floor appearance without requiring hundreds of tiny pieces.
Reindeer moss
Reindeer moss has a soft, branching texture and is often sold in shades ranging from pale chartreuse to deep green. It is excellent for filling gaps, adding dimension, and creating a fluffy finish. It can be used alone, although covering an entire wreath with loose reindeer moss generally requires more material and more glue.
Spanish moss
Spanish moss is stringy, airy, and gray-green. It works best as an accent rather than the main covering. Tuck it around twigs, nests, eggs, mushrooms, or dried flowers to give the design a wild, slightly mysterious look.
Mixed moss
Combining two or three textures usually produces the most realistic result. Southern Living suggests varying moss types across a foam form and securing them with florist pins to create a garden-like finish. Other DIY projects use sheet moss for the main layer and softer moss to disguise edges and fill open spaces.
For the easiest project, begin with sheet moss and keep a smaller bag of reindeer moss nearby for touch-ups. Think of the sheet moss as the wall paint and the reindeer moss as the trim that hides every questionable decision.
How to Make an Easy DIY Moss Wreath
Step 1: Prepare the work area
Cover the table with cardboard, kraft paper, or an old cloth. Preserved moss is lightweight and has an impressive ability to travel into coffee cups, silverware drawers, and rooms where no crafting has ever occurred.
Heat the glue gun and place the wreath form flat on the protected surface. Wear finger guards or use a wooden skewer to press moss into hot glue if you are prone to touching glue that is very obviously still hot.
Step 2: Create the hanging loop
Attach a loop of floral wire, twine, or ribbon to the wreath form before covering it. This gives you a secure hanging point and prevents you from digging through the finished moss later.
For a foam wreath, wrap the wire or ribbon completely around the form rather than relying on a pin pushed into the foam. For a grapevine wreath, thread wire through several sturdy vines and twist it firmly at the back.
Step 3: Separate and arrange the moss
Remove the moss from its packaging and gently separate compressed sections. Lay several pieces around the wreath before gluing anything. This dry arrangement helps you distribute different colors and textures evenly.
Do not search for perfectly shaped sections. Irregular edges overlap more naturally and make seams less visible.
Step 4: Attach the first layer
Working in sections of approximately 3 to 5 inches, apply hot glue to the front and outer edge of the wreath form. Press sheet moss onto the glue, allow it to set briefly, and continue around the circle.
Overlap neighboring pieces by about half an inch. Wrap the moss far enough around the outer and inner edges that the wreath form cannot be seen from the front or side.
Several established wreath tutorials use strips, sheets, or clumps of moss secured to foam, straw, plastic, or wire forms with hot glue, pins, or floral wire. Floral wire is especially helpful on grapevine and wire frames, while hot glue provides fast coverage on foam forms.
Step 5: Cover the back neatly
You do not need to cover every inch of the back unless the wreath will hang on a glass door where both sides are visible. However, wrapping moss slightly onto the back creates a cleaner finished edge.
Avoid building a thick, uneven layer at the back. The wreath should rest relatively flat against the door or wall instead of wobbling like a decorative green bagel.
Step 6: Fill bare spots
Hold the wreath upright and inspect it from several feet away. Gaps that looked invisible on the table may suddenly appear large enough to have their own ZIP code.
Glue small clumps of reindeer moss over seams, exposed foam, pins, or wire. Mix lighter and darker pieces rather than creating one suspiciously perfect patch.
Step 7: Add decorative elements
Arrange the optional decorations without gluing them first. An asymmetrical cluster positioned at the lower left or lower right often looks more modern than decorations spaced evenly around the entire circle.
Attach lightweight decorations with hot glue. Secure heavier objects, including large pinecones, thick branches, or miniature pots, with floral wire or wooden florist picks in addition to glue.
Designers commonly use moss as a base or filler around berries, pine, flowers, gourds, leaves, mushrooms, and other natural-looking decorations. Layering materials in one concentrated area can create a polished focal point while allowing much of the moss to remain visible.
Step 8: Finish with ribbon
Add a simple ribbon loop for hanging, tie a bow at the bottom, or skip the bow entirely for a minimalist design. Linen and burlap create a rustic style, satin looks more formal, and velvet works beautifully for fall and winter.
Keep the width of the ribbon in proportion to the wreath. A 1- to 2-inch ribbon generally suits a medium wreath, while wider ribbon makes a stronger seasonal statement.
Step 9: Remove loose material
Once the glue has cooled, gently shake the wreath over the covered table. Trim visible glue strings and remove loose moss. Do not shake it with the enthusiasm of someone testing a tambourine. A light shake is enough.
Easy Moss Wreath Design Ideas
Simple year-round wreath
Cover the entire form with mixed green moss and add three or five slender twigs crossing one side. This understated version works in farmhouse, cottage, woodland, and modern interiors.
Spring moss wreath
Add small faux blossoms, speckled eggs, butterflies, or a miniature bird nest. Moss-covered spring wreaths are often paired with butterflies, bunny shapes, flowers, and natural accents because the green background complements pastel colors without overwhelming them.
Summer garden wreath
Use white flowers, fern fronds, herbs, or tiny terracotta pots. A light cream ribbon will keep the finished design fresh and bright.
Fall woodland wreath
Attach acorns, pinecones, dried seed pods, miniature pumpkins, brown leaves, and rust-colored ribbon. Keep the decorations concentrated on one side so the green moss still provides contrast.
Christmas moss wreath
Add evergreen tips, red berries, bells, velvet ribbon, or dried orange slices. Moss also pairs naturally with woodland ornaments such as mushrooms, owls, pinecones, and small animal figures.
Wedding or event wreath
Use ivory ribbon, small white flowers, eucalyptus, and a wooden monogram. A moss wreath can decorate an entrance, ceremony backdrop, sweetheart table, or reception sign.
How to Display and Protect the Wreath
A preserved moss wreath is best displayed indoors or in a sheltered outdoor location. A covered porch generally provides better protection than a door exposed to heavy rain, direct afternoon sun, or strong wind.
Intense moisture can soften adhesives, fade decorations, and cause natural materials to deteriorate. Prolonged sunlight may also change the color of preserved or dyed moss. For longer-lasting results, hang the wreath where it receives indirect light and remains reasonably dry.
Use an over-the-door wreath hanger, ribbon secured over the top of the door, a removable hook rated for the wreath’s weight, or properly installed wall hardware. Check that the wreath does not scrape painted surfaces whenever the door opens and closes.
Retail and design sources frequently present artificial or preserved moss wreaths as adaptable decorations that can be updated throughout the year. Unlike a planted succulent wreath, however, a decorative preserved moss wreath does not need soaking or routine watering.
Common Mistakes to Avoid
Using too little moss
Sparse coverage exposes the wreath form and makes the finished project appear unfinished. Buy an extra package or reserve several large pieces for last-minute repairs.
Applying glue everywhere at once
Hot glue cools quickly. Work in small sections so the moss can be pressed into place while the adhesive is still tacky.
Making the front completely flat
A natural moss wreath should have some variation in height. Add small clumps over the first layer to create gentle dimension.
Attaching heavy decorations with glue alone
Large branches, pinecones, fruit, or ornaments may pull away from the moss. Anchor them to the wreath form with wire, pins, or florist picks.
Adding too many focal points
Choose one main decorative cluster, one bow, or one monogram. When every inch is demanding attention, the moss becomes expensive green wallpaper.
Watering preserved moss
Preserved craft moss is not a living plant and normally should not be watered. Confirm the package instructions because products intended for living arrangements have different care requirements.
My Experience Making an Easy DIY Moss Wreath
The first time I made a moss wreath, I approached the project with dangerous confidence. I had a foam ring, one bag of moss, and the belief that “one bag� was a scientific unit of measurement. It was not.
I began by gluing large sections of sheet moss to the front of the form. The process was satisfyingly fast, and for approximately seven minutes I believed I had discovered a hidden talent. Then I lifted the wreath and found a bright white stripe of foam around the entire outer edge. From the front, it looked rustic. From the side, it looked like a frosted donut wearing a green hat.
The solution was to cut narrower strips of moss and wrap them around the inner and outer curves before adding a second layer to the front. This order would have been much easier from the beginning: cover the edges first, then overlap the front pieces. Once I made that adjustment, the wreath looked fuller and the seams nearly disappeared.
I also learned that moss should be arranged before the glue gun becomes involved. My first few pieces were all dark green, leaving the pale chartreuse moss for the final quarter. The result resembled two different wreaths negotiating a merger. I pulled off a few pieces and redistributed the colors, which immediately made the surface appear more natural.
For decoration, I originally planned to add twigs, dried flowers, ribbon, pinecones, mushrooms, and a small wooden bird. After placing everything on the wreath, it appeared less like peaceful home decor and more like a woodland parade float. Removing about half the decorations improved the design dramatically.
The final arrangement used three thin twigs, a small bundle of cream-colored dried flowers, and a narrow linen ribbon. I positioned the decorations near the lower right side instead of spreading them around the entire circle. That asymmetrical placement made the wreath feel intentional and allowed the different moss textures to remain the main attraction.
Another useful lesson involved glue quantity. Large puddles of hot glue can soak through thin moss and become visible. Smaller lines or dots hold the material securely while staying hidden. When a heavier twig refused to cooperate, floral wire succeeded where increasingly emotional amounts of glue had failed.
After hanging the wreath, I stepped back and noticed two bare areas that had been invisible while it was lying flat. Keeping leftover reindeer moss proved helpful. I tucked small clumps into those spots and secured them with tiny dots of glue. The repair took less than five minutes and gave the wreath a noticeably fuller silhouette.
The completed DIY moss wreath remained light enough for a removable door hook and neutral enough to stay up beyond one season. In spring, I added a temporary cluster of speckled eggs. In fall, I replaced them with acorns and a rust-colored velvet ribbon. Because those accents were attached with wire rather than permanent glue, the basic wreath could be refreshed without starting over.
The biggest takeaway was that a moss wreath rewards restraint. Perfect symmetry is unnecessary, and a few uneven textures actually improve the natural look. Thorough coverage, a secure hanger, and one focused group of decorations matter far more than complicated techniques.
It is also a forgiving project. A visible seam can be covered with more moss. A crooked flower can be repositioned. A questionable bow can be removed before anyone sees photographic evidence. For beginners, that flexibility makes this one of the easiest nature-inspired wreath projects to complete successfully.
Final Thoughts
An easy DIY moss wreath requires only a simple form, preserved craft moss, adhesive, and a little patience. Cover the form in manageable sections, vary the moss textures, inspect the wreath while it is hanging, and use wire for heavier decorations.
The finished wreath can remain simple or change with the seasons. Add flowers for spring, herbs for summer, pinecones for fall, or berries and velvet ribbon for Christmas. The moss-covered base does most of the visual work, so there is no need to bury it beneath an entire craft-store ecosystem.
Best of all, the project is beginner-friendly, customizable, and surprisingly polished. In an hour or two, you can transform a plain wreath form into an earthy decoration that looks as though it came from a boutique where everything smells faintly of cedar and costs more than expected.
SEO Information

