Beauty Unlocked
Woodworking Mistakes
May
Woodworking looks peaceful from the outside: warm sawdust, beautiful boards, clean joinery, maybe a mug of coffee sitting safely away from the finish table. Then reality walks in wearing steel-toe boots. A board cups overnight. A miter opens like it has trust issues. A stain reveals glue fingerprints you swear were not there yesterday. Welcome to woodworking, where every mistake is both a teacher and a tiny invoice.
The good news? Most woodworking mistakes are predictable. Beginners and experienced builders often trip over the same issues: measuring too quickly, ignoring grain direction, rushing glue-ups, choosing the wrong blade, skipping sanding steps, or pretending wood movement is a myth invented by people who own moisture meters. The better news is that these mistakes are preventable once you understand why they happen.
This guide breaks down the most common woodworking mistakes, why they matter, and how to avoid them without turning your shop into a stress laboratory. Whether you are building a bookshelf, a table, a cabinet, a cutting board, or your first “simple weekend project” that mysteriously becomes a three-week emotional journey, these lessons will help you work cleaner, safer, and smarter.
1. Measuring Once and Hoping for the Best
The classic rule is “measure twice, cut once,” but many woodworking mistakes happen even when the tape measure comes out twice. The real problem is inconsistent measuring. If you measure one part from the left edge, another from the right edge, and a third from a pencil line that looks like it was drawn during an earthquake, your project will slowly drift out of square.
How to avoid it
Use one reference edge whenever possible. Mark parts clearly, label faces, and use a sharp pencil or marking knife for precise layout. For repeat cuts, use a stop block instead of measuring each piece individually. This is especially important for cabinet parts, rails, stiles, drawer components, and any project where “almost the same length” is just another way of saying “future firewood.”
2. Forgetting About the Saw Kerf
The kerf is the material removed by the saw blade. It may look tiny, but ignore it often enough and your project will shrink like a sweater in a hot dryer. If you cut directly down the center of your line, the blade removes material from both sides. If you cut on the wrong side of the line, your board may become short before you even get to make a more creative mistake.
How to avoid it
Always mark the waste side of the cut. Put an “X” on the piece that will fall away. Then align the blade so the kerf stays on the waste side, leaving your finished piece at the correct length. For critical parts, cut slightly proud of the line and trim to final size with a shooting board, hand plane, router jig, or carefully adjusted saw setup.
3. Using Dull or Wrong Blades
A dull blade does not just cut poorly. It burns wood, tears fibers, increases effort, and can make machines behave unpredictably. The wrong blade can be just as frustrating. A low-tooth ripping blade may chew through thick stock beautifully but leave plywood looking like it lost a fight with a raccoon. A fine crosscut blade may produce clean edges but struggle when ripping long boards.
How to avoid it
Match the blade to the task. Use ripping blades for long cuts with the grain, crosscut blades for cutting across grain, and higher-tooth-count blades for plywood or finish-grade cuts. Keep blades clean and sharp. Resin buildup can make a good blade act like a bad one, so clean it regularly before blaming the saw, the lumber, the weather, or your ancestors.
4. Ignoring Wood Movement
Wood is not plastic. It expands and contracts as humidity changes, mostly across the grain. If you glue a wide solid-wood panel into a rigid frame with no room to move, the wood will eventually express its feelings through cracks, gaps, warping, or broken joints. This is one of the most important woodworking mistakes to understand because a project can look perfect today and misbehave months later.
How to avoid it
Design with movement in mind. Use floating panels in frame-and-panel doors. Attach tabletops with figure-eight fasteners, Z-clips, buttons, or elongated screw holes. Avoid trapping wide solid panels on all four sides. Let boards acclimate to your shop before milling, and whenever possible, use properly dried lumber for indoor furniture.
5. Skipping Milling and Expecting Straight Results
If your board is twisted, bowed, cupped, or crowned before you build with it, your finished project will not magically become square. Woodworking is not a courtroom drama; the evidence will not disappear. Many beginner woodworking mistakes start at the lumber rack, where a board looks “good enough” until it becomes a table leg that refuses to touch the floor.
How to avoid it
Choose stable boards with straight grain when possible. Joint one face flat, plane the opposite face parallel, joint one edge straight, and rip the opposite edge to width. If you do not own a jointer and planer, buy surfaced lumber, use hand planes, or design projects that tolerate minor imperfections. For tabletops and shelves, avoid boards with extreme twist unless you enjoy negotiating with physics.
6. Rushing Glue-Ups
Glue-ups are where calm woodworkers become competitive eaters in a hot dog contest. The clock starts ticking, clamps suddenly hide, parts slide around, and one board somehow gets installed backward. Rushing a glue-up can lead to misaligned panels, starved joints, clamp dents, glue stains, and language that should not be repeated near children or pets.
How to avoid it
Do a dry run before opening the glue bottle. Lay out clamps, cauls, pads, rags, mallets, squares, and all project parts in the exact order you need them. Check that joints close fully without heroic clamping pressure. Use the right glue for the project and environment. Apply enough glue for coverage, but not so much that the squeeze-out forms a decorative waterfall.
7. Leaving Glue Squeeze-Out Behind
Glue squeeze-out is sneaky. It dries clear, hides under dust, and then appears under stain like a ghost with excellent timing. Because glue seals the wood surface, stain cannot penetrate evenly where glue remains. The result is pale blotches around joints, fingerprints, and edges.
How to avoid it
Remove glue carefully. Some woodworkers wipe wet glue with a damp rag; others wait until it gels and then lift it away with a scraper or chisel. The best method depends on the wood, glue, and finish. Before staining, inspect joints under angled light or wipe the surface lightly with mineral spirits to reveal hidden residue. A few minutes of checking can save hours of sanding and muttering.
8. Sanding Poorlyor Sanding Too Much
Sanding seems simple, which is why it causes so many woodworking mistakes. Pressing too hard with a random orbital sander can create swirl marks. Skipping grits can leave scratches that appear only after finish is applied. Rounding over crisp edges can make careful joinery look soft and tired. Sanding too fine before staining can burnish the surface so stain absorbs unevenly.
How to avoid it
Let the sander do the work. Keep it flat, move slowly, and avoid tipping it at edges. Progress through grits in order, usually stopping around 180 or 220 for many furniture projects before finishing. Vacuum dust between grits. For end grain, sand a little finer than face grain to help it absorb stain more evenly. Above all, do not treat sanding like punishment. Treat it like surface preparation, because that is exactly what it is.
9. Choosing the Wrong Finish for the Job
A finish is not just “the shiny stuff at the end.” It affects durability, color, feel, repairability, and moisture resistance. A delicate oil finish may look beautiful on a decorative box but may not survive life on a kitchen table. A heavy film finish may protect well but look plasticky if applied too thickly. Outdoor projects need different protection than indoor furniture.
How to avoid it
Choose finish based on use. For high-wear surfaces, consider polyurethane, varnish, lacquer, or a durable hardwax oil. For decorative pieces, oil or shellac may be enough. For outdoor furniture, use exterior-rated wood, glue, fasteners, and finishes. Always test finish on scrap from the same project. Scrap tests are not wasted time; they are tiny insurance policies with sawdust on them.
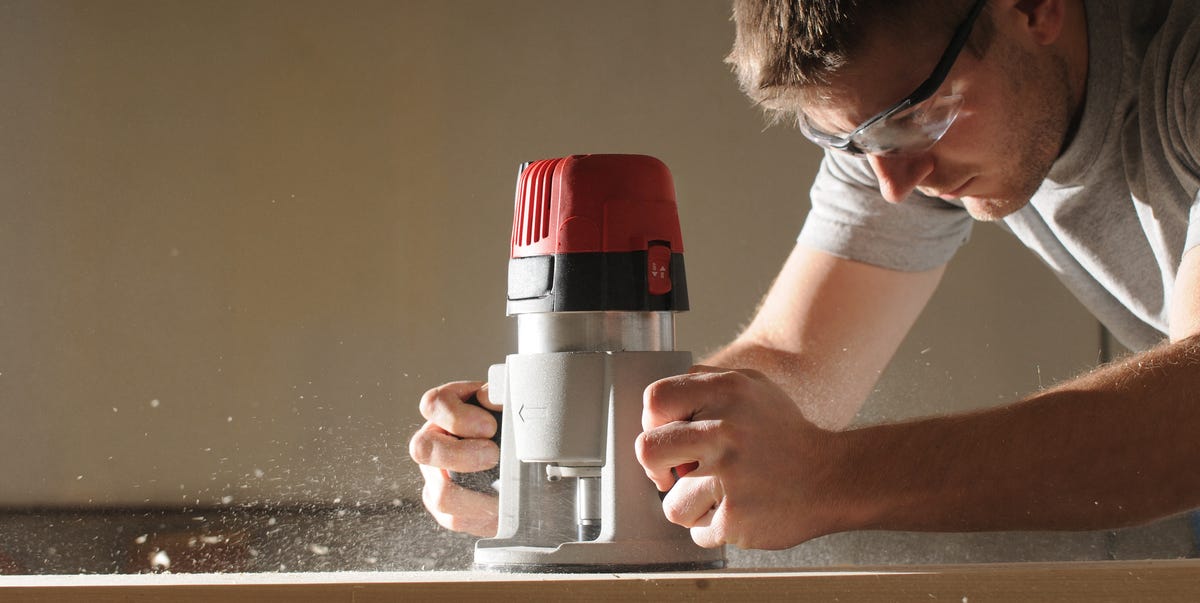
10. Forgetting Shop Safety Basics
Some woodworking mistakes ruin boards. Others can injure people. Kickback, loose clothing, poor dust collection, missing guards, unstable workpieces, and unsafe hand placement are serious hazards. A table saw, router, bandsaw, jointer, or miter saw does not care whether you are “almost done.” In fact, “almost done” is when many woodworkers get careless.
How to avoid it
Wear eye and hearing protection. Use dust collection and a properly fitted respirator when needed. Keep hands away from blades and bits. Use push sticks, featherboards, guards, splitters, riving knives, and hold-downs. Do not rip twisted or wet boards on a table saw. Support long stock. Disconnect power before changing blades or bits. And never make a cut when your inner voice says, “This is probably fine.” That voice has terrible insurance.
11. Cutting Joinery Before Testing the Setup
Joinery is where tiny errors become visible. A dado that is too loose, a tenon that is too thin, a dowel hole that is off-center, or a pocket screw placed too close to an edge can weaken the project or make assembly miserable. The biggest mistake is testing the setup on the actual workpiece first.
How to avoid it
Use scrap from the same material to test joinery. Check fit before cutting all matching parts. When drilling dowels, use centers, jigs, or guides to improve alignment. When cutting mortise-and-tenon joints, sneak up on the fit rather than removing too much at once. A joint should fit firmly without needing a hammer the size of a medieval weapon.
12. Not Checking for Square During Assembly
A project can have perfectly cut parts and still assemble crooked. Glue is slippery, clamps apply uneven pressure, and panels can rack out of square while you are admiring your productivity. By the time the glue dries, your cabinet may have the geometry of a potato chip.
How to avoid it
Check diagonals during assembly. If both diagonal measurements match, the frame or box is square. Use assembly squares, corner clamps, cauls, or temporary braces when needed. Tighten clamps gradually and evenly. Do not assume clamping harder makes things better. Sometimes it only makes the mistake more committed.
13. Building Without a Plan
Improvisation is wonderful in jazz. In woodworking, it can become expensive. Building without a plan often leads to mismatched proportions, missing joinery details, incorrect hardware clearances, and awkward assembly sequences. The project may still come together, but it might require the creativity of an escape room designer.
How to avoid it
Create a simple drawing, cut list, and assembly order before you start. Identify finished dimensions, material thickness, hardware needs, joinery methods, and finishing steps. Think about how parts will be clamped, sanded, and finished. A plan does not eliminate creativity; it gives creativity a safe place to stand.
14. Buying Cheap Materials for Practice Projects
Using inexpensive wood for practice is smart. Using terrible wood for learning can be frustrating. Warped boards, wet lumber, splintery plywood, and mystery scraps can make good technique look bad. Beginners often blame themselves when the real villain is a board shaped like a ski jump.
How to avoid it
Practice on affordable but workable material. Poplar, pine, Baltic birch-style plywood, and straight construction lumber can all be useful depending on the project. Avoid badly twisted boards, loose knots in critical areas, or plywood with thin face veneers if you plan to sand aggressively. Good material does not need to be fancy; it just needs to behave.
15. Treating Mistakes Like Failures Instead of Feedback
Every woodworker makes mistakes. The difference between a beginner and a more experienced builder is not perfection. It is recovery. Skilled woodworkers know how to plug a misdrilled hole, recut a part, hide a gap with a design detail, plane a proud joint flush, or turn a mistake into a “custom feature” with a straight face.
How to avoid it
Slow down when something goes wrong. Do not immediately cut, sand, or glue your way deeper into trouble. Ask what caused the mistake: layout, tool setup, grain direction, moisture, blade choice, clamping pressure, or impatience. Then choose the cleanest repair. Sometimes the best fix is replacing one part. Sometimes it is redesigning a detail. Sometimes it is walking away, drinking water, and returning when your brain is no longer making dial-up internet noises.
Practical Experience: What Woodworking Mistakes Teach You Over Time
The first major lesson woodworking teaches is humility. A board can be flat in the morning and slightly cupped after lunch. A miter saw can be accurate for months and then drift just enough to make picture frames look suspicious. A finish can look flawless under shop lights and then reveal streaks when placed near a window. These experiences can feel annoying at first, but they are actually how judgment develops.
One useful habit is keeping a small “mistake notebook.” It does not need to be dramatic. Just write down what went wrong, what tool setup you used, what wood species was involved, and how you fixed it. Over time, patterns appear. Maybe your cabinet doors tend to come out slightly oversized because you forget finish thickness. Maybe your glue-ups slide because you over-clamp too quickly. Maybe your plywood edges chip because you use the same blade for everything. Once you see the pattern, the solution becomes much easier.
Another experience many woodworkers share is learning to slow down at transition points. The dangerous moments are often not during the main work but between steps: changing from milling to cutting joinery, moving from sanding to finishing, or shifting from dry-fit to glue-up. That is when assumptions sneak in. Before each transition, stop and ask three questions: Are the parts labeled? Is the setup tested? Is the next step reversible? If the answer to all three is yes, you are probably in good shape.
Experience also teaches that sharp tools are not a luxury. A sharp chisel, plane iron, saw blade, or router bit gives better control, cleaner surfaces, and safer work. Beginners sometimes fear sharp tools, but dull tools often require extra force, and extra force is where slips happen. A sharp tool used correctly feels predictable. It cuts instead of crushes. It listens instead of argues.
Finally, woodworking mistakes teach patience with the material. Wood has grain, density, moisture, color variation, knots, figure, and personality. Two boards from the same rack can behave differently. That is not a flaw in woodworking; that is the craft. The goal is not to dominate the material but to understand it well enough to make smart decisions. When a project goes wrong, the best woodworkers do not simply say, “I messed up.” They ask, “What is the wood telling me, and what should I change next time?” That mindset turns every error into skill.
Conclusion: Better Woodworking Starts With Better Habits
Woodworking mistakes are part of the craft, but they do not have to control the craft. Most errors come from rushing, poor layout, dull tools, wrong materials, skipped tests, weak safety habits, or ignoring the natural movement of wood. The solution is not perfection. The solution is a better process.
Measure from consistent reference points. Account for the kerf. Test cuts on scrap. Keep blades sharp. Respect grain direction and wood movement. Prepare glue-ups before the glue bottle opens. Sand with intention. Choose finishes based on the project’s real-life use. Protect your lungs, eyes, ears, and fingers. And when a mistake happens, pause before reacting. A calm repair is almost always better than a panicked one.
The beautiful thing about woodworking is that every project leaves you with two products: the thing you built and the skill you gained while building it. Sometimes the skill is learned from a perfect joint. Sometimes it is learned from a board cut one inch too short. Either way, the shop keeps teaching. Keep listening.
Note: This is original, web-ready HTML content based on reputable woodworking and shop-safety guidance, written in standard American English without source-link clutter inside the article.
