
Beauty Tools & Accessories
How To Make a DIY Hydroponic Garden
Jul
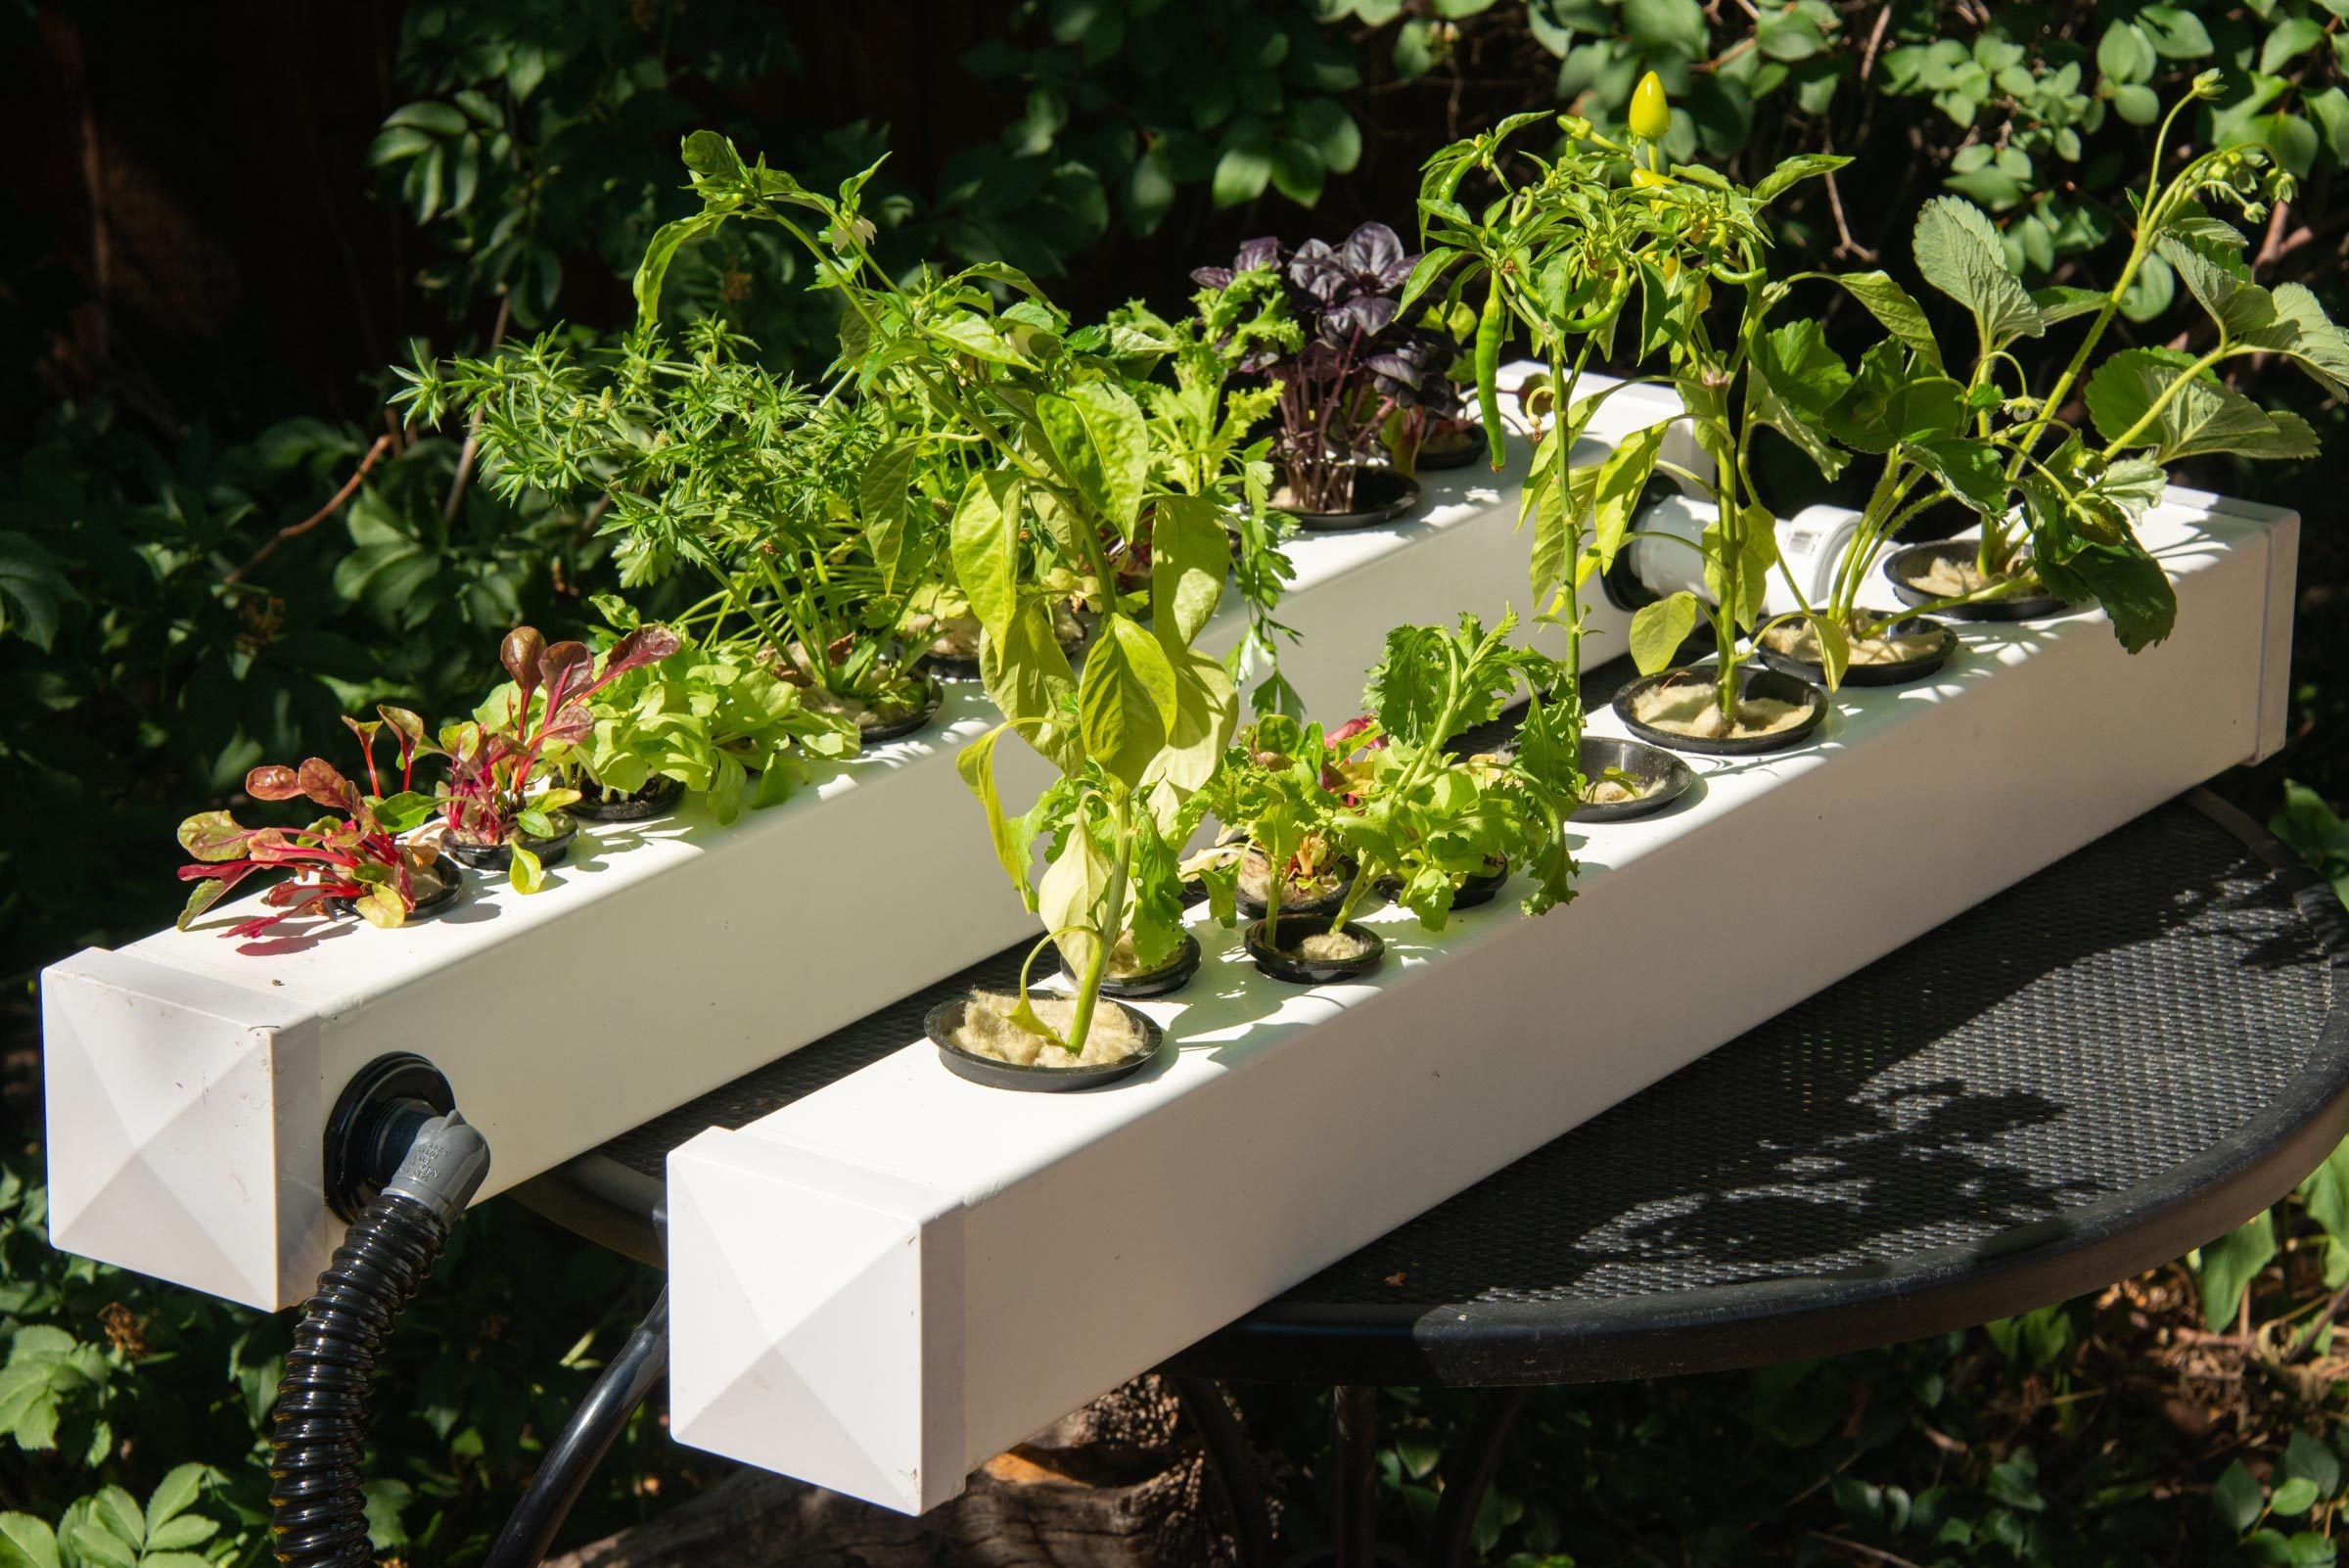
Building a DIY hydroponic garden sounds like something that belongs in a futuristic kitchen where the refrigerator talks back and the lettuce has its own Wi-Fi password. In reality, hydroponics is much simpler: you grow plants without soil, using water, nutrients, light, oxygen, and a little patience. That is the whole magic trick. No backyard? No problem. Poor soil? Ignore it. Apartment balcony the size of a welcome mat? Still possible.
A home hydroponic system lets you grow herbs, lettuce, spinach, basil, bok choy, kale, and even small fruiting crops in a controlled space. Instead of digging, weeding, and arguing with squirrels, you manage water quality, light, and nutrients. It is gardening with fewer muddy shoes and more satisfying “look what I grew” moments.
This guide explains how to make a DIY hydroponic garden using beginner-friendly materials, a simple deep water culture setup, and practical maintenance habits. You do not need to be an engineer, botanist, or person who owns fifteen different screwdrivers. You need a container, net cups, growing medium, water, hydroponic nutrients, a light source, and the willingness to check on your plants before they start sending passive-aggressive yellow leaves.
What Is a DIY Hydroponic Garden?
A DIY hydroponic garden is a homemade system that grows plants without soil. The roots receive moisture, oxygen, and dissolved nutrients directly from a water-based solution. In traditional gardening, soil acts as the middleman. It stores nutrients, anchors roots, supports microbes, and holds water. In hydroponics, you skip much of that middleman work and deliver what plants need in a more direct way.
The most common beginner hydroponic systems include deep water culture, wick systems, nutrient film technique, drip systems, and ebb-and-flow systems. For a first project, deep water culture is usually the friendliest option. The plant sits in a net cup above a reservoir, while its roots hang down toward oxygen-rich nutrient water. It is simple, compact, affordable, and forgiving enough for new growers.
Why Grow Hydroponically at Home?
A DIY hydroponic garden gives you control. You control the water, the nutrients, the light, the growing space, and the crop schedule. That means you can grow fresh greens year-round indoors, even when outdoor weather is acting like it has unresolved emotional issues.
Hydroponics is especially useful for small spaces. A countertop, shelf, closet corner, garage bench, balcony, or spare room can become a mini garden. Because there is no soil, there are usually fewer weeds and less mess. You also avoid many soil-borne problems, though hydroponics still requires cleanliness and regular monitoring.
Another advantage is speed. Leafy greens and herbs often grow quickly in hydroponic systems because the roots have easy access to water, oxygen, and nutrients. The catch is that hydroponics is less “set it and forget it” than soil gardening. When something goes wrong, plants can show symptoms fast. That is not a reason to panic; it is a reason to build simple routines.
The Best Beginner System: Deep Water Culture
For a first DIY hydroponic garden, deep water culture, often called DWC, is the easiest place to start. In this system, plants grow in net cups placed in holes on the lid of a reservoir. The roots grow downward into a nutrient solution. An air pump and air stone add oxygen to the water, helping roots breathe and stay healthy.
Deep water culture works well for lettuce, basil, mint, parsley, cilantro, spinach, Swiss chard, bok choy, and many other leafy crops. It is not the best first choice for large tomatoes, cucumbers, or peppers unless you are ready for stronger lights, bigger reservoirs, plant supports, and more nutrient management. Start with lettuce before attempting a tomato jungle. Your future self will thank you.
Supplies You Need
You can build a basic DIY hydroponic garden with common materials from a garden center, hardware store, or online supplier. Keep the setup simple and clean. Avoid containers that previously held chemicals, cleaners, paint, or mystery liquids from the garage shelf of doom.
- A food-safe plastic storage tote or bucket with a lid
- Net cups, usually 2-inch or 3-inch cups for leafy greens
- Hydroponic growing medium such as clay pebbles, rockwool, coco coir, or perlite
- Hydroponic nutrient solution formulated for leafy greens or general vegetables
- pH test kit or digital pH meter
- EC or TDS meter to measure nutrient strength
- Air pump, airline tubing, and air stone
- Seeds or healthy seedlings
- LED grow light if natural light is not strong enough
- Drill with hole saw or a safe cutting tool for making lid openings
- Clean water, preferably tested if your tap water is very hard or treated heavily
Step-by-Step: How To Make a DIY Hydroponic Garden
1. Choose the Right Location
Pick a place with stable temperature, access to electricity, and enough room to check the reservoir. A kitchen counter, utility shelf, laundry room, or bright corner can work well. The system should be close enough that you will actually maintain it. A hydroponic garden hidden in a forgotten basement corner can quickly become a science fair project nobody asked for.
Keep water and electrical parts organized. Use drip loops with cords, keep plugs off the floor, and avoid placing pumps or power strips where water can splash. For indoor systems, a grounded outlet and basic water safety habits are important.
2. Select Beginner-Friendly Plants
Start with fast-growing leafy crops. Lettuce is the classic beginner plant because it grows quickly, stays compact, and does not demand intense light compared with fruiting vegetables. Basil is another excellent choice because it responds well to regular harvesting. Bok choy, kale, arugula, parsley, cilantro, and mint can also perform nicely.
Avoid starting with large tomatoes, melons, squash, or full-size cucumbers. These plants need more space, stronger lighting, careful pruning, and heavier feeding. They are not impossible, but they are like choosing a drum solo for your first music lesson.
3. Prepare the Reservoir
Use a dark-colored tote or bucket if possible. Light entering the nutrient solution can encourage algae growth. If your container is clear or translucent, wrap the outside with opaque tape, foil, or dark material. Clean the reservoir with mild dish soap, rinse thoroughly, and let it dry before use.
Cut holes in the lid to fit your net cups. The cups should sit securely without falling through. Space lettuce plants about 6 to 8 inches apart. Herbs may need similar spacing, while larger greens may need more. Crowded plants compete for light and airflow, and nobody enjoys a salad bar traffic jam.
4. Install the Air Pump and Air Stone
Place the air stone in the bottom of the reservoir and connect it to the air pump with airline tubing. The pump should sit outside the reservoir and ideally above the waterline to reduce backflow risk. When turned on, the air stone should create a steady stream of bubbles.
Roots need oxygen. In deep water culture, oxygen is not optional; it is one of the main reasons the system works. Without enough oxygen, roots can become stressed, weak, or vulnerable to disease. Healthy roots are usually pale, clean-looking, and fresh. Brown, slimy, unpleasant-smelling roots are a warning sign that something is wrong.
5. Add Water and Nutrients
Fill the reservoir with clean water, leaving some space below the lid. Add hydroponic nutrients according to the label directions. Do not guess by vibes. More nutrients do not automatically mean more growth. Too much fertilizer can stress roots and cause leaf problems.
After mixing nutrients, check the pH. Many hydroponic vegetables grow best when the nutrient solution is slightly acidic to near neutral, commonly around the mid-5s to mid-6s depending on the crop and product guidance. If pH drifts too far, plants may struggle to absorb nutrients even when those nutrients are present. This is the hydroponic version of standing in front of a locked pantry with a full grocery bag inside.
Use an EC or TDS meter to estimate nutrient strength. Follow the nutrient manufacturer’s range for your crop. Seedlings usually need a weaker solution than mature plants. If leaves look burned at the tips, growth slows, or plants wilt despite enough water, nutrient strength may be too high.
6. Start Seeds or Transplant Seedlings
You can start seeds in rockwool cubes, coco plugs, peat-free seed plugs, or another hydroponic-friendly starter. Keep them moist but not waterlogged. Once seedlings have roots emerging from the starter cube and a few true leaves, place them into net cups with growing medium around them for support.
If transplanting seedlings from soil, gently rinse soil away from the roots before moving them into the hydroponic system. Be patient; roots are delicate. A rough transplant can stress the plant. Some growers prefer starting from seed because it avoids soil contamination and transplant shock.
7. Set the Water Level
At the beginning, the nutrient solution should be high enough to moisten the bottom of the starter cube or reach the young roots. As roots grow downward, you can keep the water level slightly lower, allowing an air gap between the lid and water surface. This gives roots access to both oxygen and nutrient solution.
Check the water level every few days. Plants drink more as they grow, and indoor air can cause evaporation. Top off with clean water when needed, then monitor pH and nutrient strength. Replace the full nutrient solution every one to two weeks for a small home system, or sooner if it becomes cloudy, smells bad, or falls badly out of balance.
8. Provide Enough Light
Hydroponic plants still need light. Water and nutrients cannot replace photosynthesis, no matter how encouragingly you speak to the basil. A sunny window may work for herbs and greens during bright seasons, but indoor hydroponic gardens usually perform better with LED grow lights.
For leafy greens and herbs, provide about 12 to 14 hours of light per day. Use a timer so the schedule stays consistent. Place the light close enough to prevent stretched, weak seedlings, but not so close that leaves get hot or scorched. Follow the light manufacturer’s hanging-height recommendations and adjust as plants grow.
9. Maintain the System Weekly
A good hydroponic routine is simple. Check water level, pH, nutrient strength, root appearance, leaf color, and pump operation. Look for algae, pests, clogged tubing, weak airflow, or strange odors. Make small corrections early instead of waiting until your lettuce looks like it has given up on society.
Clean tools before using them. Remove dead leaves. Keep the reservoir covered. Wash hands before handling seedlings or harvested greens. Hydroponics may reduce soil mess, but food safety and sanitation still matter.
Best Plants for a DIY Hydroponic Garden
Leafy Greens
Lettuce, spinach, kale, arugula, bok choy, Swiss chard, and mustard greens are excellent choices. They grow quickly, stay manageable, and do not require pollination. Many can be harvested leaf by leaf, allowing multiple harvests from the same plant.
Herbs
Basil, mint, parsley, cilantro, dill, and chives can grow well in hydroponic systems. Basil is especially rewarding because frequent cutting encourages bushier growth. Mint grows aggressively, so give it space unless you want it to take over like a tiny green landlord.
Fruiting Crops
Tomatoes, peppers, strawberries, cucumbers, and dwarf eggplants can be grown hydroponically, but they need more light, more nutrients, stronger support, and often hand pollination indoors. Try these after you succeed with greens.
Common DIY Hydroponic Mistakes
Using the Wrong Fertilizer
Regular garden fertilizer is not always suitable for hydroponics. Soil fertilizers may rely on soil biology or slow-release processes. Hydroponic nutrients are designed to dissolve in water and provide essential elements in forms plants can use directly.
Ignoring pH
pH affects nutrient availability. If pH is too high or too low, leaves may yellow, growth may slow, and the plant may look hungry even though nutrients are in the water. Test regularly and adjust gradually.
Letting Light Hit the Reservoir
Light plus nutrients plus water often equals algae. Algae competes for oxygen and makes the system harder to manage. Use an opaque reservoir and cover unused lid holes.
Overcrowding Plants
Seedlings look adorable when they are small, which tricks many beginners into planting too many. Then the plants grow, airflow drops, leaves overlap, and the garden becomes a leafy subway at rush hour. Give plants room.
Forgetting Temperature
Most leafy greens prefer moderate indoor temperatures. Water that becomes too warm can hold less oxygen and may encourage root problems. Keep the system away from hot windows, heaters, and direct afternoon sun if temperatures spike.
Troubleshooting Your Hydroponic Garden
If leaves turn yellow, check pH first, then nutrient strength, light, and root health. Yellowing can come from nutrient imbalance, poor pH, weak light, or natural aging of older leaves. If seedlings stretch tall and thin, they probably need stronger or closer light. If leaf tips turn brown, nutrient concentration may be too strong or the plants may be stressed.
If roots look brown and smell unpleasant, improve aeration, lower water temperature if it is too warm, and replace the nutrient solution. Clean the reservoir before restarting. If algae appears, block light from reaching the water and clean affected surfaces. If growth stalls, make sure the air pump is working, the pH is in range, the nutrient solution is fresh, and the plant has enough light.
How Much Does a DIY Hydroponic Garden Cost?
A small homemade deep water culture system can be built affordably, especially if you already own a storage tote, drill, or shelf. The main costs are the air pump, air stone, net cups, growing medium, nutrients, meters, and grow light. A very basic setup for herbs or lettuce can cost less than many store-bought countertop gardens, though a quality LED light may be the biggest investment.
Do not buy every gadget at the beginning. Start with one reservoir and a few plants. Learn how your water behaves, how fast your crops grow, and how often you enjoy maintaining the system. Then upgrade. Hydroponics rewards curiosity, not shopping-cart bravery.
Experience Notes: What You Learn After Building a DIY Hydroponic Garden
The first lesson of making a DIY hydroponic garden is that plants are honest, but not always polite. They will not send a detailed report titled “Your pH Is Slightly Off.” Instead, they curl a leaf, slow down, turn pale, or droop dramatically like they are auditioning for a garden soap opera. At first, every symptom feels mysterious. After a few weeks, you begin to read the system more calmly.
One practical experience is that simple systems are easier to love. A beginner may feel tempted to build a complicated vertical tower, automatic dosing setup, or multi-reservoir masterpiece. Those systems can be exciting, but a single deep water culture tote teaches the fundamentals better. You can see the roots, hear the bubbles, test the water, and connect cause with effect. When you adjust pH and the plants improve, the lesson sticks.
Another experience is that light matters more than beginners expect. A plant placed near a window may survive, but survival is not the same as strong growth. Lettuce grown under consistent LED lighting often looks sturdier, greener, and more compact than lettuce stretching toward weak indoor daylight. A timer also removes guesswork. The plants receive their daily light schedule whether you remember or not, which is helpful because humans are famously distractible around snacks, phones, and laundry.
You also learn that water is not just water. Tap water can vary in mineral content, alkalinity, and starting pH. Some growers can use tap water with no trouble; others fight constant pH drift. Keeping a small notebook or digital log helps. Write down the date, pH, EC or TDS, water level, nutrient changes, and plant observations. It feels nerdy for about three days. Then it becomes the reason you know what actually worked.
Harvesting teaches another satisfying lesson: cut-and-come-again greens are perfect for home hydroponics. Instead of pulling the whole lettuce plant, you can trim outer leaves and let the center continue growing. Basil responds beautifully to pruning when you cut above a node, encouraging bushier growth. This turns the garden into a small fresh-food routine rather than a one-time harvest event.
The biggest emotional surprise is how motivating a small indoor garden can be. Checking roots, smelling basil, and picking lettuce for a sandwich makes the project feel alive in a way that store-bought produce never does. Yes, you will make mistakes. You may overfeed once. You may forget to top off water. You may grow one tragic lettuce plant that leans sideways like it has seen too much. That is normal. Hydroponics is not about perfection; it is about observation, adjustment, and enjoying the tiny miracle of dinner growing in a bucket.
Conclusion
Learning how to make a DIY hydroponic garden is one of the most approachable ways to grow fresh food at home. Start with a simple deep water culture system, choose easy crops like lettuce and basil, use proper hydroponic nutrients, test pH, provide steady light, and keep the reservoir clean. Once you understand the rhythm, hydroponics becomes less intimidating and much more fun.
The best first system is not the fanciest one. It is the one you can build, maintain, observe, and improve. Begin small, keep notes, harvest often, and let each crop teach you something. Before long, your countertop or shelf can become a productive little garden that delivers fresh greens without soil, weeds, or backyard drama.

