
Hair Care
How To Get Rid of Earwigs
Jul
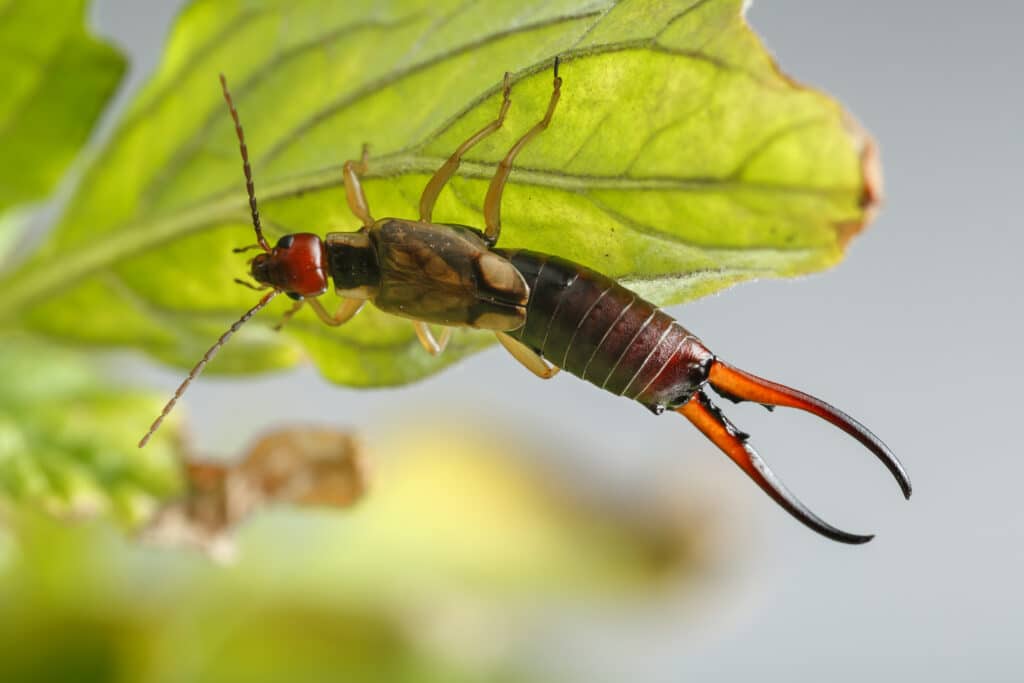
You flip over a flower pot, and suddenly there’s a tiny armored parade of pincers sprinting in every direction.
Congratulations: you’ve met earwigs. They look like mini sci-fi villains, but the good news is they’re usually more
annoying than dangerous. The bad news? If your yard is damp, shady, and cluttered, they can multiply fast and start
snacking on seedlings, petals, and soft fruit while you sleep.
This guide gives you a full, practical plan to get rid of earwigs in your home and gardenwithout turning your space
into a chemical war zone. You’ll learn how to identify where they’re coming from, reduce the conditions they love,
trap them effectively, protect your plants, and prevent future infestations. Think of this as your “calm, competent,
slightly annoyed homeowner” blueprint.
What Are Earwigs and Why Are They in Your Space?
Earwigs (often called “pincher bugs”) are nocturnal insects that hide during the day and feed at night. They prefer
dark, cool, moist hiding spotsmulch, leaf litter, boards, stones, damp cardboard, and cracks around foundations.
Indoors, they usually show up in bathrooms, basements, laundry rooms, garages, or near entry points where moisture is present.
Important reality check: earwigs are typically nuisance pests indoors. They don’t usually damage your house structure,
and they don’t reproduce well inside most homes. In gardens, though, large populations can chew irregular holes in
leaves and blossoms, damage seedlings, and nick corn silk or soft fruit. In smaller numbers, they can also play a
useful role by feeding on other pests like aphids. In other words: they’re not pure villains, but they can absolutely
overstay their welcome.
Signs You Have an Earwig Problem (and Not Something Else)
- Jagged, irregular feeding holes in leaves, flower petals, and seedlings.
- More activity at night than day (flashlight checks after dark are revealing).
- Clusters under damp items like mulch, stones, pots, hoses, boards, cardboard, or doormats.
- Indoor sightings during warm months, especially in humid rooms or near doors and windows.
- Plant damage with no slime trails (helps distinguish from slug damage).
If your plants look chewed but you only inspect during daylight, you might blame the wrong pest. Earwigs are sneaky
night-shift workers. If you want accurate diagnosis, inspect at dusk or early night before taking action.
How To Get Rid of Earwigs: A Step-by-Step IPM Strategy
The most effective approach is Integrated Pest Management (IPM): identify first, prevent second, control only
when needed, and use the least-risk method that works.
Step 1: Confirm Earwigs Are the Culprit
Grab a flashlight and do a 10-minute yard inspection after sunset. Check under pots, edging stones, dense ground cover,
and thick mulch near damaged plants. If earwigs are there in noticeable numbers, proceed with control. If not, pause.
You may be dealing with slugs, cutworms, or another pest.
Step 2: Remove Moisture and Shelter (This Is the Big One)
Earwig control succeeds or fails on moisture management. If the environment stays damp and protected, any trap or spray
is just a temporary bandage.
- Fix leaking spigots, hoses, and irrigation lines.
- Improve drainage so water doesn’t pool near your foundation.
- Direct downspouts away from the house.
- Water garden beds in the morning so surfaces dry before night.
- Thin or refresh soggy mulch; avoid heavy wet buildup against the home.
- Clear leaf litter, stacked boards, and other damp hiding spots.
- Store firewood elevated and away from the foundation.
If you change only one thing, change moisture. It’s the lever that affects everything else.
Step 3: Trap Aggressively for 10–14 Days
Trapping is one of the most reliable low-toxicity ways to reduce earwig numbers. The key is consistency.
Trap Option A: Rolled Newspaper/Cardboard Trap
- Roll damp newspaper or corrugated cardboard into a loose tube before dusk.
- Place it near damaged plants, under shrubs, or in mulched areas.
- In the morning, shake contents into a bucket of soapy water.
- Repeat nightly until counts drop.
Trap Option B: Oil Pitfall Trap
- Use a low-sided can (like a tuna can).
- Add about 1/2 inch of vegetable oil; a little fish oil scent can improve attraction.
- Sink the can so the rim is level with soil.
- Empty and reset daily.
Pro tip: Place multiple traps where you already see damage, not randomly across the entire yard. You’re targeting
hotspots, not decorating.
Step 4: Protect Plants During Peak Activity
Earwigs feed at night, so your best defense is reducing night access and vulnerability:
- Keep beds weeded and open for airflow (less damp shelter).
- Protect seedlings earlythey’re the most vulnerable stage.
- Harvest ripe soft fruit promptly to reduce food sources.
- Avoid leaving damp cloth, cardboard, or debris near prized flowers.
- Continue spot-trapping near marigolds, dahlias, hostas, and other frequently damaged plants.
Step 5: Stop Indoor Invaders at the Entry Points
Most indoor earwig issues start outdoors. So think “perimeter first, indoors second.”
- Install door sweeps and weatherstripping.
- Caulk gaps around doors, windows, pipes, and utility penetrations.
- Repair torn screens on windows, vents, and crawl-space openings.
- Reduce indoor humidity with ventilation or a dehumidifier.
- Vacuum or sweep intruders rather than crushing them (they can release odor).
If you only spray inside while outdoor conditions remain ideal for earwigs, they’ll keep wandering in. Fix the outside
environment first.
Step 6: Use Pesticides Only as a Last Resort
If you still have heavy activity after sanitation, moisture fixes, sealing, and trapping, targeted pesticide use may help.
But keep it minimal and label-driven.
- Use products explicitly labeled for earwigs and for the exact site of application.
- Focus treatment on outdoor problem zones and entry areasnot broad indoor broadcast spraying.
- Do not use outdoor-only products indoors.
- Never use more than label directions (“more” is not “better”).
- Keep kids and pets away during application and reentry intervals.
- Store products in original containers and dispose of leftovers properly.
Safety note: If you are not comfortable handling pesticides, use a licensed pest professional.
For younger household members, pesticide handling should always be done by a responsible adult.
A 14-Day Earwig Knockdown Plan
Days 1–3: Reset the Environment
- Fix leaks, clear debris, trim dense damp edges, and improve drainage.
- Seal entry points and set dehumidification indoors if needed.
Days 4–10: Trap Daily
- Set 6–12 traps in hotspots each evening.
- Empty traps each morning and log counts in notes.
- Adjust placement to where captures are highest.
Days 11–14: Maintain and Monitor
- Reduce to maintenance traps in key zones.
- Recheck moisture and hiding spots after rain or irrigation changes.
- Decide if further action is needed based on actual counts and damage.
Common Mistakes That Keep Earwigs Coming Back
- Only treating indoors while ignoring damp outdoor harborage.
- Skipping identification and targeting the wrong pest.
- Inconsistent trapping (one trap, one night, then giving up).
- Overwatering in evening, creating perfect nighttime conditions.
- Using pesticide first without sanitation and exclusion.
- Assuming one-time treatment is permanent.
FAQ: Quick Answers About Earwig Control
Do earwigs bite people?
They may pinch defensively with their forceps, but they are not major medical threats in normal situations. Most people
experience little or mild discomfort if handled.
Do earwigs crawl into ears and lay eggs?
That old story is mostly folklore. Rare insect-in-ear events can happen with many insects, but the classic earwig horror
tale is not a normal behavior pattern.
Can earwigs damage a house?
Not usually. Indoors, they’re mostly nuisance invaders. Outdoors, they’re more relevant as garden pests in high numbers.
How long does it take to control an infestation?
Most households see meaningful improvement in 1–2 weeks with moisture reduction plus daily trapping. Persistent problems
usually mean moisture, shelter, or entry points were not fully addressed.
Should I eliminate every earwig I see in my garden?
Not necessarily. Moderate numbers may be tolerated in some landscapes because earwigs can also feed on smaller pests.
Focus on damage thresholds, not total annihilation.
Final Takeaway
If you remember one formula, make it this:
Dry it out + clear hiding spots + trap nightly + seal entry points.
That combination solves most earwig problems without overusing chemicals. You’re not trying to “win one dramatic battle.”
You’re redesigning conditions so earwigs decide your property is a terrible place to hang out. Once that shift happens,
control gets easier, cheaper, and a lot less gross.
Experience Notes: from Real-World Earwig Battles
The stories below are composite experiences based on common homeowner and gardener patterns, designed to show what works
in real lifenot just on paper.
Case 1: The “Basement Surprise” Home. A family kept finding earwigs in a finished basement and assumed the
solution was indoor bug spray. They sprayed baseboards twice, but earwigs kept showing up. The turning point came when
they checked outside after dark and found damp mulch packed against the foundation, plus a dripping hose bib near the side
door. They pulled mulch back, fixed the drip, added a door sweep, and ran a dehumidifier in the basement. At the same time,
they vacuumed stragglers and stopped panic-spraying. Result: sightings dropped by about 80% in a week and became occasional
rather than nightly.
Case 2: The “Flower Bed Mystery.” A gardener blamed rabbits for ragged petals on marigolds and dahlias.
No rabbit tracks, no daytime suspects, just damaged blooms each morning. Night flashlight check solved it: earwigs everywhere
in wet mulch and under edging stones. She switched watering to early morning, thinned mulch in problem spots, and set rolled
newspaper traps for 12 nights. She logged trap counts like a tiny scientist. The first three nights were heavy; by day 10,
counts were minimal and bloom damage slowed dramatically.
Case 3: The “Patio Pot Invasion.” A renter had earwigs around container herbs and assumed the entire
apartment complex was doomed. Instead of going full apocalypse, he tested a targeted plan: remove saucers with standing water,
elevate pots for airflow, clean leaf litter, and set two oil traps near the wettest containers. He also stopped leaving damp
cardboard boxes on the patio floor. Within 5 days, trap counts dropped from “yikes” to “meh,” and basil leaves stopped getting
notched overnight.
Case 4: The “Too Much Product” Problem. One household used multiple pesticides from online marketplaces
without checking labels carefully. It was expensive, stressful, and not very effective. A local professional later simplified
everything: identify hotspots, control moisture, use exclusion, then apply a label-appropriate perimeter treatment only where
needed. Fewer products, better results, lower risk. The lesson: precision beats volume every time.
Case 5: The “Garden Comeback After Rainy Month.” Following a wet stretch, earwig numbers surged around
lettuce seedlings. The gardener used a 14-day reset: sanitation, nightly traps, and daily morning disposal. He also harvested
ripe produce promptly and removed old boards stacked behind raised beds. Damage did not disappear overnight, but the pattern
changed from escalating to declining. That psychological shift mattered as much as the entomology: once he saw measurable
progress in trap counts, the problem felt manageable instead of mysterious.
Across all these experiences, the winning strategy was nearly identical: reduce moisture, remove shelter, trap consistently,
and seal entry points. People who skipped one of those pillars usually saw rebound activity. People who did all four
typically got steady control without relying on constant spraying. Earwigs may be persistent, but they’re predictableand
predictable pests are beatable.

